> For AI agents: the complete documentation index is available at https://www.jumpserver.com/docs/v4/llms.txt, the full documentation bundle is available at https://www.jumpserver.com/docs/v4/llms-full.txt.
# Import and export resources
This topic describes how to import and export resources, currently supporting "CSV" and "Excel" formats.
Resource import includes "Import for creation" and "Import for update".
The steps for importing and exporting are the same, except for the field definitions of different resource types.
For more information, see [Resource Attributes](#resource-attributes).
## Create resources by importing
1
At the top-left of the page, select , then click **Console**.
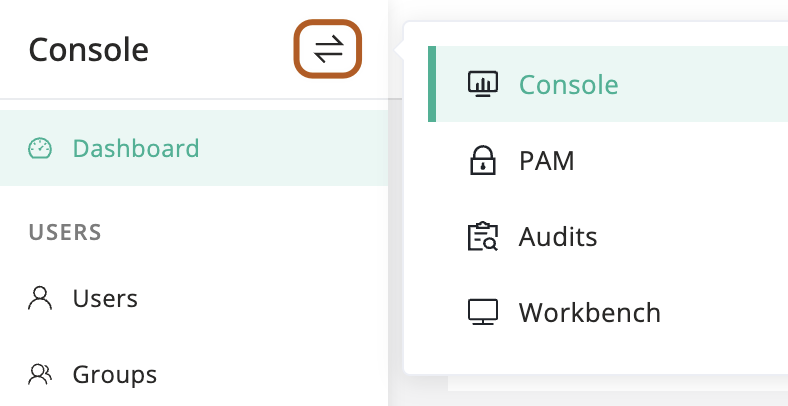
2
Navigate to the "Resources" page.
3
In the top-right corner of the "Resources" table, click .

4
At this point, a pop-up window will appear.
5
In the **Import** section, choose "Create".
6
After the "Download creation template", click CSV or XLSX to download the template.
7
Add the resources you want to create to the template.
Tip
For more information about resource field definitions, see [Resource Attributes](#resource-attributes).
8
In the **Upload** section, click "Drag files here, or click to upload" to select the template you have edited.
9
The resource data will appear in the table. Double-click an entry to edit.
10
Click **Import** button to begin the import.
Warning
For import errors, see [Troubleshooting Import Failures](#import-failure).
## Update resources by importing
1
At the top-left of the page, select , then click **Console**.

2
Navigate to the "Resources" page.
3
In the top-right corner of the "Resources" table, click .

4
At this point, a pop-up window will appear.
5
In the **Import** section, choose "Update".
6
After the "Download update template", click CSV or XLSX to download the template.
7
Add the resources you want to update to the template. Make sure each entry includes an "ID".
Note
We recommend exporting the resources you want to update, copying their information into the template, making the necessary changes, and then importing it to update.
For export guides, see [Export resources](#export-resources).
Tip
For more information about resource field definitions, see [Resource Attributes](#resource-attributes).
8
In the **Upload** section, click "Drag files here, or click to upload" to select the template you have edited.
9
The resource data will appear in the table. Double-click an entry to edit.
10
Click **Import** button to start the import.
Warning
For import errors, see [Troubleshooting Import Failures](#import-failure).
## Export resources
1
At the top-left of the page, select , then click **Console**.

2
Navigate to the "Resources" page.
3
Perform the corresponding action based on the export scope you want.
**Export all**
No action required, proceed directly to the next step.
**Export selected items**
In the resources table, check the resources you want to export, then proceed to the next step.
**Export filtered items**
In the resources table, search for the resources you want to export, then proceed to the next step.
4
In the top-right corner of the "Resources" table, click .

5
At this point, a pop-up window will appear.
6
In the **File type** section, choose "CSV" or "Excel" as the export format.
7
In the **Export range** section, choose the scope you want to export.
8
Click **Confirm** button to start the export.
## Troubleshooting
### Import failure
If there are import failures, follow the steps below to fix them and continue the import.
1
At the top left of the table, click **Failed** tab to show only the failed entries.
2
In the **Status** column, hover over the to check the failure reason.
3
After correcting all the erroneous fields, click **Continue**.
## Resource attributes
Click the resource name to view the field definitions for each resource, helping you add resources to the file more accurately.
- [Users](https://www.jumpserver.com/docs/v4/import-export/users.md)