Introduction
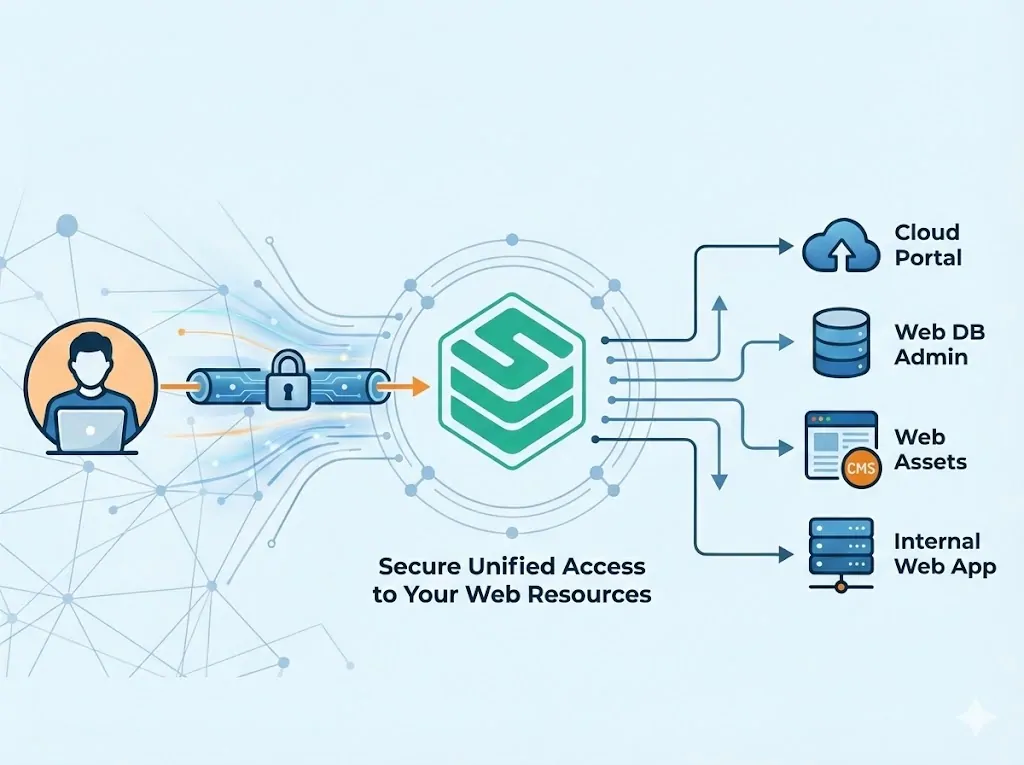
In the realm of Privileged Access Management (PAM), securing access to internal web dashboards, cloud consoles (like AWS/Azure), and SaaS applications is crucial. JumpServer Web Assets provide a solution by allowing users to access these web systems through remote applications. This ensures that the actual target address and credentials can remain hidden from the end-user, while the session is fully audited.
To enable this, JumpServer relies on a "publisher" to launch the browser. This guide covers the entire workflow: setting up the publisher (RemoteApp or VirtualApp), creating the asset, configuring automation, and connecting.
Part 1: Deploying the Publisher
Before creating a Web Asset, you must configure a publisher. JumpServer supports two types: RemoteApp (Windows-based) and VirtualApp (Linux-based).
Option A: Deploying a RemoteApp Machine (Windows)
RemoteApp uses a Windows host to run the browser. JumpServer uses a tool called Tinker to automate deployment and manage sessions.
Prerequisites:
OS: Windows Server 2019 Standard or Datacenter.
Specs: At least 4 CPU cores and 8 GB RAM.
Services: OpenSSH or WinRM installed; Remote Desktop Services (RDS) license activated.
Steps to Deploy:
1. Create the Machine Entry:
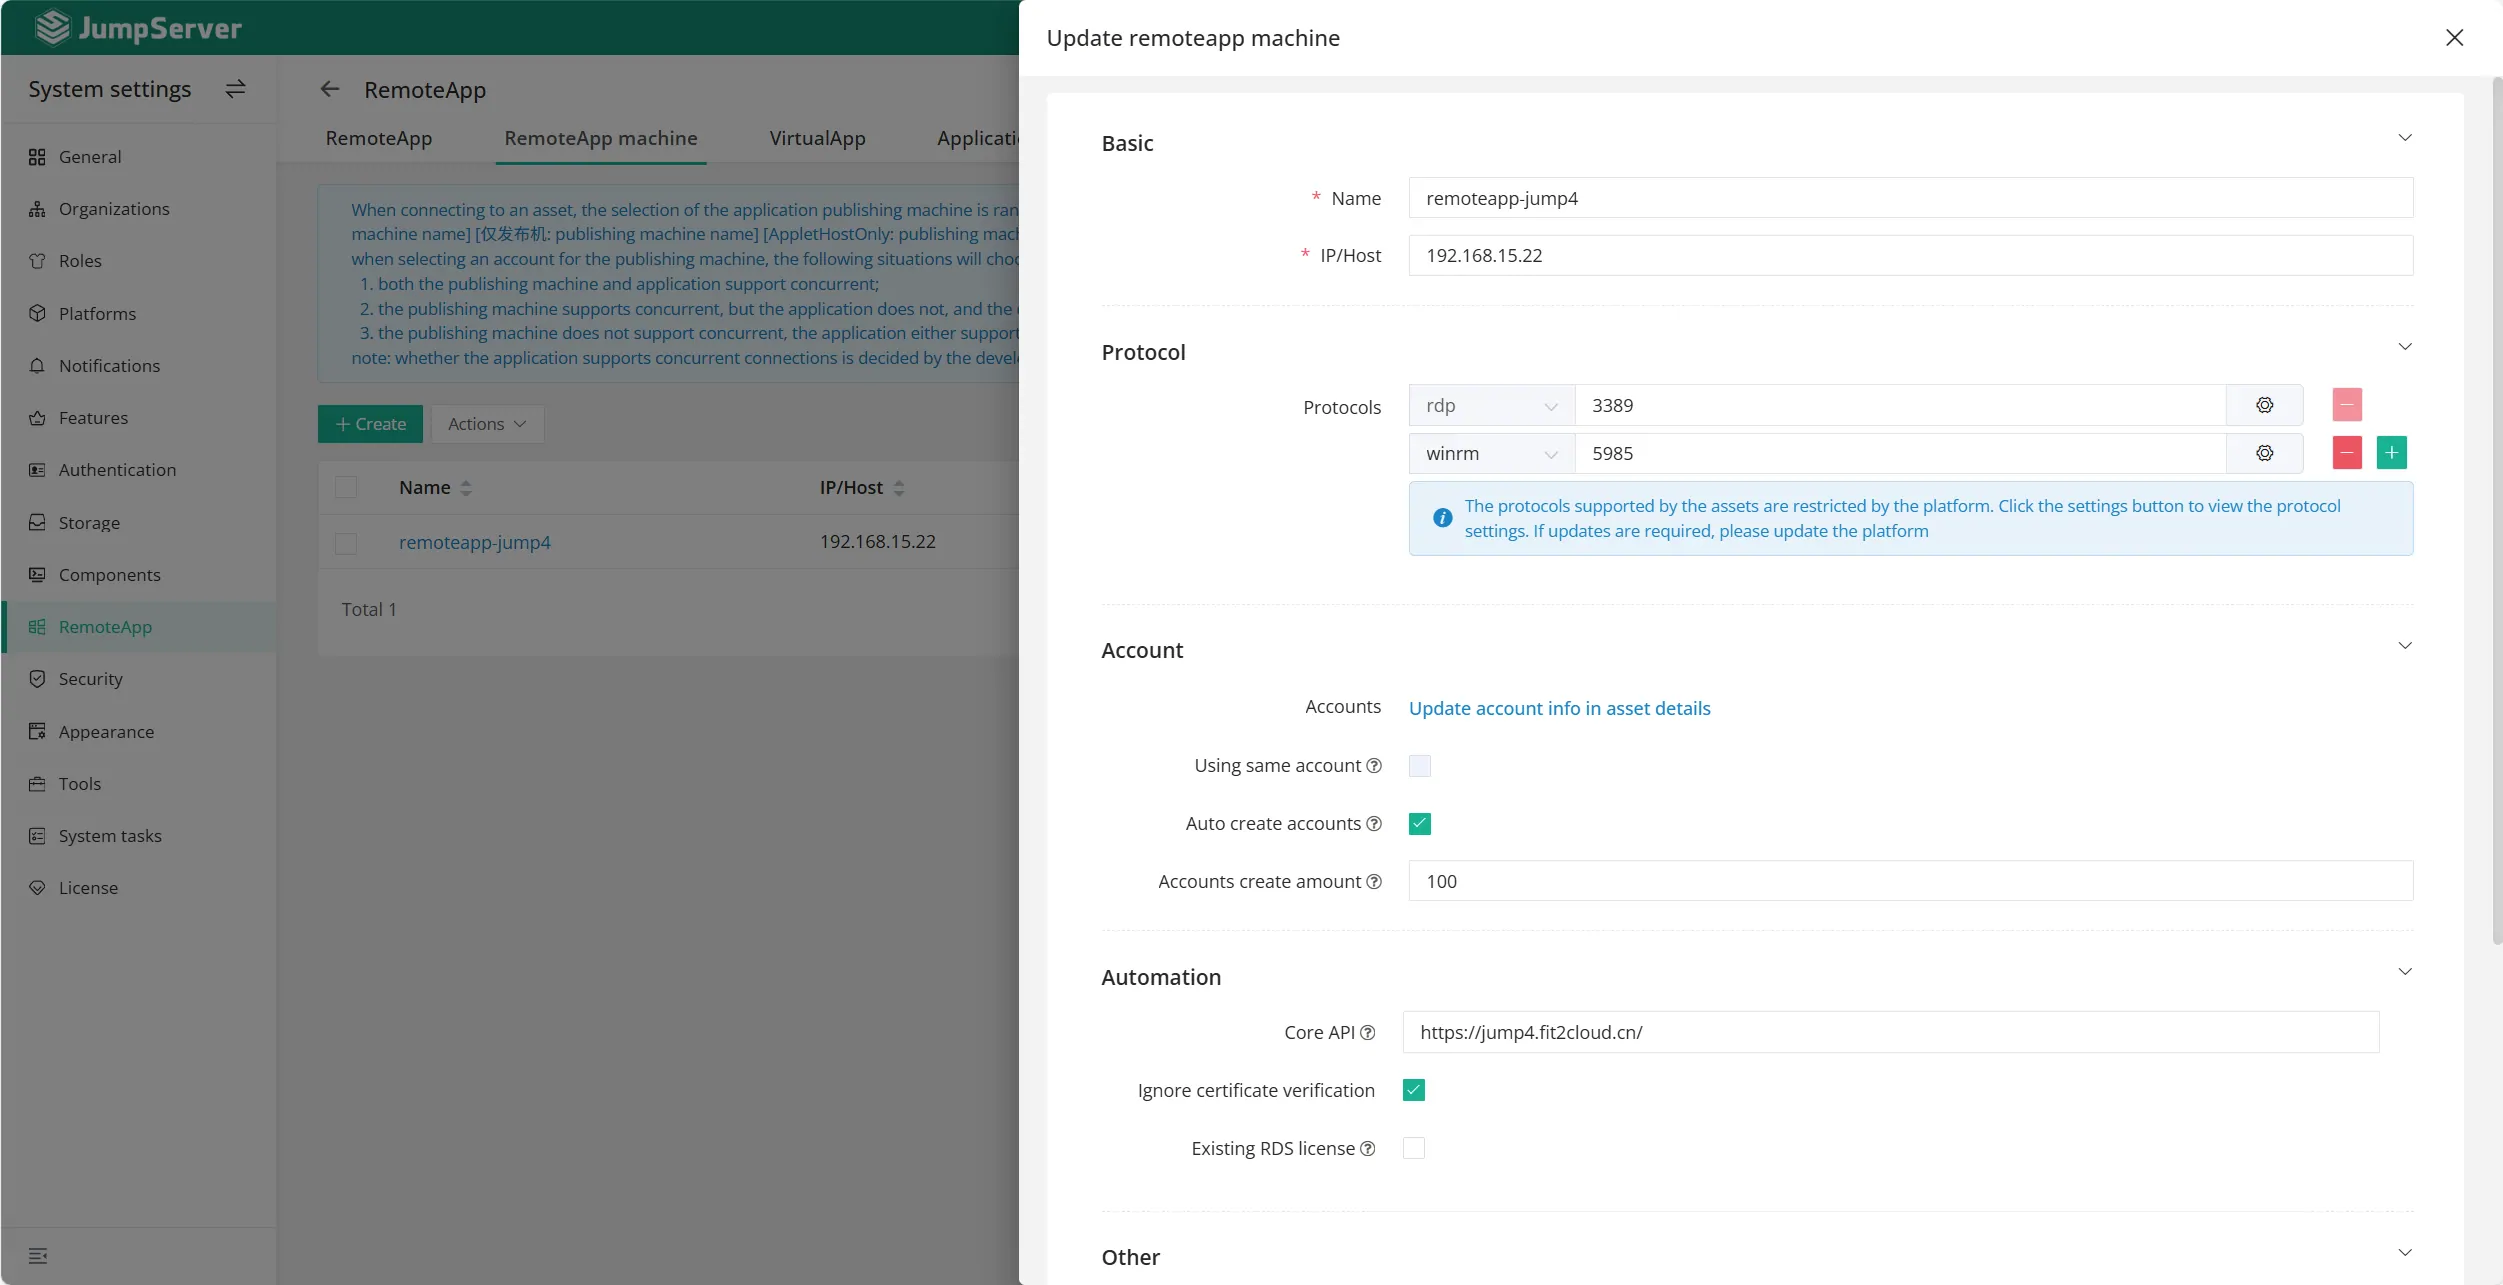
Navigate to System settings> RemoteApp > RemoteApp machine.
Click Create. Enter the Name and IP/Host.
Select the Protocol: Choose rdp for user connections and either ssh or winrm for JumpServer management.
Accounts: Add a privileged account (Administrator group) for JumpServer to manage the host.
Core API: Input the URL of JumpServer. The component Tinker deployed on this Windows server will call JumpServer API with this URL.
RDS Settings: Configure licensing mode (Per Device/Per User) if you have an existing license, otherwise, a trial is used.
Click Submit.
2. Initialize Deployment:
Click on the name of the machine you just created.
Go to the Deploy RemoteApp machine tab.
In the Quick Update card, locate Deploy and publish and click the Deploy button.
JumpServer will automatically install Chrome, Tinker, and necessary components.
Option B: Deploying a VirtualApp Publisher (Linux)(Enterprise Edition)
VirtualApp uses a Linux host to run browsers inside Docker containers managed by the Panda component.
This is an feature in JumpServer Enterprise Edition.
Steps to Deploy:
1. Enable the Feature:
Go to System Settings > Function Settings > Virtual App and enable it.
2. Configure the Host IP:
Log in to your JumpServer Linux host.
Edit the config file: vi /opt/jumpserver/config/config.txt.
Add or modify: PANDA_HOST_IP = <Your_Server_IP>.
Restart JumpServer: jmsctl restart.
3. Check the Status of Application Provider:
Navigate to System settings > RemoteApp > Application providers.
Check the status of listed application providers.
Part 2: Creating a Web Asset
Once your publisher (RemoteApp or VirtualApp) is ready, you can create the website asset in JumpServer.
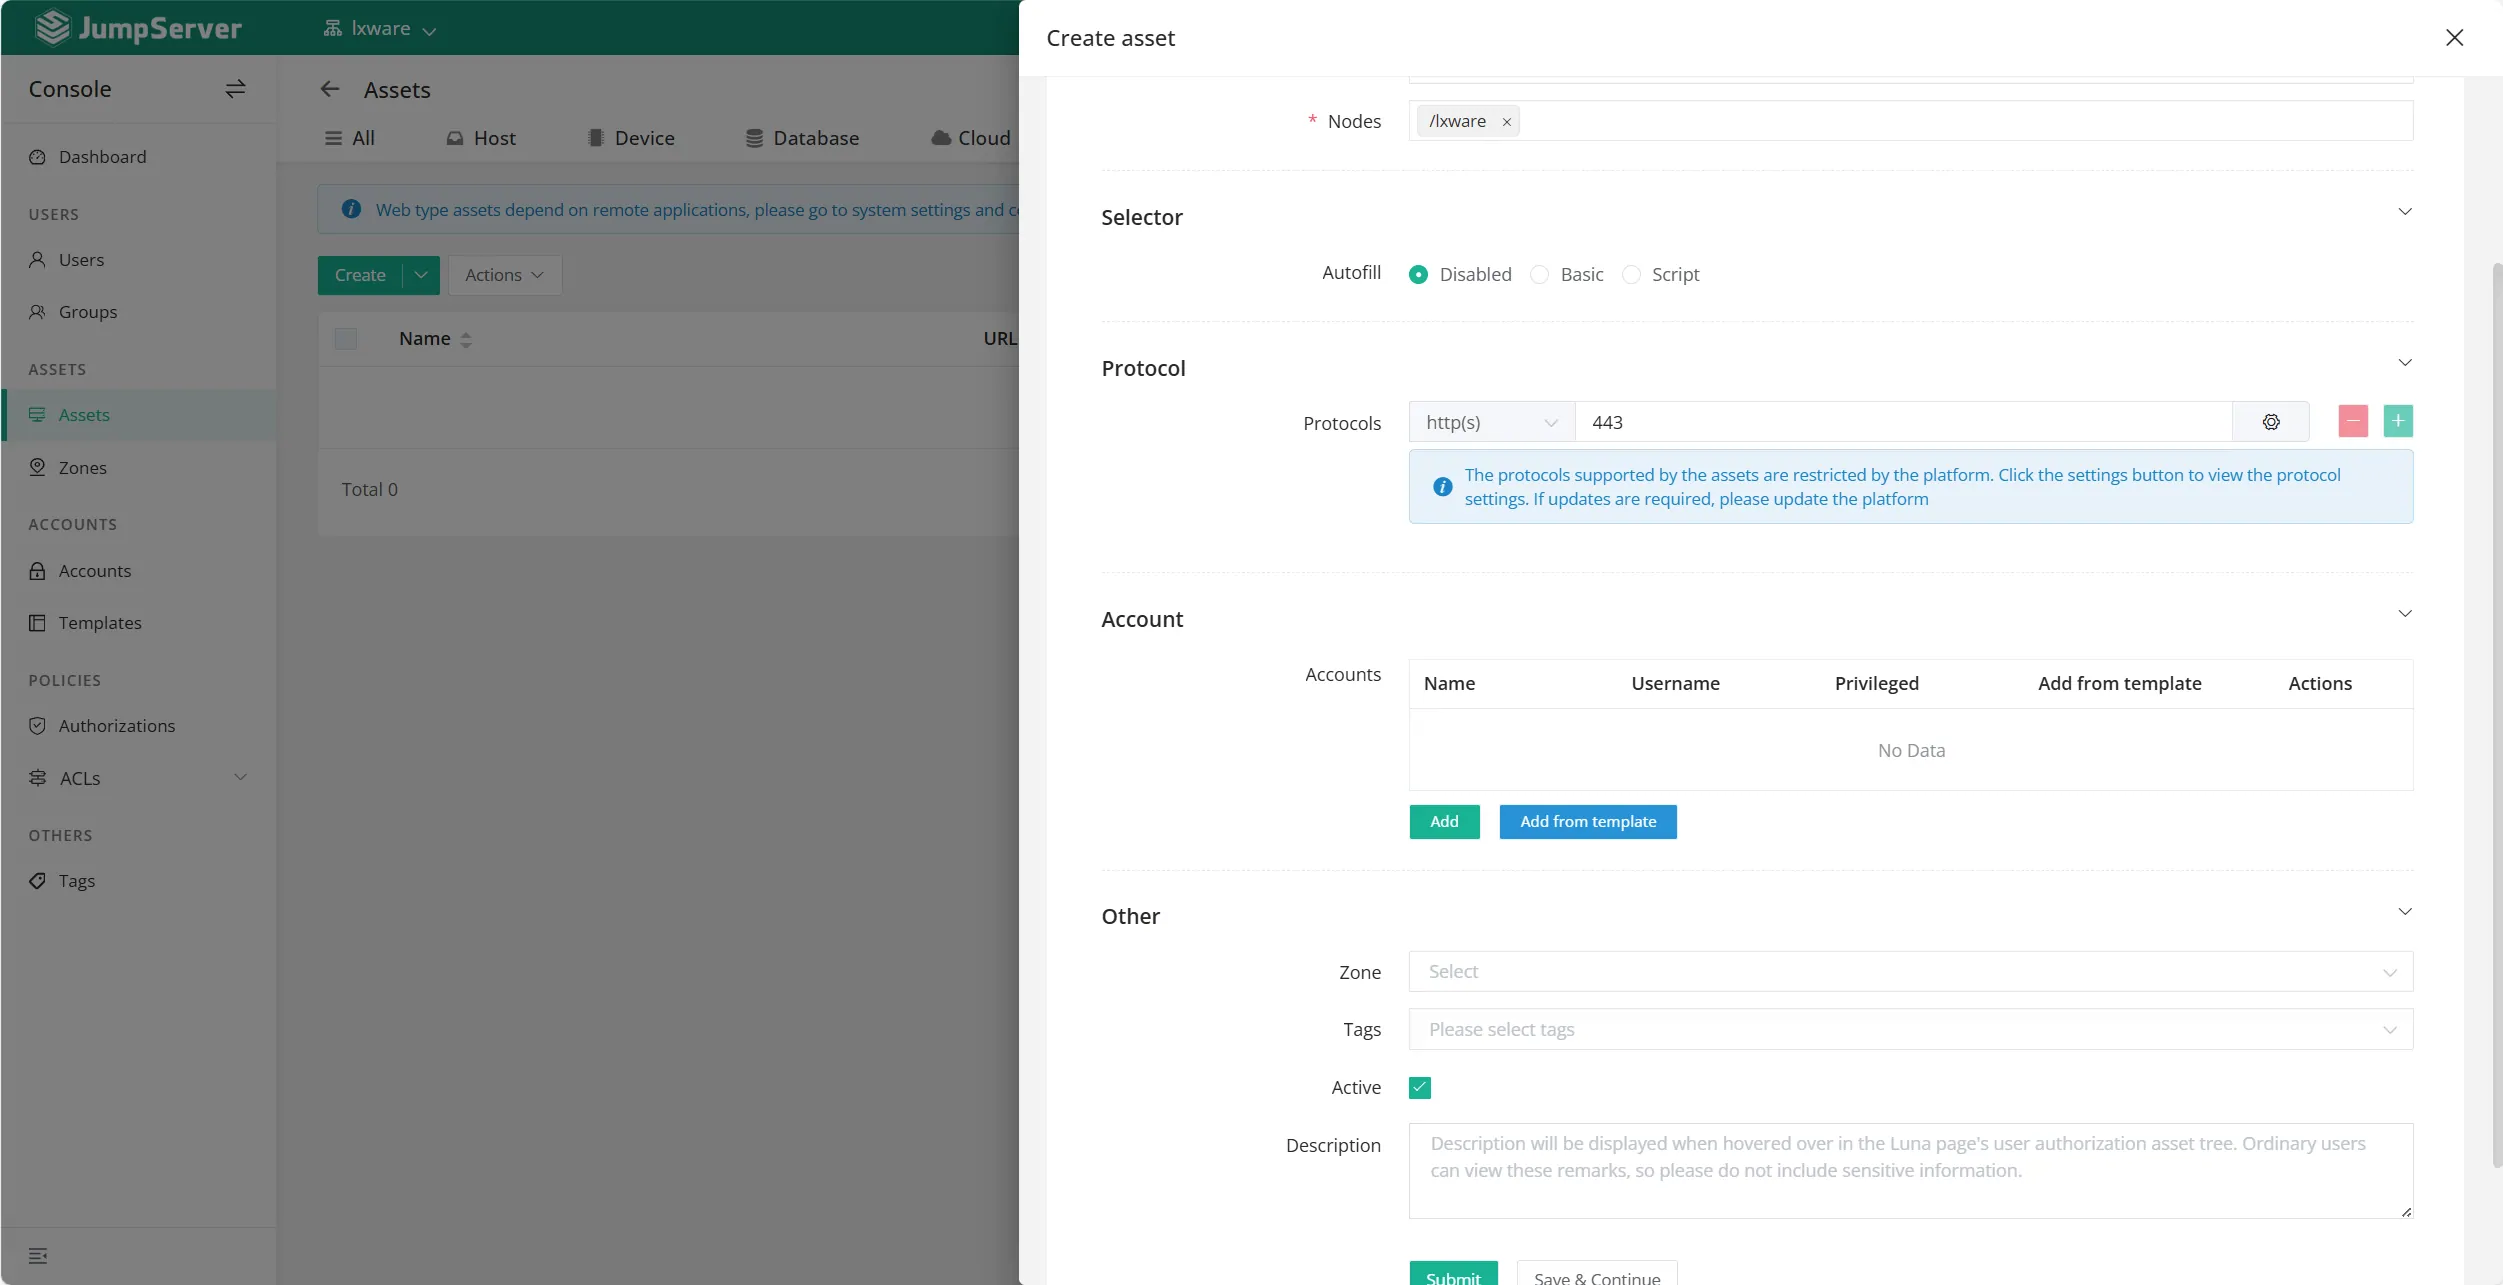
1. Navigate to Console > Assets > Web.
2. Click Create.
3. Fill in the required details:
* Name: A unique identifier for the web system.
* Website URL: The full address (e.g., https://console.aws.amazon.com). Note: If the port is not 80 or 443, you must include it in the URL.
* Nodes: Select the asset node for organization.
* Platform: Select the Website platform.
* Accounts: (Optional) Associate credentials here to enable Autofill.
Part 3: Configuring Autofill (Single Sign-On)
Autofill is a critical feature that automatically inputs credentials, allowing users to log in without knowing the password.
You can select one of three methods in the asset configuration:
1. Disabled
Use this for public websites that do not require login.
2. Basic
Best for simple login pages where the username, password, and submit button are on the same screen.
You must provide Selectors (ID, Name, CSS, or XPath) so JumpServer knows where to type.
Tip: Use your browser's Developer Tools (F12) to find the element ID or Name.
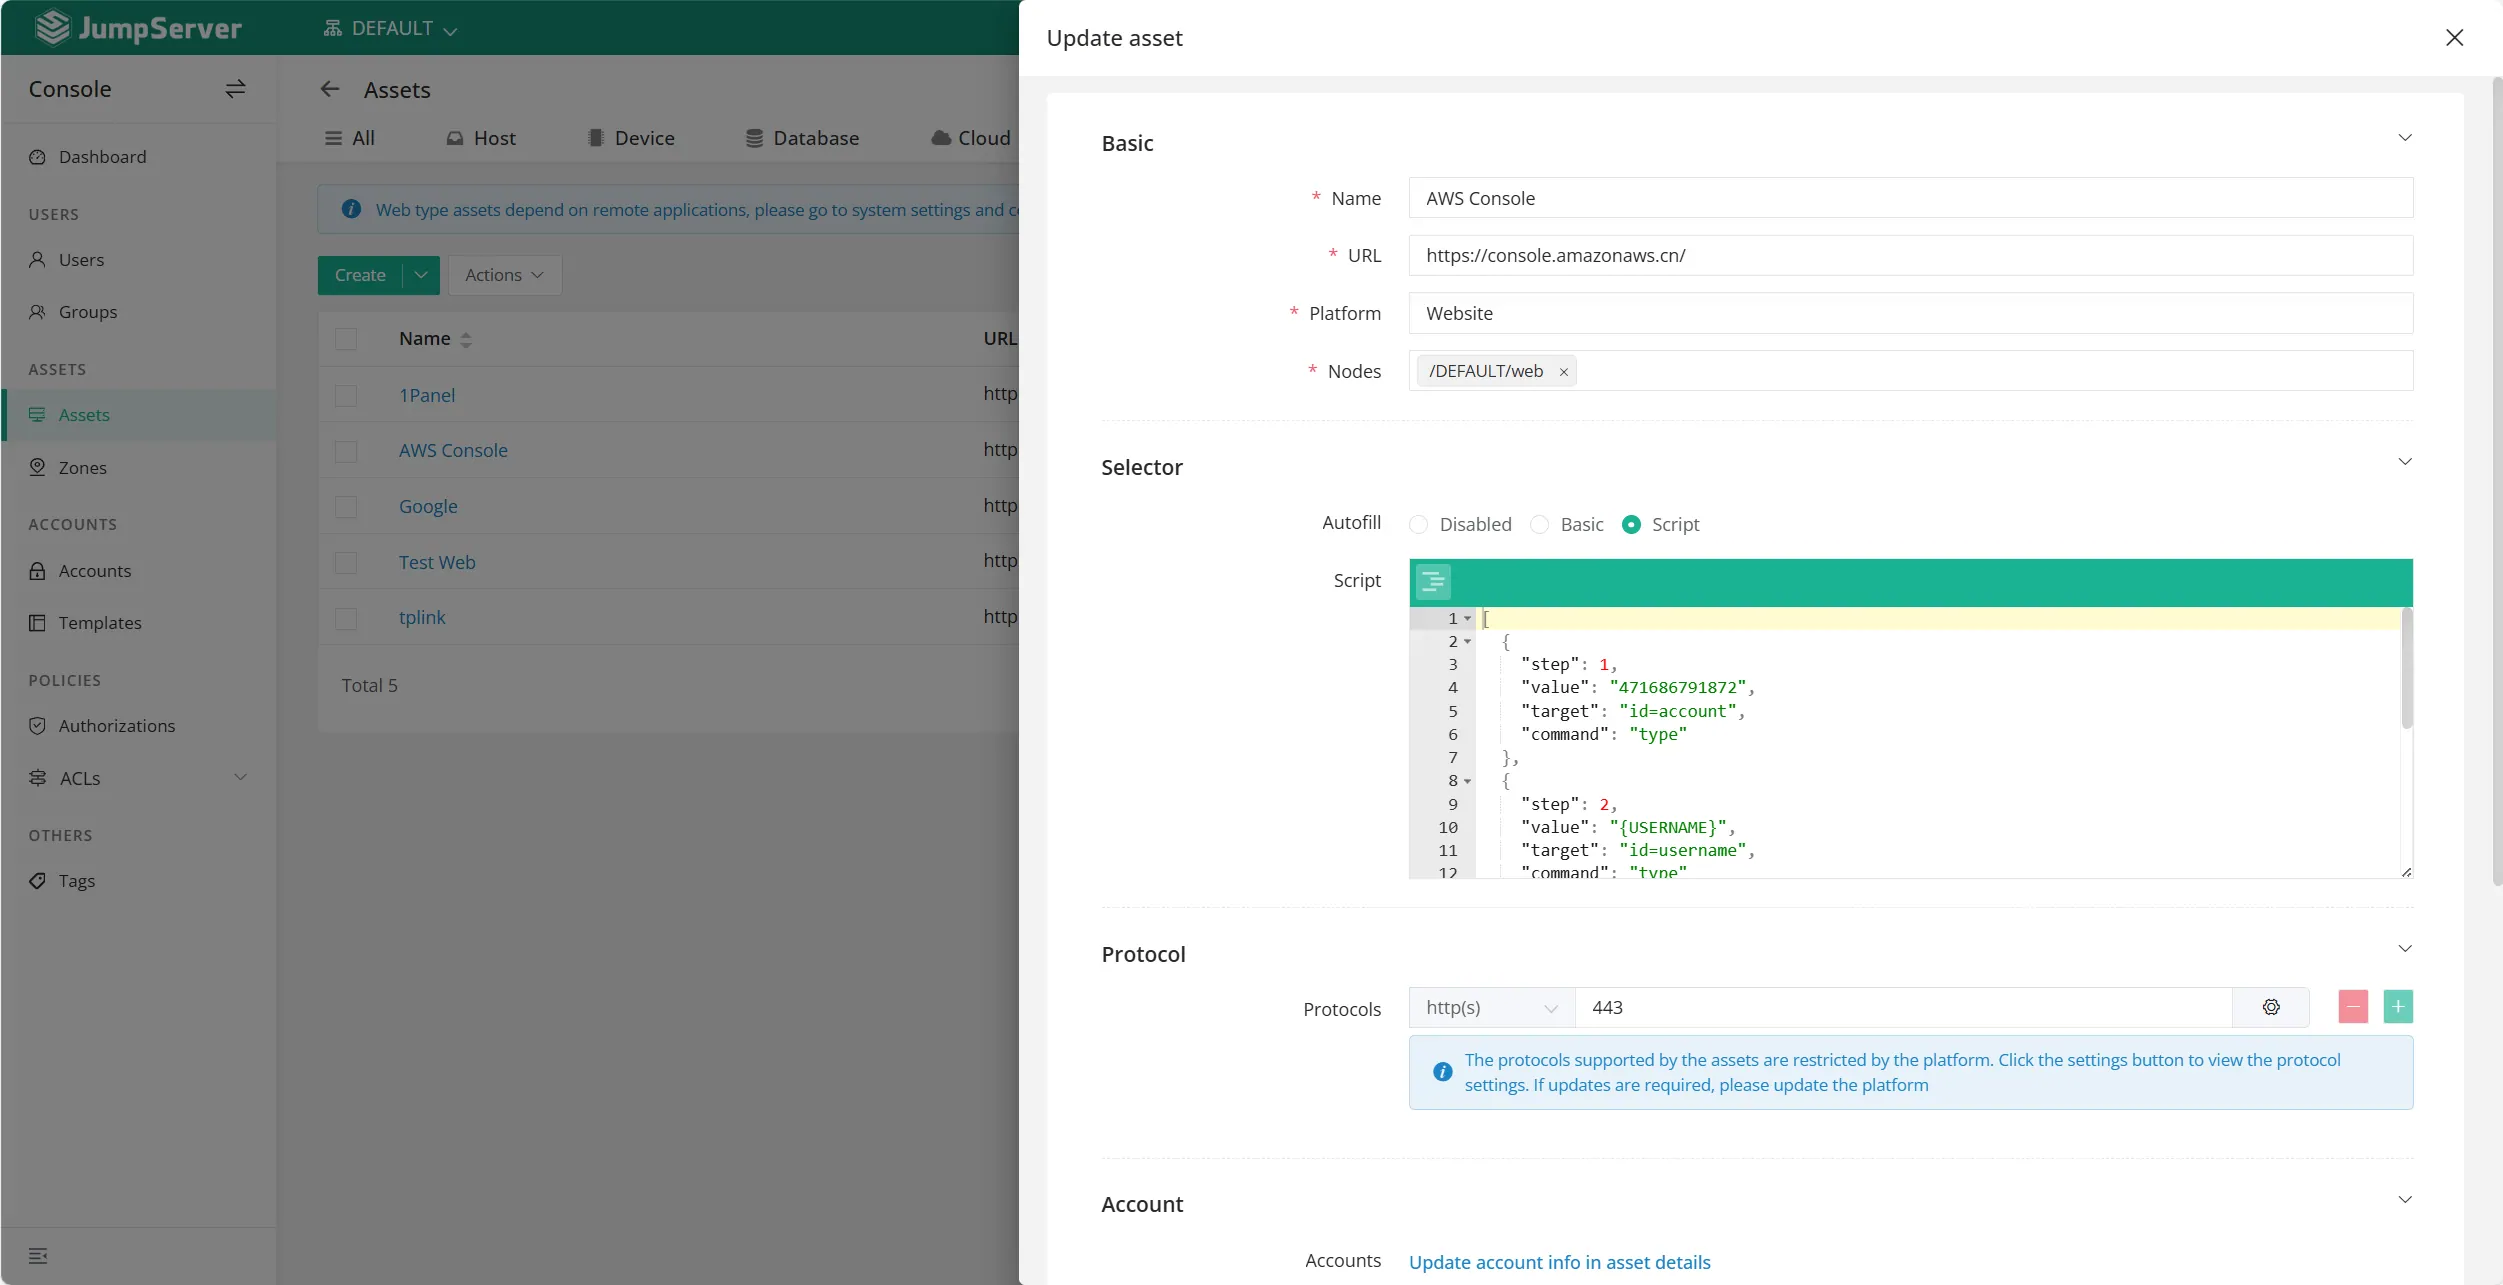
3. Script
This script method is intended for websites with complex login procedures. It supports advanced automation, including multi-step authentication and interaction with dynamic page elements.
Script structure
The script here is an array, where each element is a dictionary, representing a step in the script. Each step contains the following keys:
command options:
Example Script:
Switch to the iframe with
id=iframe_id.Type the username into the input field with
name=username. The{USERNAME}variable will be replaced with the actual username when the script is executed.Click the next button to proceed to the next step in the login process.
Pause the script for 5 seconds to allow the next page to load.
Type the password into the input field with
name=password. The{SECRET}variable will be replaced with the actual password when the script is executed.Click the submit button to complete the login process.
[
  {
      "step": 1,
      "command": "select_frame",
      "target": "id=iframe_id",
      "value": ""
  },
  {
      "step": 2,
      "command": "type",
      "target": "name=username",
      "value": "{USERNAME}"
  },
  {
      "step": 3,
      "command": "click",
      "target": "id=next_button",
      "value": ""
  },
  {
      "step": 4,
      "command": "sleep",
      "target": "5",
      "value": ""
  },
  {
      "step": 5,
      "command": "type",
      "target": "name=password",
      "value": "{SECRET}"
  },
  {
      "step": 6,
      "command": "click",
      "target": "id=submit_button",
      "value": ""
  }
]
Part 4: Connecting to the Web Asset
After creating the asset and granting permissions, users can connect via the Web Terminal.
1. Go to the Workbench or Web Terminal page.
2. Locate the Web Asset in the asset tree or use the search bar.
3. Click the asset name to initiate the connection.
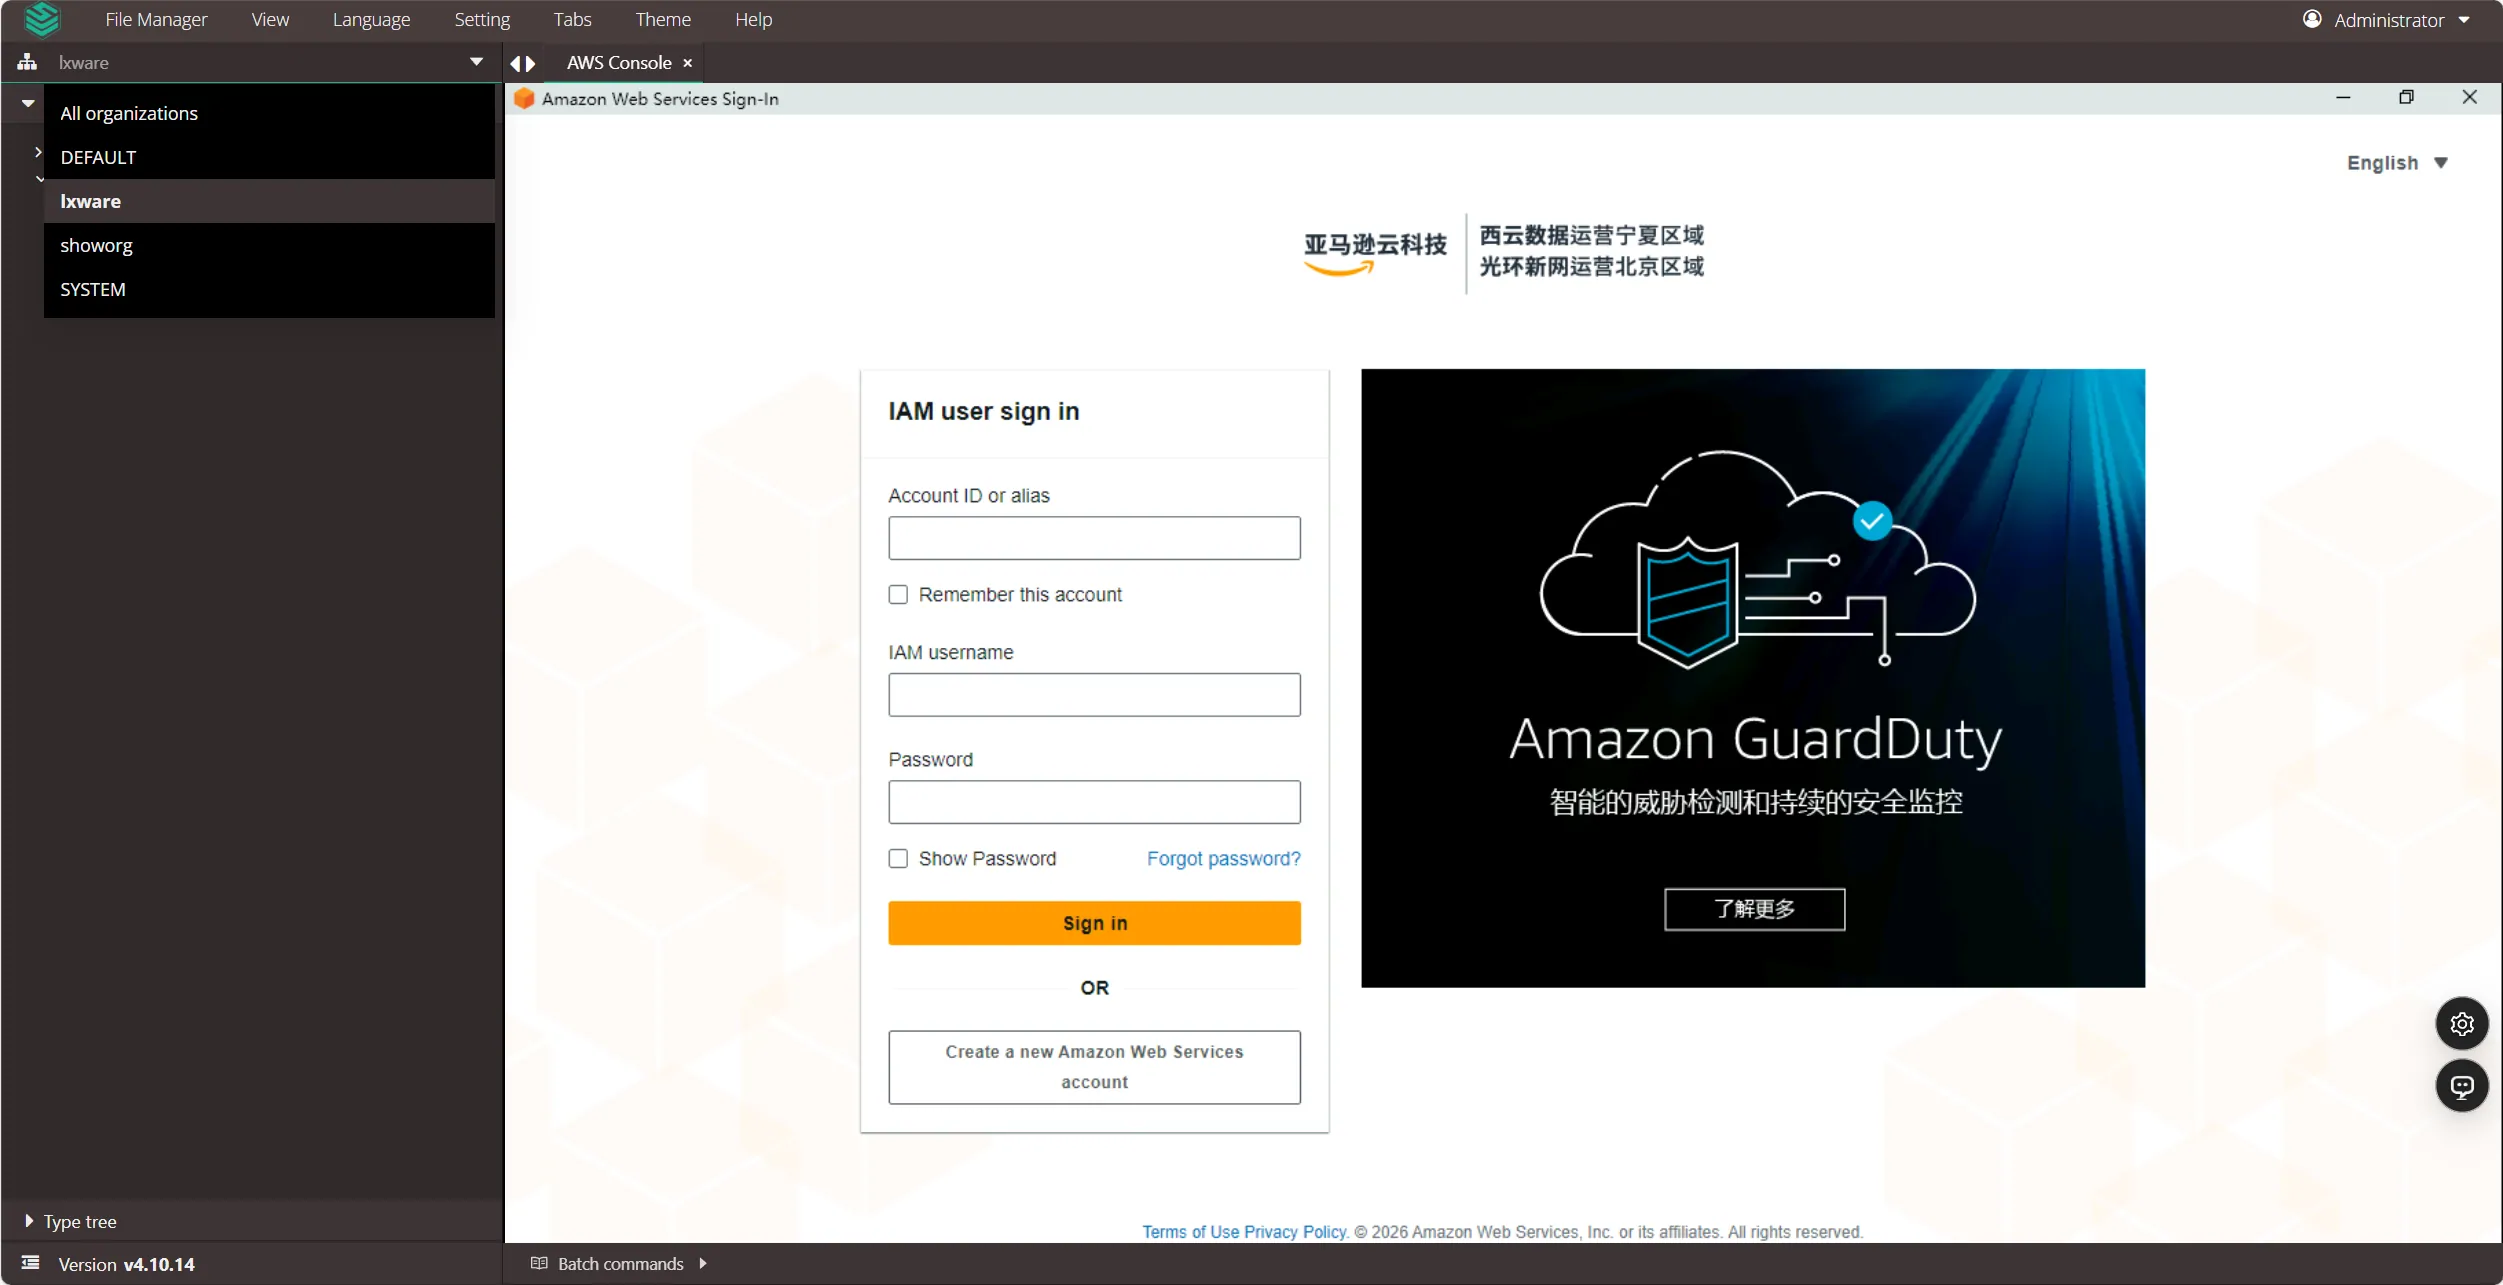
4. The Experience:
JumpServer calls the publisher (VirtualApp container or RemoteApp machine).
A remote browser window opens inside your web interface.
If Autofill is configured, the system enters the credentials automatically.
FAQ & Troubleshooting
Q: Can I use Web Assets for databases?
A: Yes, JumpServer supports accessing databases via Web GUI (e.g., phpMyAdmin) or via RemoteApp tools like DBeaver or Navicat.
Q: My script isn't working on a slow website.
A: Increase the sleep command duration in your JSON script to ensure the page loads fully before the script attempts to type the password.
Q: What is the difference between RemoteApp and VirtualApp?
A: RemoteApp requires a Windows Server and is resource-heavy but supports native Windows apps. VirtualApp runs on Linux containers, is lightweight, and is ideal for browser-based assets.