Introduction
MySQL is a widely used open-source relational database management system that utilizes Structured Query Language (SQL) for data storage and retrieval. JumpServer, as an open-source bastion host, provides robust support for managing and auditing MySQL database connections. This tutorial provides a step-by-step guide on managing MySQL in JumpServer V4, comparing connection methods, and troubleshooting common issues.
1. MySQL Database Onboarding Process
To manage a MySQL database in JumpServer, follow these core steps:
Prerequisites
JumpServer (Community or Enterprise edition) must be deployed (V4 is recommended).
The target MySQL instance must be network-accessible.
A valid database account (e.g., Root) is required for connection.
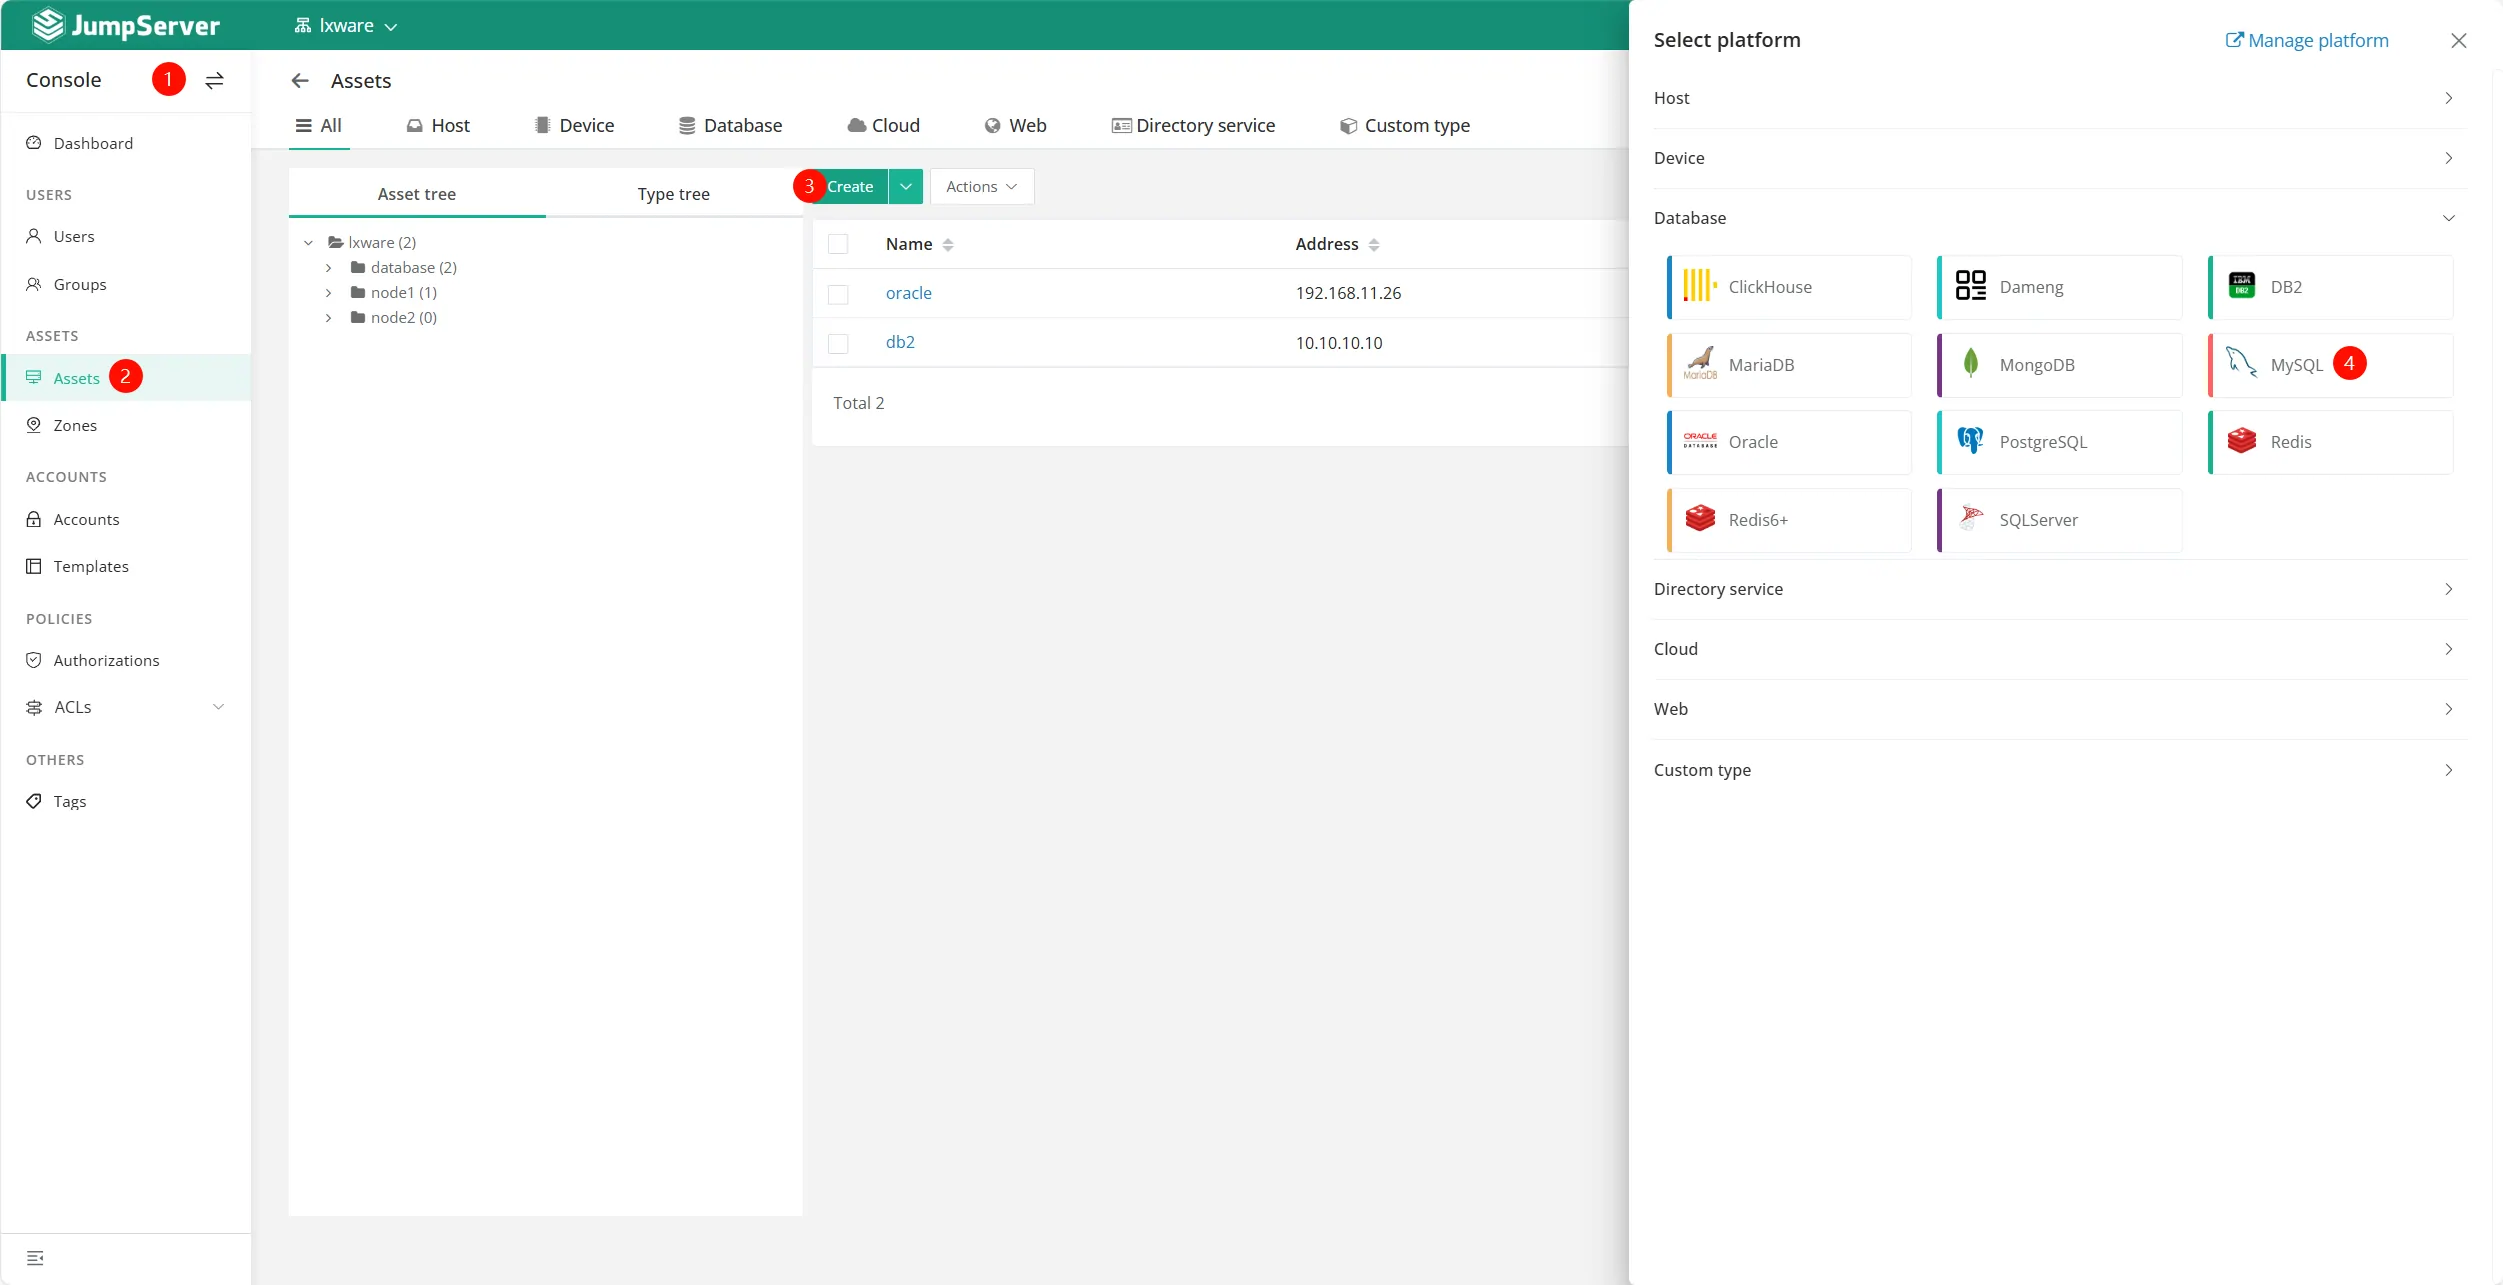
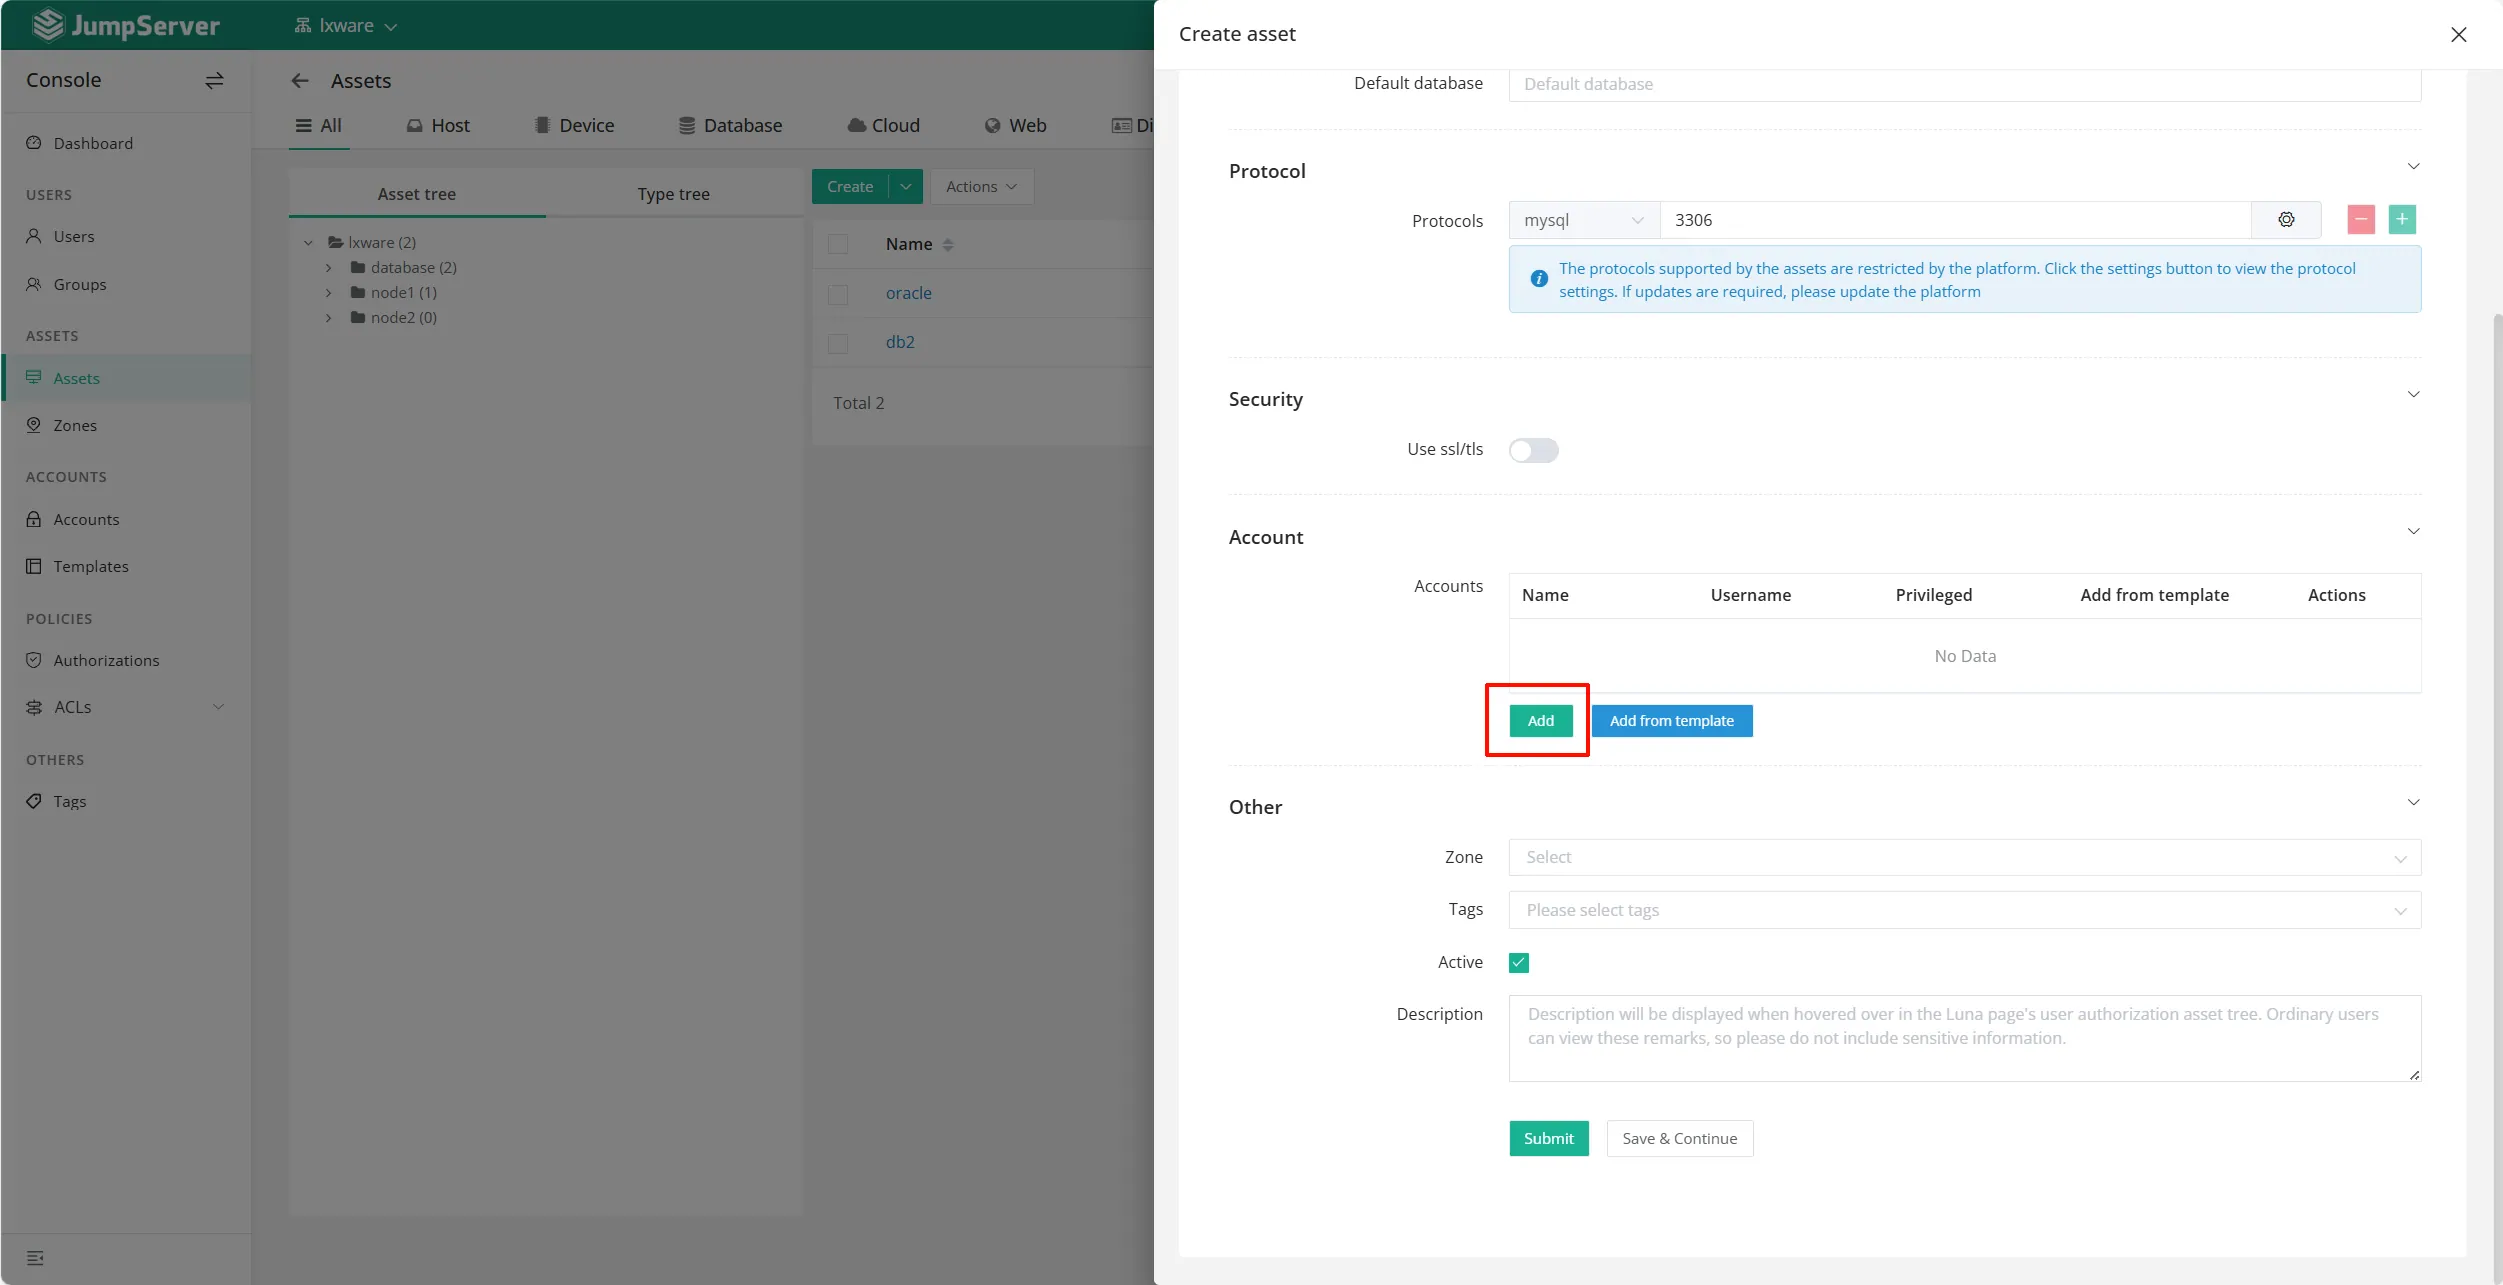
Step 1: Add Database Assets
Log in to the JumpServer console.
Navigate to Asset List → Database → Create.
Select MySQL as the platform type and fill in the following:
Name: Recommended format:
BusinessName-MySQL-Environment.Address: IP or Domain of the MySQL instance.
Default Database: The initial database to enter upon connection (can be switched later).
Security: Supports SSL/TLS configuration (Optional).
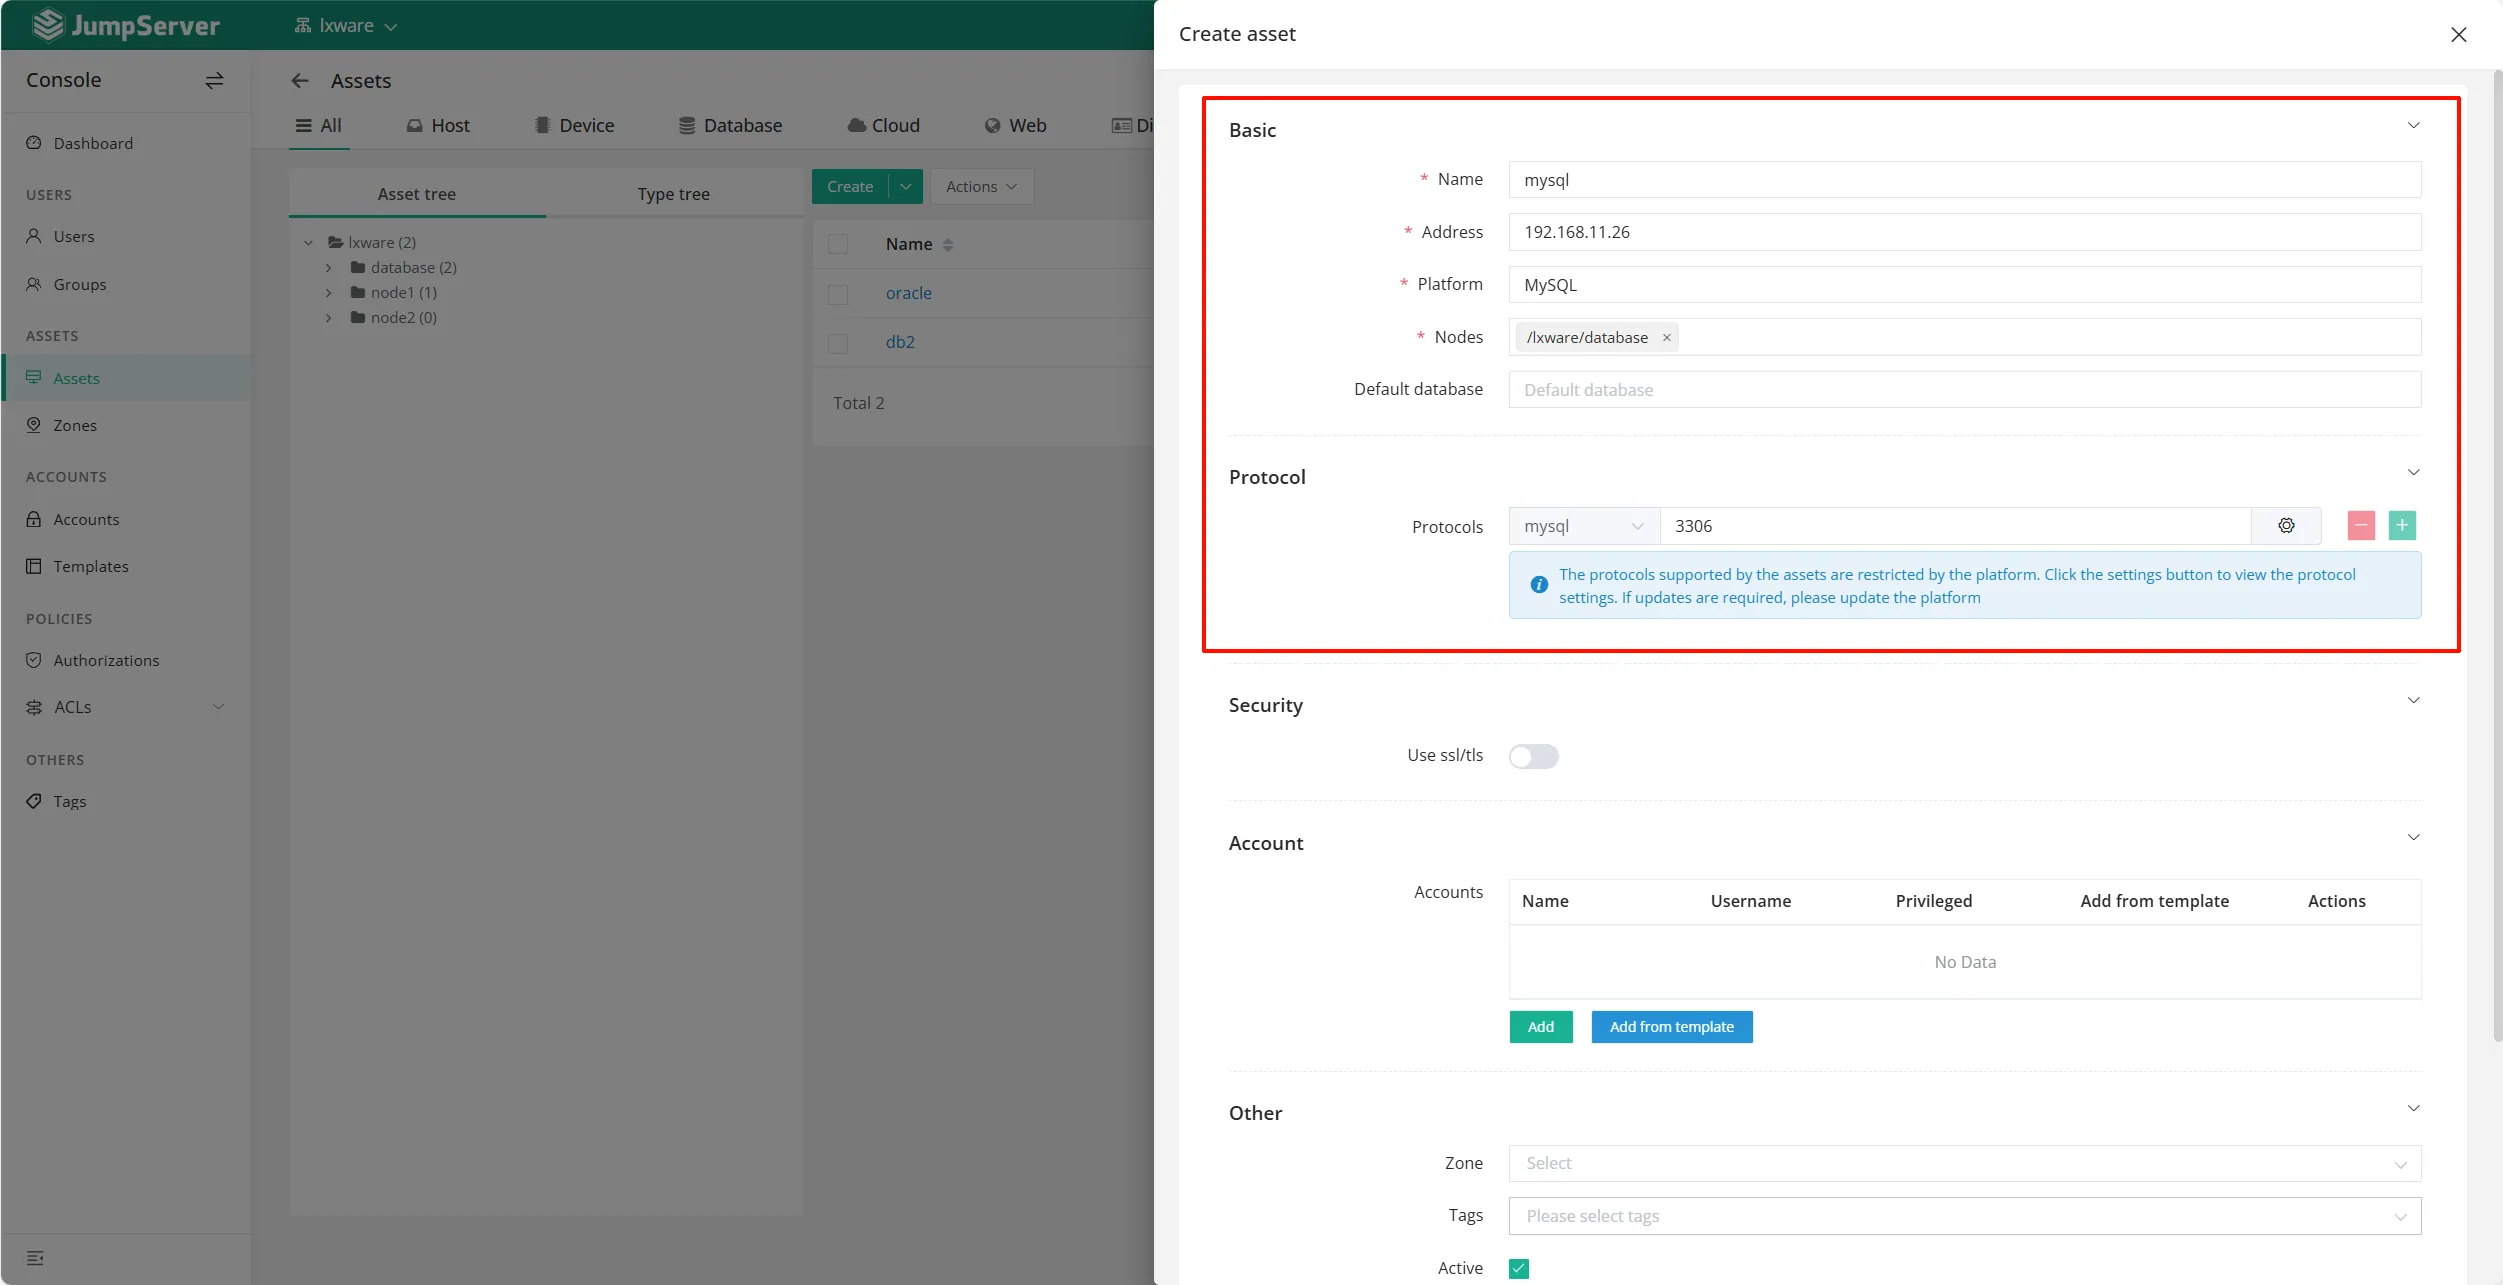
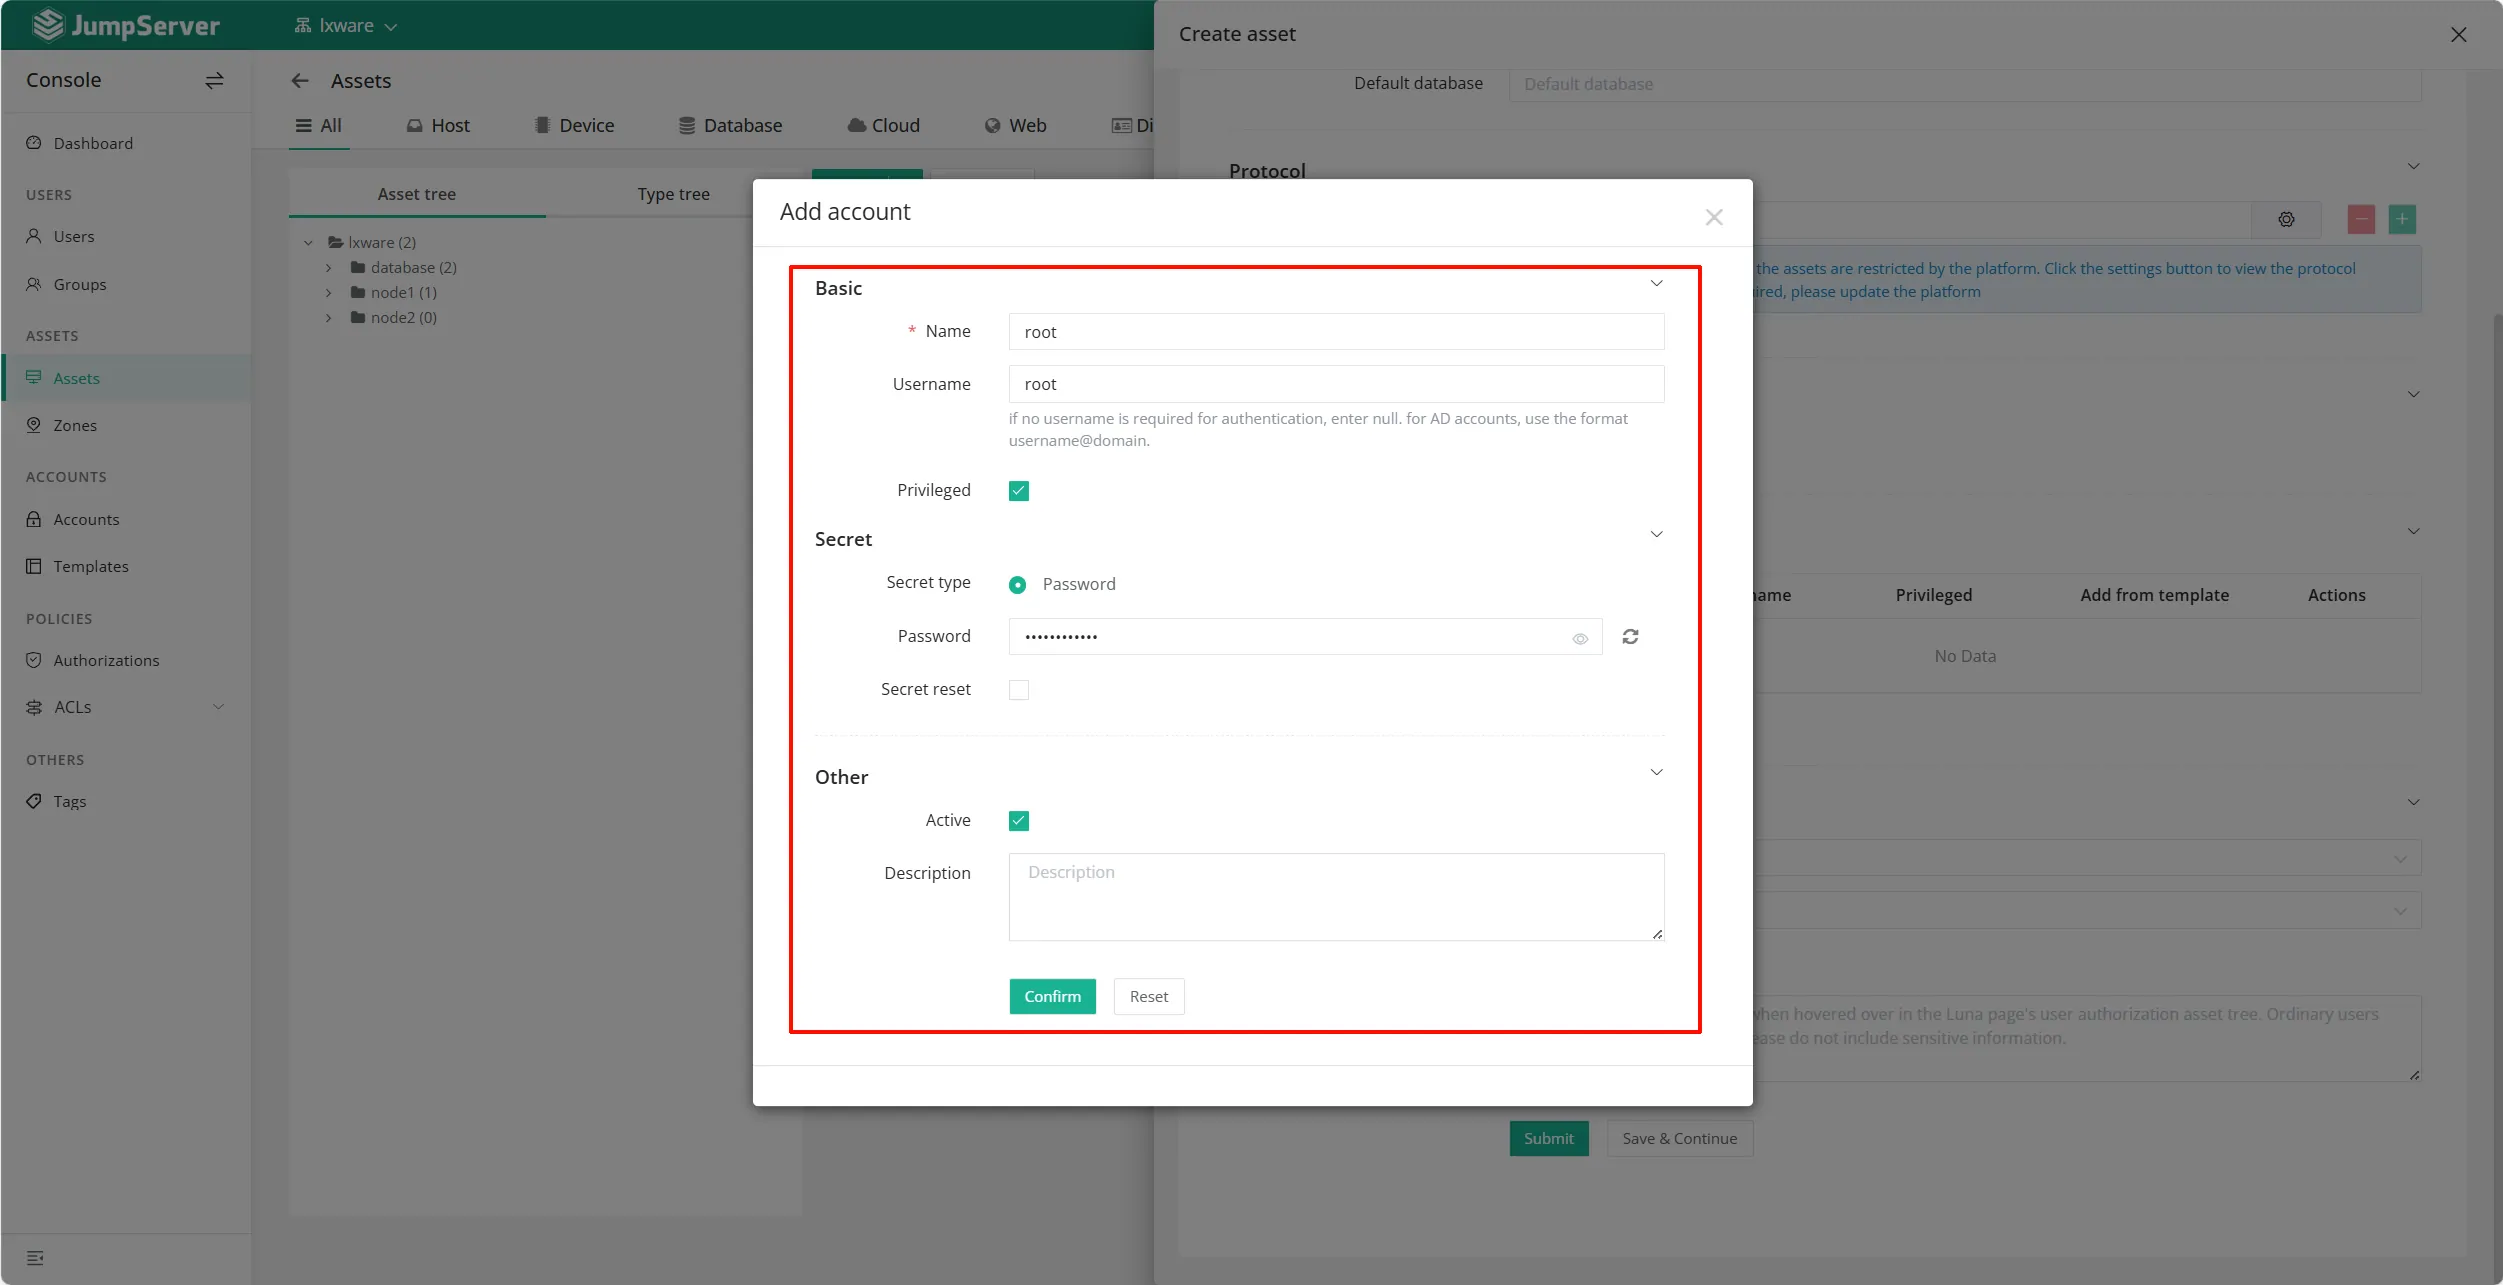
Step 2: Create Database Accounts
In the asset details, add a new account with the following information:
Username: The MySQL login account (e.g., Root or a dedicated management account).
Password: The corresponding password for the database user.
Privileged Account: Recommended for administrative scenarios.
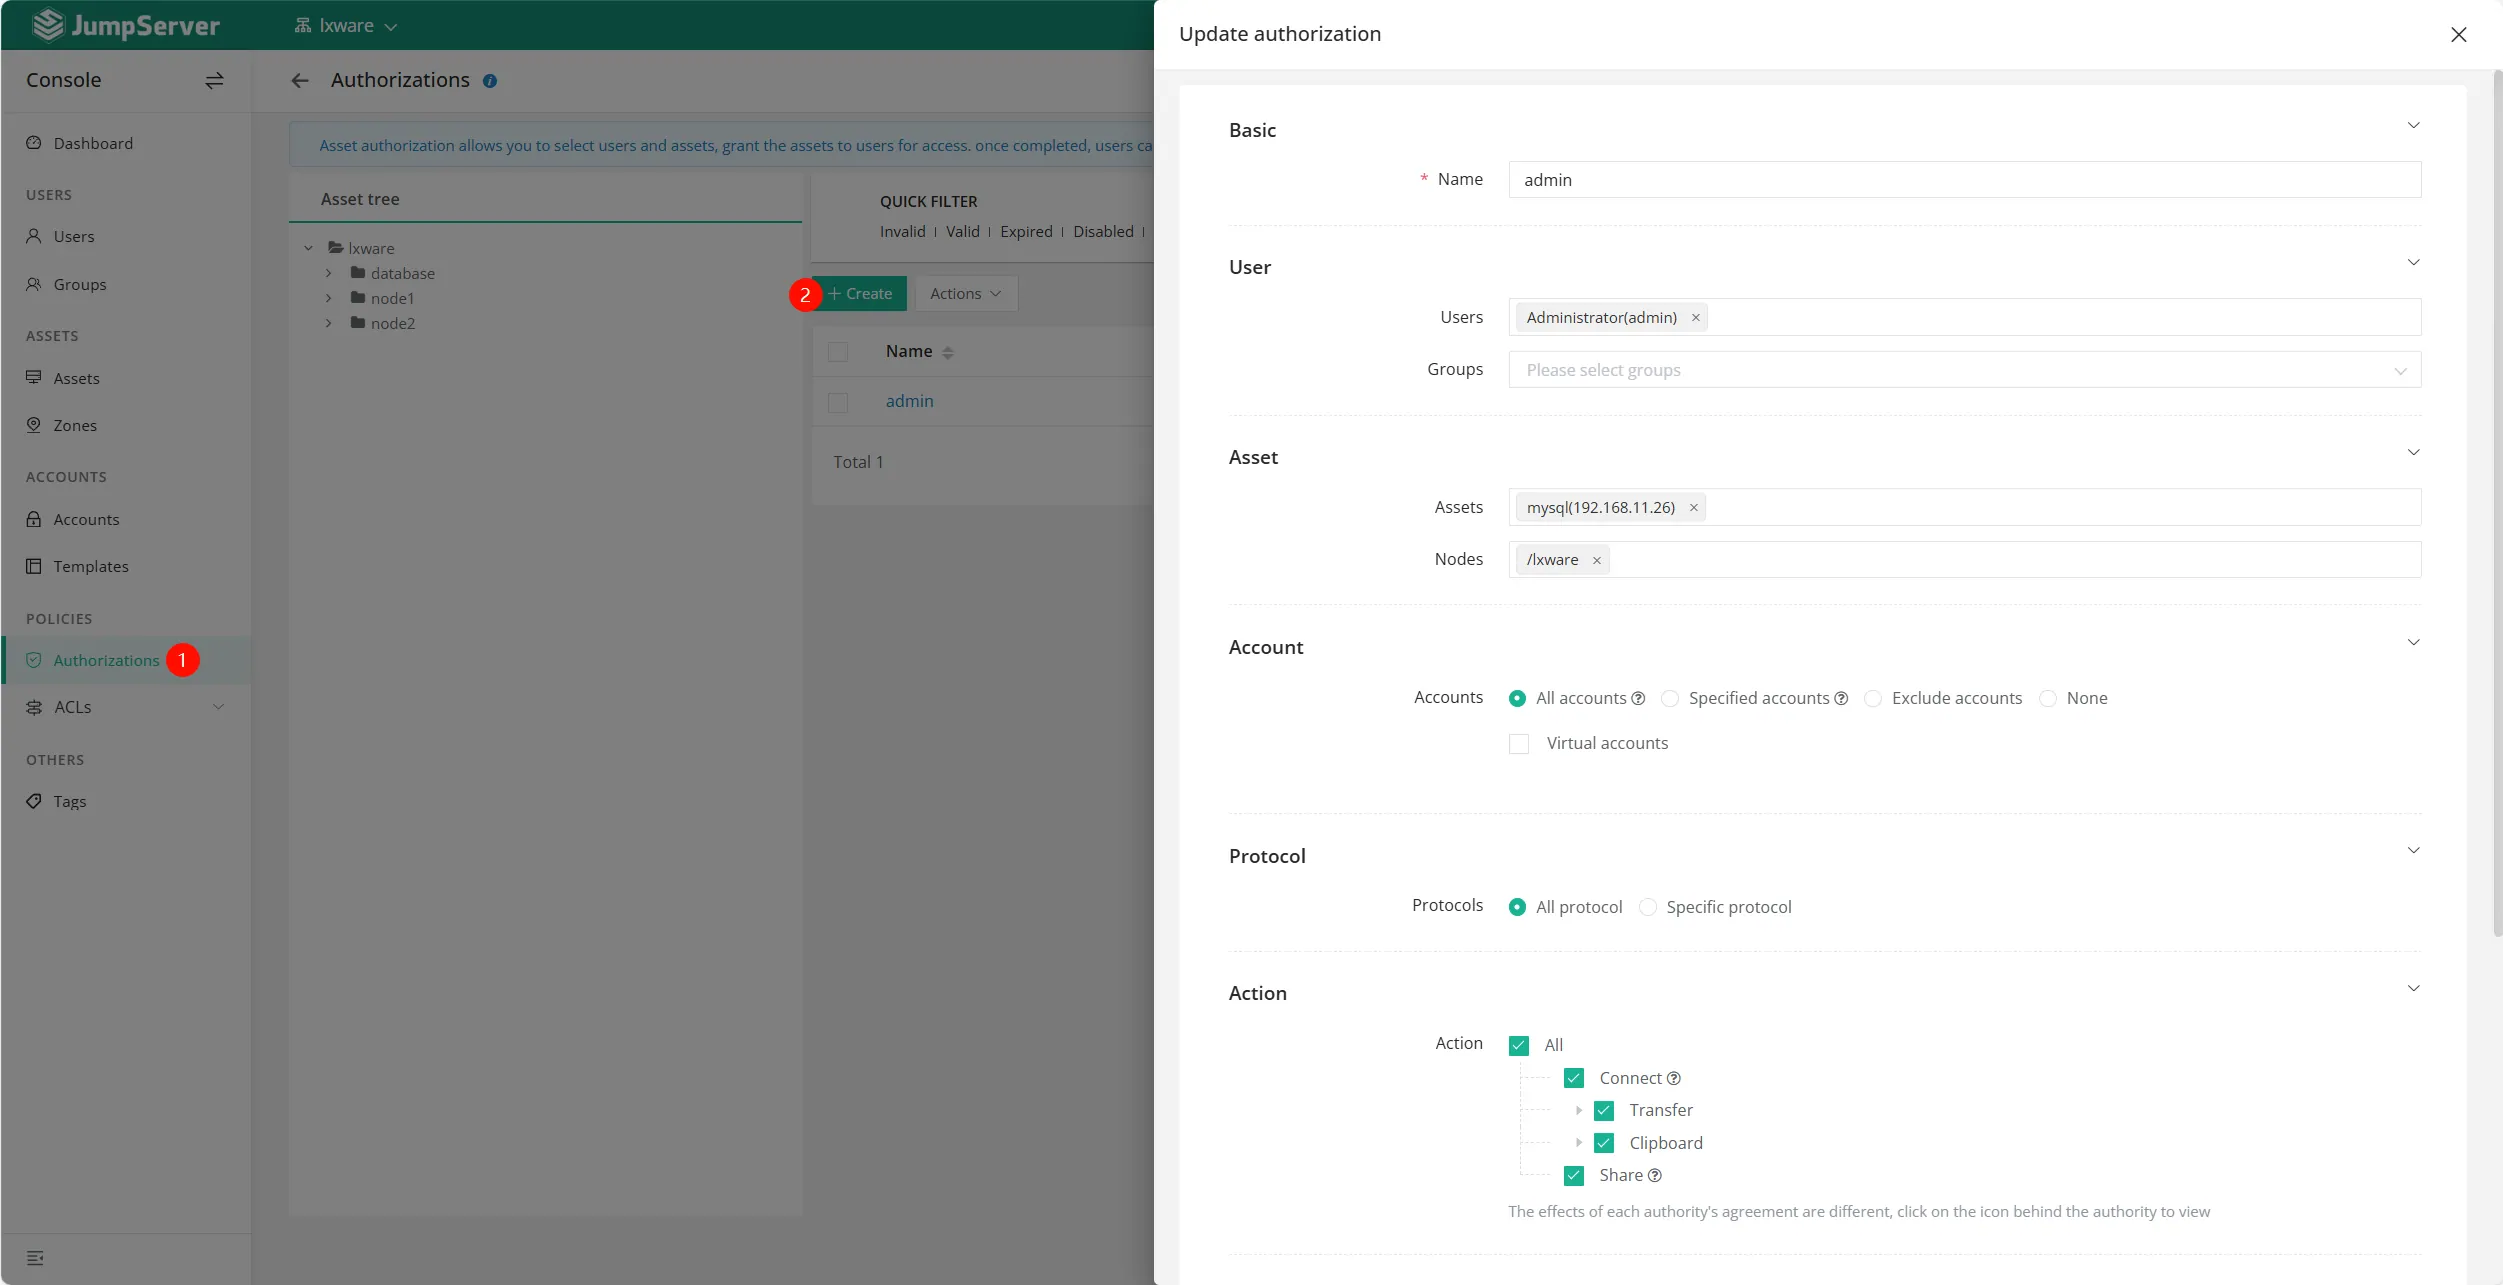
Step 3: Asset Authorization
Grant access permissions by going to Asset Authorization → Create:
Asset/Node: Select the onboarded MySQL asset.
User/Group: Choose the JumpServer users who need access.
Account: Choose "All Accounts" or specific accounts as needed.
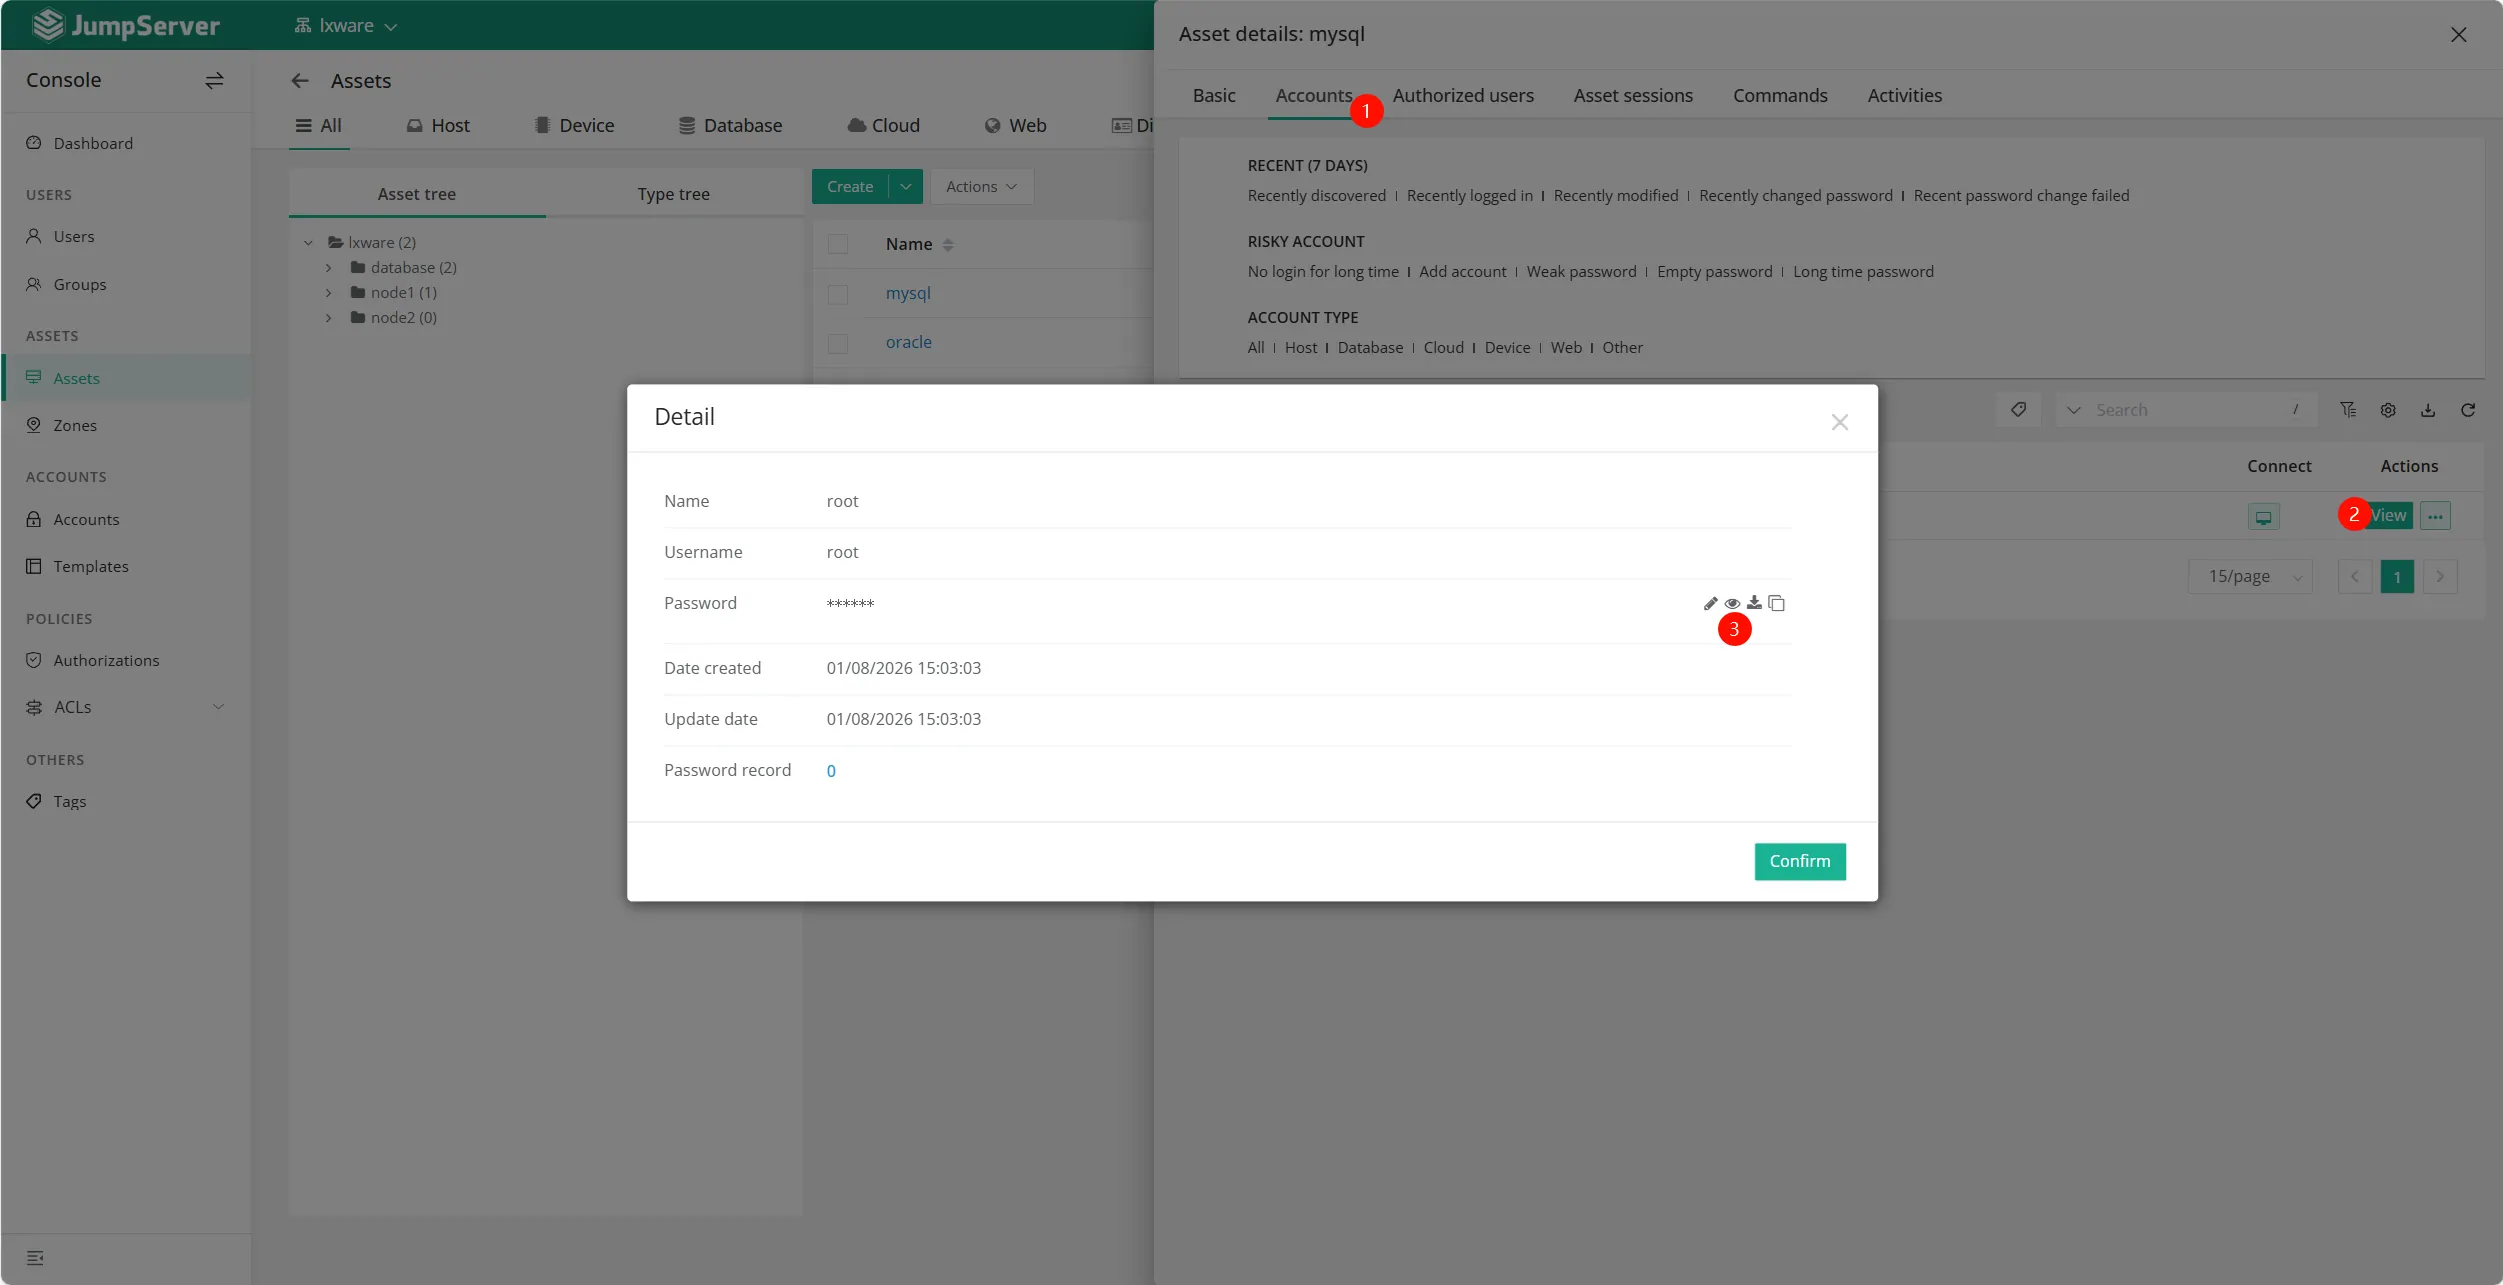
2. Querying Management Information
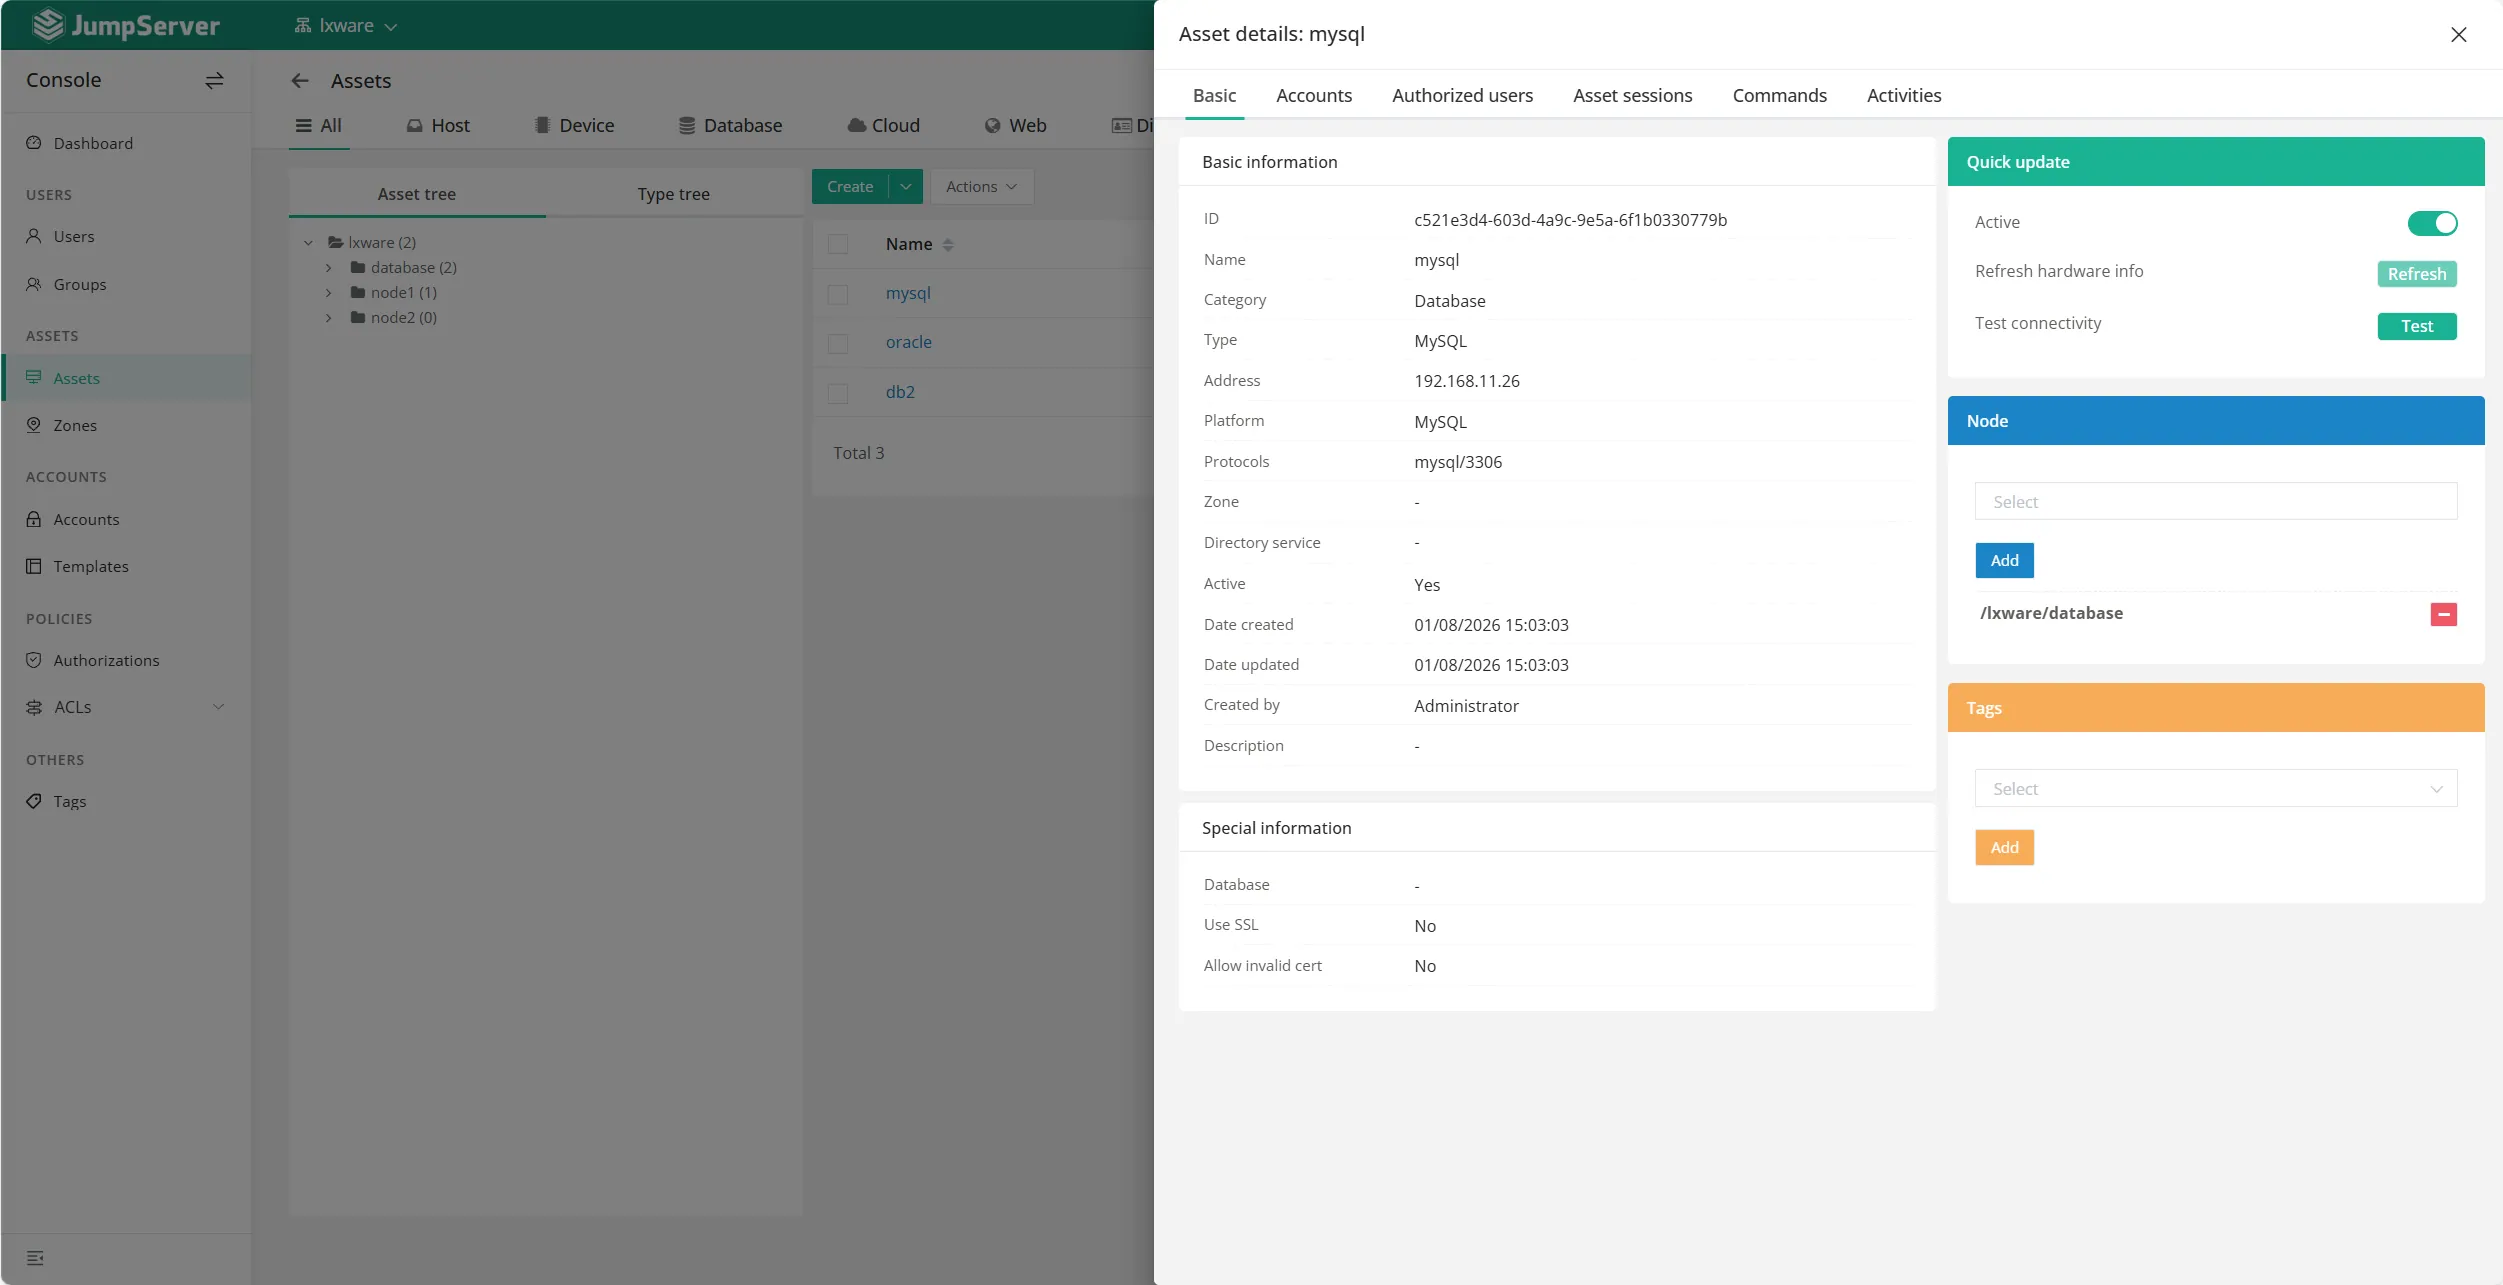
Administrators can easily retrieve database details via the console:
Basic Info: Go to the Asset List and click the asset name to see the IP, port, and asset ID.
View Password: Under the Account tab of the specific asset, click the "View" button (Requires admin privileges and MFA enabled).
3. Comparison of Connection Methods
JumpServer offers various ways to connect to MySQL based on different use cases:
4. Troubleshooting Common Errors
If you encounter issues while connecting, follow these troubleshooting steps:
Connection Timeout / Network Unreachable: Verify connectivity using ping or telnet. Ensure the database's bind-address allows remote connections and firewall/security groups are configured correctly.
Too Many Connections: Check the max_connections parameter in MySQL's my.cnf. Optimize application connection pools to release idle connections.
Access Denied (Error 1045): Confirm the username and password stored in JumpServer are correct41414141. Update the secret key and test the account connectivity.
SSL Transport Errors (Error 3159): If SSL is not required, disable require_secure_transport in MySQL config. Otherwise, configure proper certificates in JumpServer.
Core API Error (Remote App): Usually caused by the Remote App host being offline or Tinker component issues. Redeploy the Remote App host or the specific application.
5. Best Practice Recommendations
Account Management: Use dedicated accounts for different roles (Admin, Developer, Read-only). Enable automatic password rotation every 90 days via JumpServer.
Security Configuration: Disable direct Root access through the bastion host. Retain connection audit logs for at least 180 days to meet compliance requirements.
Performance: Use connection pools for frequently accessed assets. Schedule heavy queries during off-peak hours using local client tools.
Disaster Recovery: Regularly back up JumpServer asset configurations and authorization settings.
By following these standardized processes, enterprises can achieve secure and efficient management of MySQL databases within JumpServer while meeting all operational auditing requirements.
.webp)