How to Configure Passkey Authentication in JumpServer

Passwords remain the most common way to protect online accounts — yet they are also one of the weakest links in enterprise security. Users reuse credentials, choose predictable passwords, and fall victim to phishing attacks that expose secrets at scale.
Passkey (also called a passkey or passkeys) is a passwordless authentication standard built on FIDO2, WebAuthn, and CTAP. Instead of typing a password, users verify their identity with a device-bound cryptographic key — unlocked by a fingerprint, face scan, PIN, or hardware security key. Because the private key never leaves the authenticator, Passkeys resist phishing, credential stuffing, and brute-force attacks far more effectively than traditional passwords.
JumpServer has supported Passkey authentication since v3.7.0, giving administrators a modern, standards-based option for securing privileged access to bastion host sessions. This tutorial covers the full workflow: enabling Passkey at the system level, registering a passkey for your user account, and signing in through the JumpServer login page.
What You Will Learn
- What Passkey authentication is and how it works in JumpServer
- How to enable and configure Passkey in JumpServer system settings
- How users register a Passkey through personal MFA settings
- How to sign in to JumpServer using a Passkey instead of a password
Prerequisites
Before you begin, confirm the following:
- A JumpServer instance (Community or Enterprise Edition) running v3.7.0 or later
- HTTPS access to JumpServer — Passkey authentication requires a trusted TLS connection; HTTP-only deployments will not work
- A modern browser that supports WebAuthn (Chrome, Edge, Safari, or Firefox)
- An authenticator available on the user's device: built-in biometrics (Touch ID, Windows Hello), a phone/tablet, or a USB security key (YubiKey, etc.)
- Administrator access to JumpServer System settings → Authentication for the initial configuration
Note: If the FIDO server ID (service domain) is left blank, JumpServer defaults to the request hostname and matches domains listed in your
config.txtDOMAINS setting. When multiple domains serve JumpServer, enter them as a comma-separated list without port numbers.
Part 1: Understand Passkey Authentication
What Is a Passkey?
A Passkey is a digital credential used for passwordless login. It is stored by the operating system or browser and can sync across devices within the same ecosystem (for example, iCloud Keychain or Google Password Manager).
When you use a Passkey, you authenticate to your device — not to a remote password field — using biometrics or a PIN. There is no shared secret for attackers to steal or phish.
How Passkey Login Works
Passkey authentication relies on asymmetric cryptography:
- Registration — The user verifies their identity (biometrics or PIN). The authenticator generates a key pair: a private key stays on the device; the public key is stored on the JumpServer server and linked to the user account.
- Authentication — At login, the user unlocks the private key on their device. JumpServer sends a challenge; the authenticator signs it with the private key.
- Verification — JumpServer validates the signature against the stored public key. Login succeeds only when the key pair matches.
Even if an attacker compromises the server and obtains public keys, they cannot forge the corresponding private keys — a fundamental security advantage over password-based authentication.
Part 2: Configure Passkey in JumpServer (Administrator)
System administrators must enable Passkey globally before any user can register or use one.
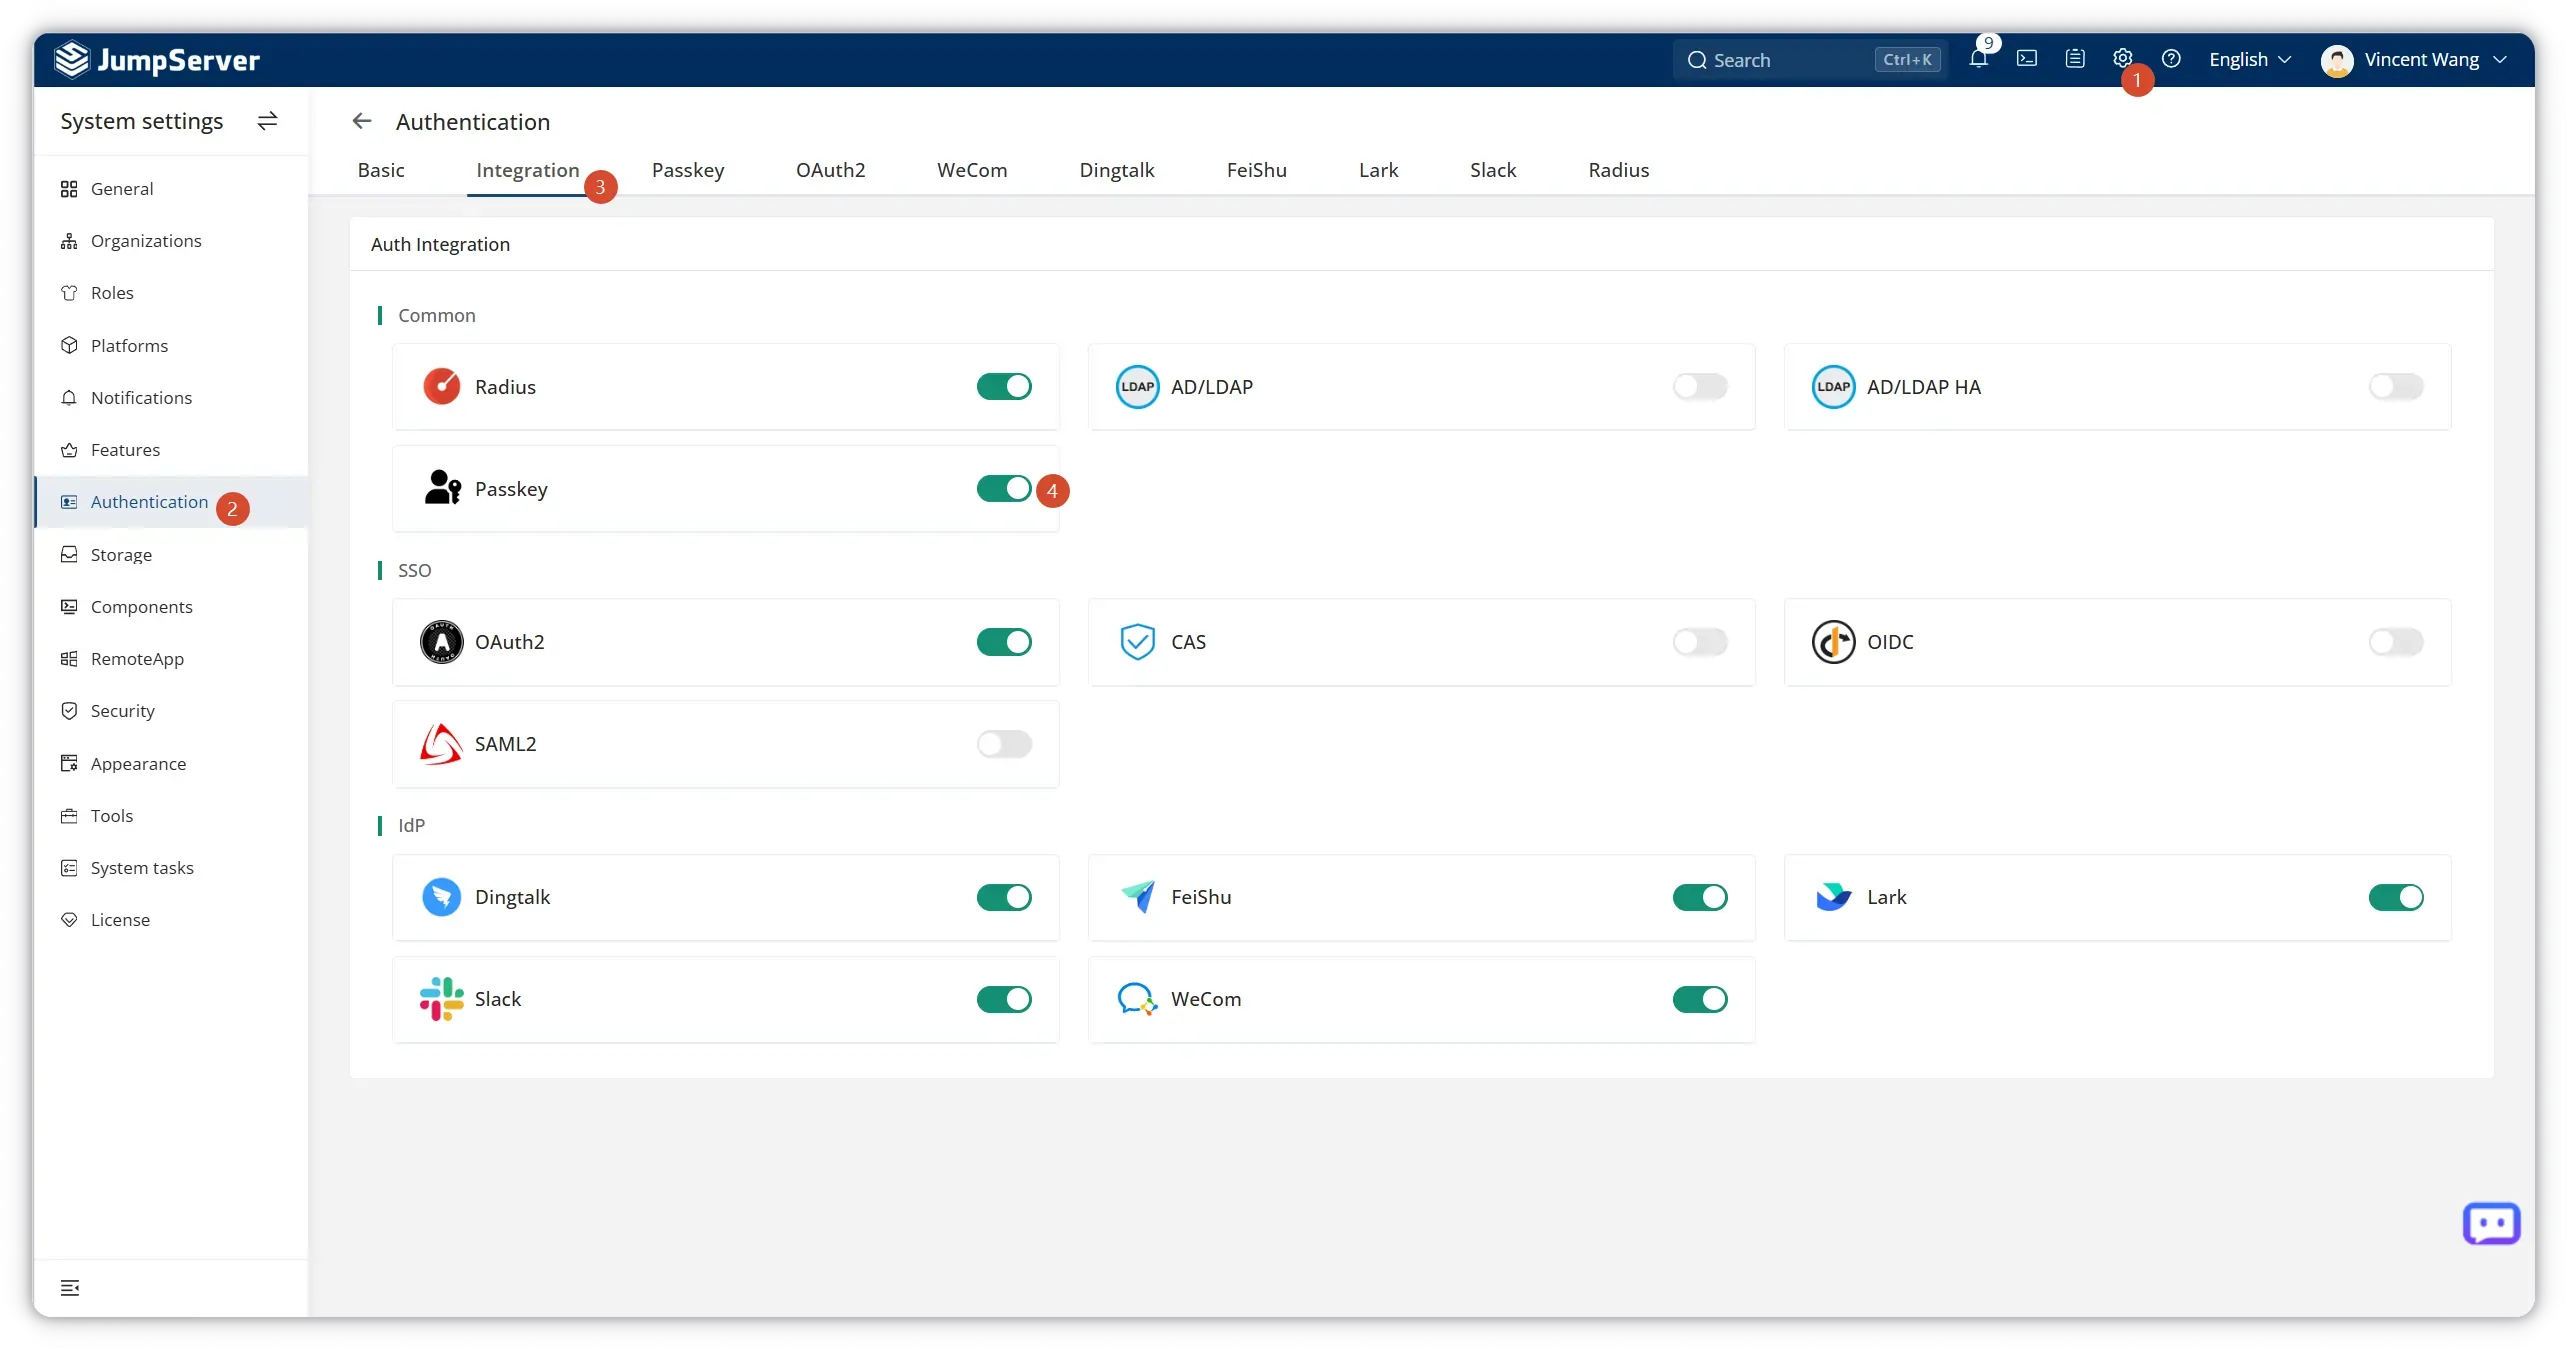
Step 1: Enable Passkey Integration
- Click the Settings (gear) icon in the top-right corner of the JumpServer console.
- In the left sidebar under System settings, select Authentication.
- Open the Integration tab.
- Under Common, toggle Passkey to ON.
Step 2: Configure FIDO Server Parameters
Open the Passkey tab and configure the following fields:
| Parameter | Description | Example |
|---|---|---|
| Passkey | Enable or disable Passkey authentication | Enabled |
| FIDO server ID | The domain name(s) allowed to use Passkey auth. Comma-separated for multiple domains. If empty, defaults to the request host matching DOMAINS in config.txt. |
jumpserver.example.com |
| FIDO server name | Human-readable service name shown during passkey registration | JumpServer |
Important: The UI displays "Only SSL domain can use passkey auth." Ensure JumpServer is served over HTTPS with a valid certificate before proceeding.
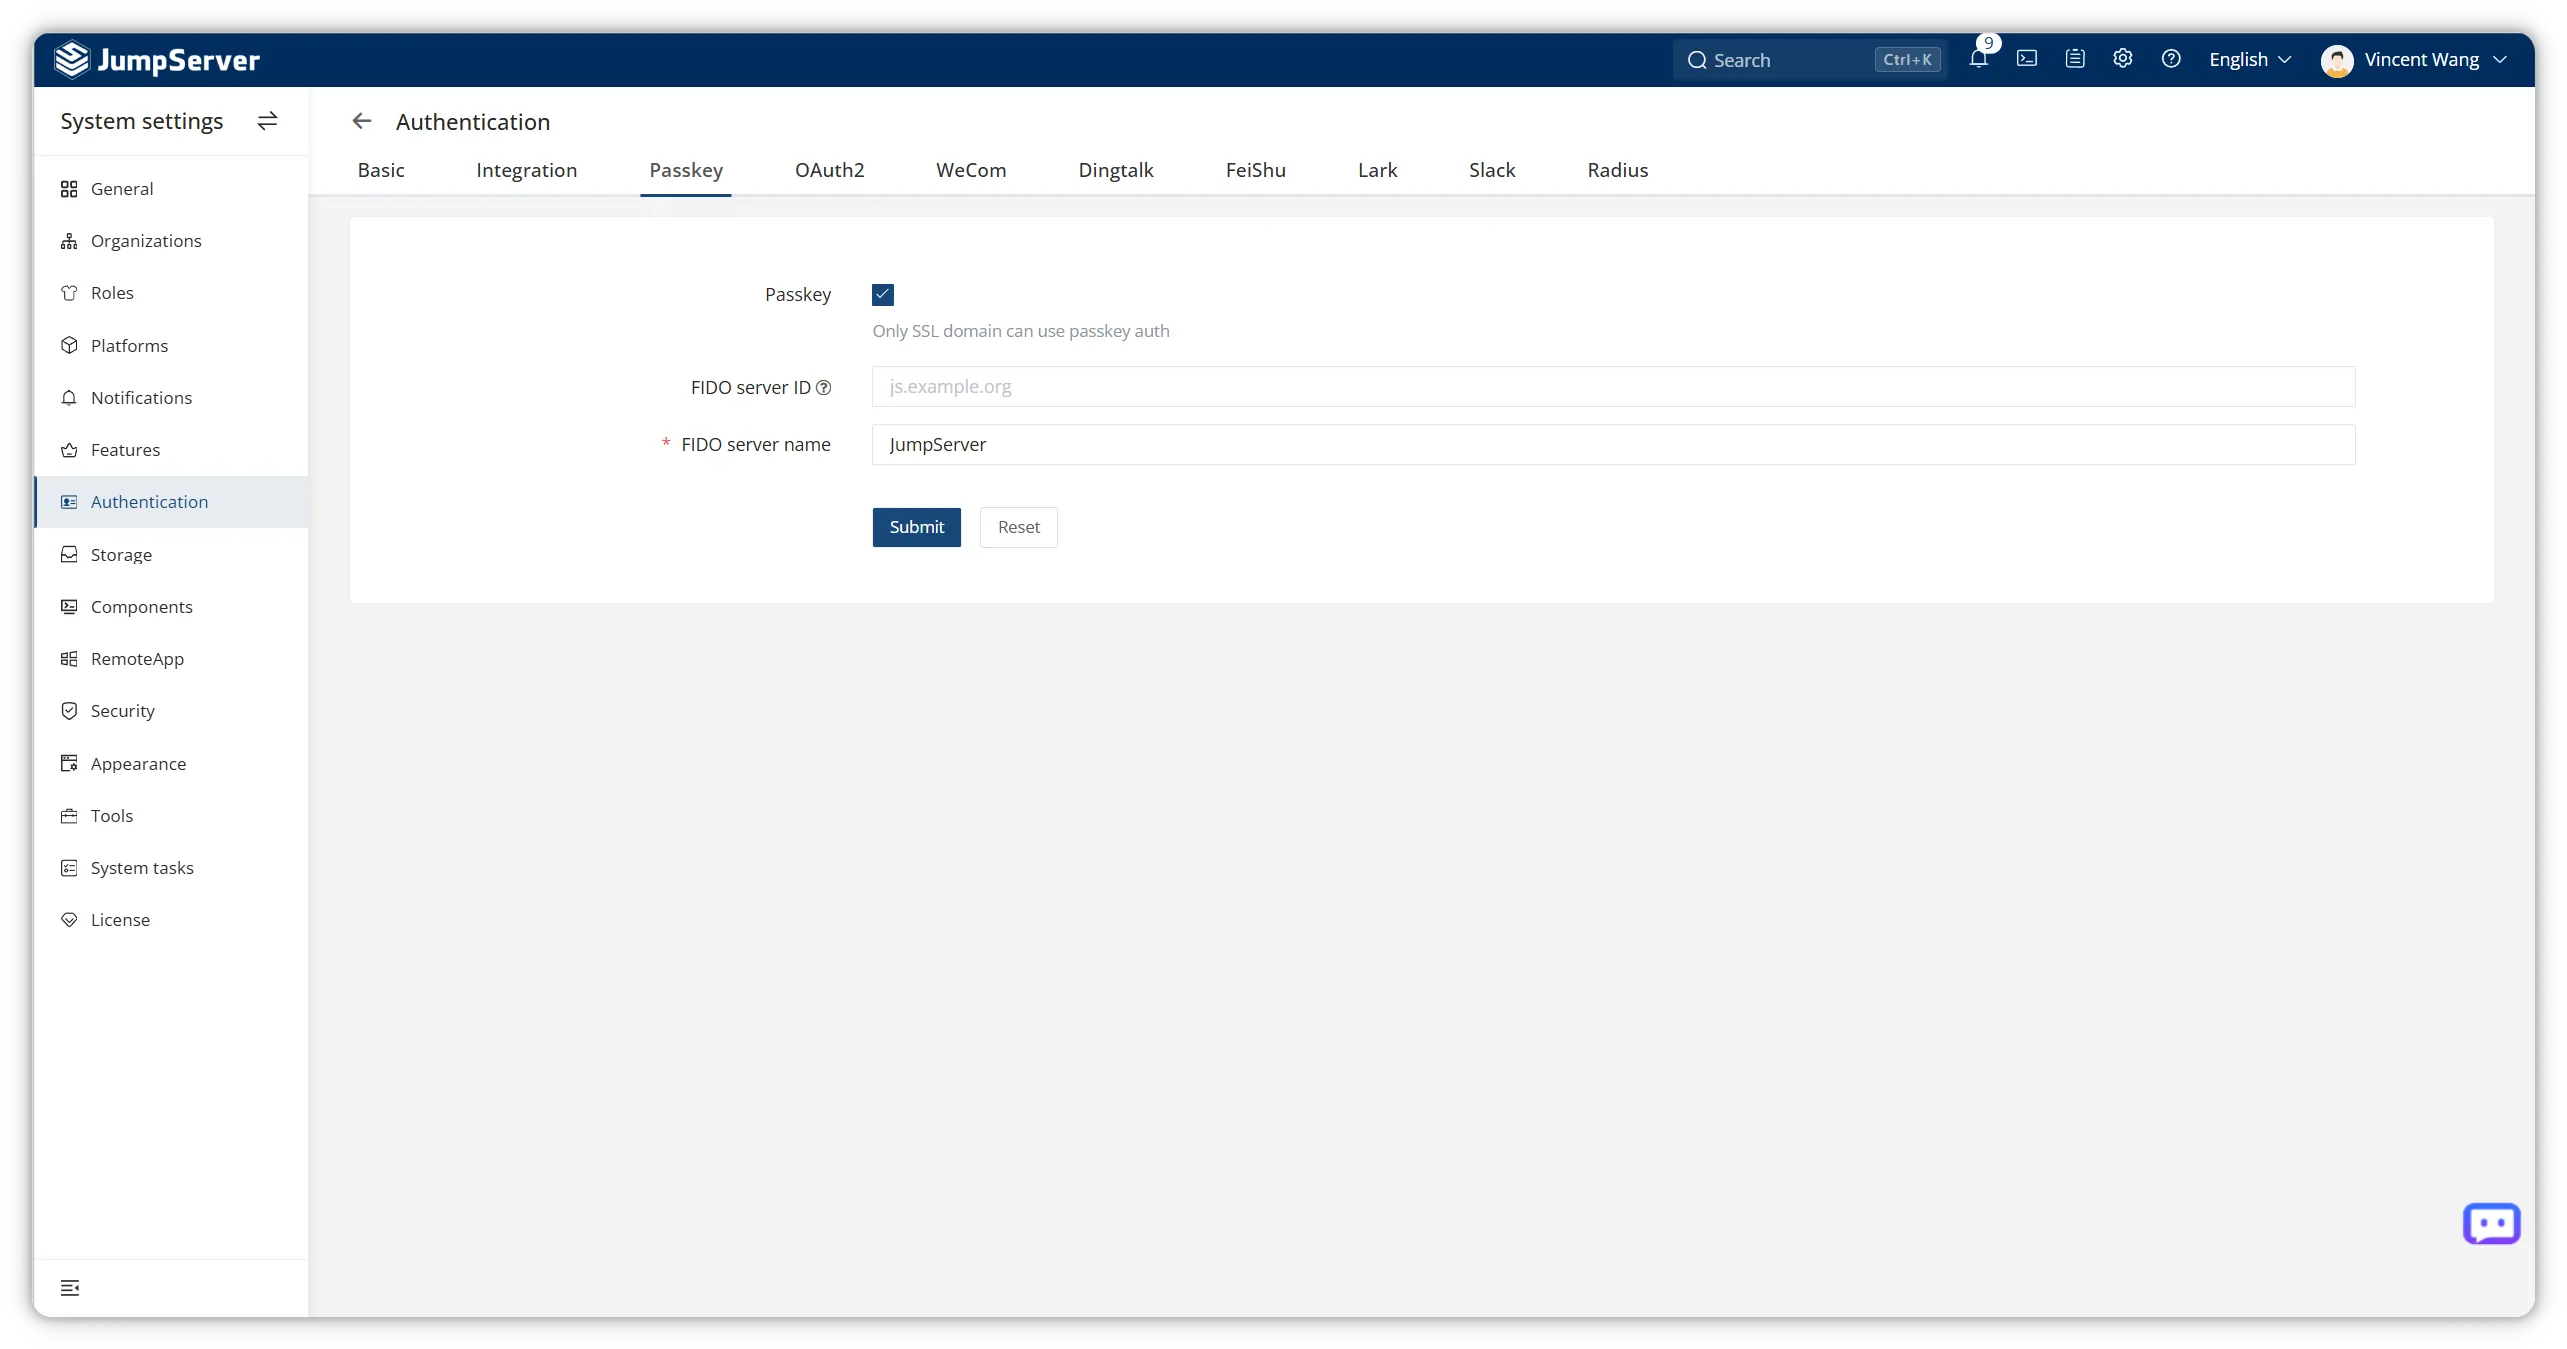
Click Submit to save the configuration.
Part 3: Register a Passkey (End User)
After the administrator enables Passkey, each user must register at least one passkey on their account.
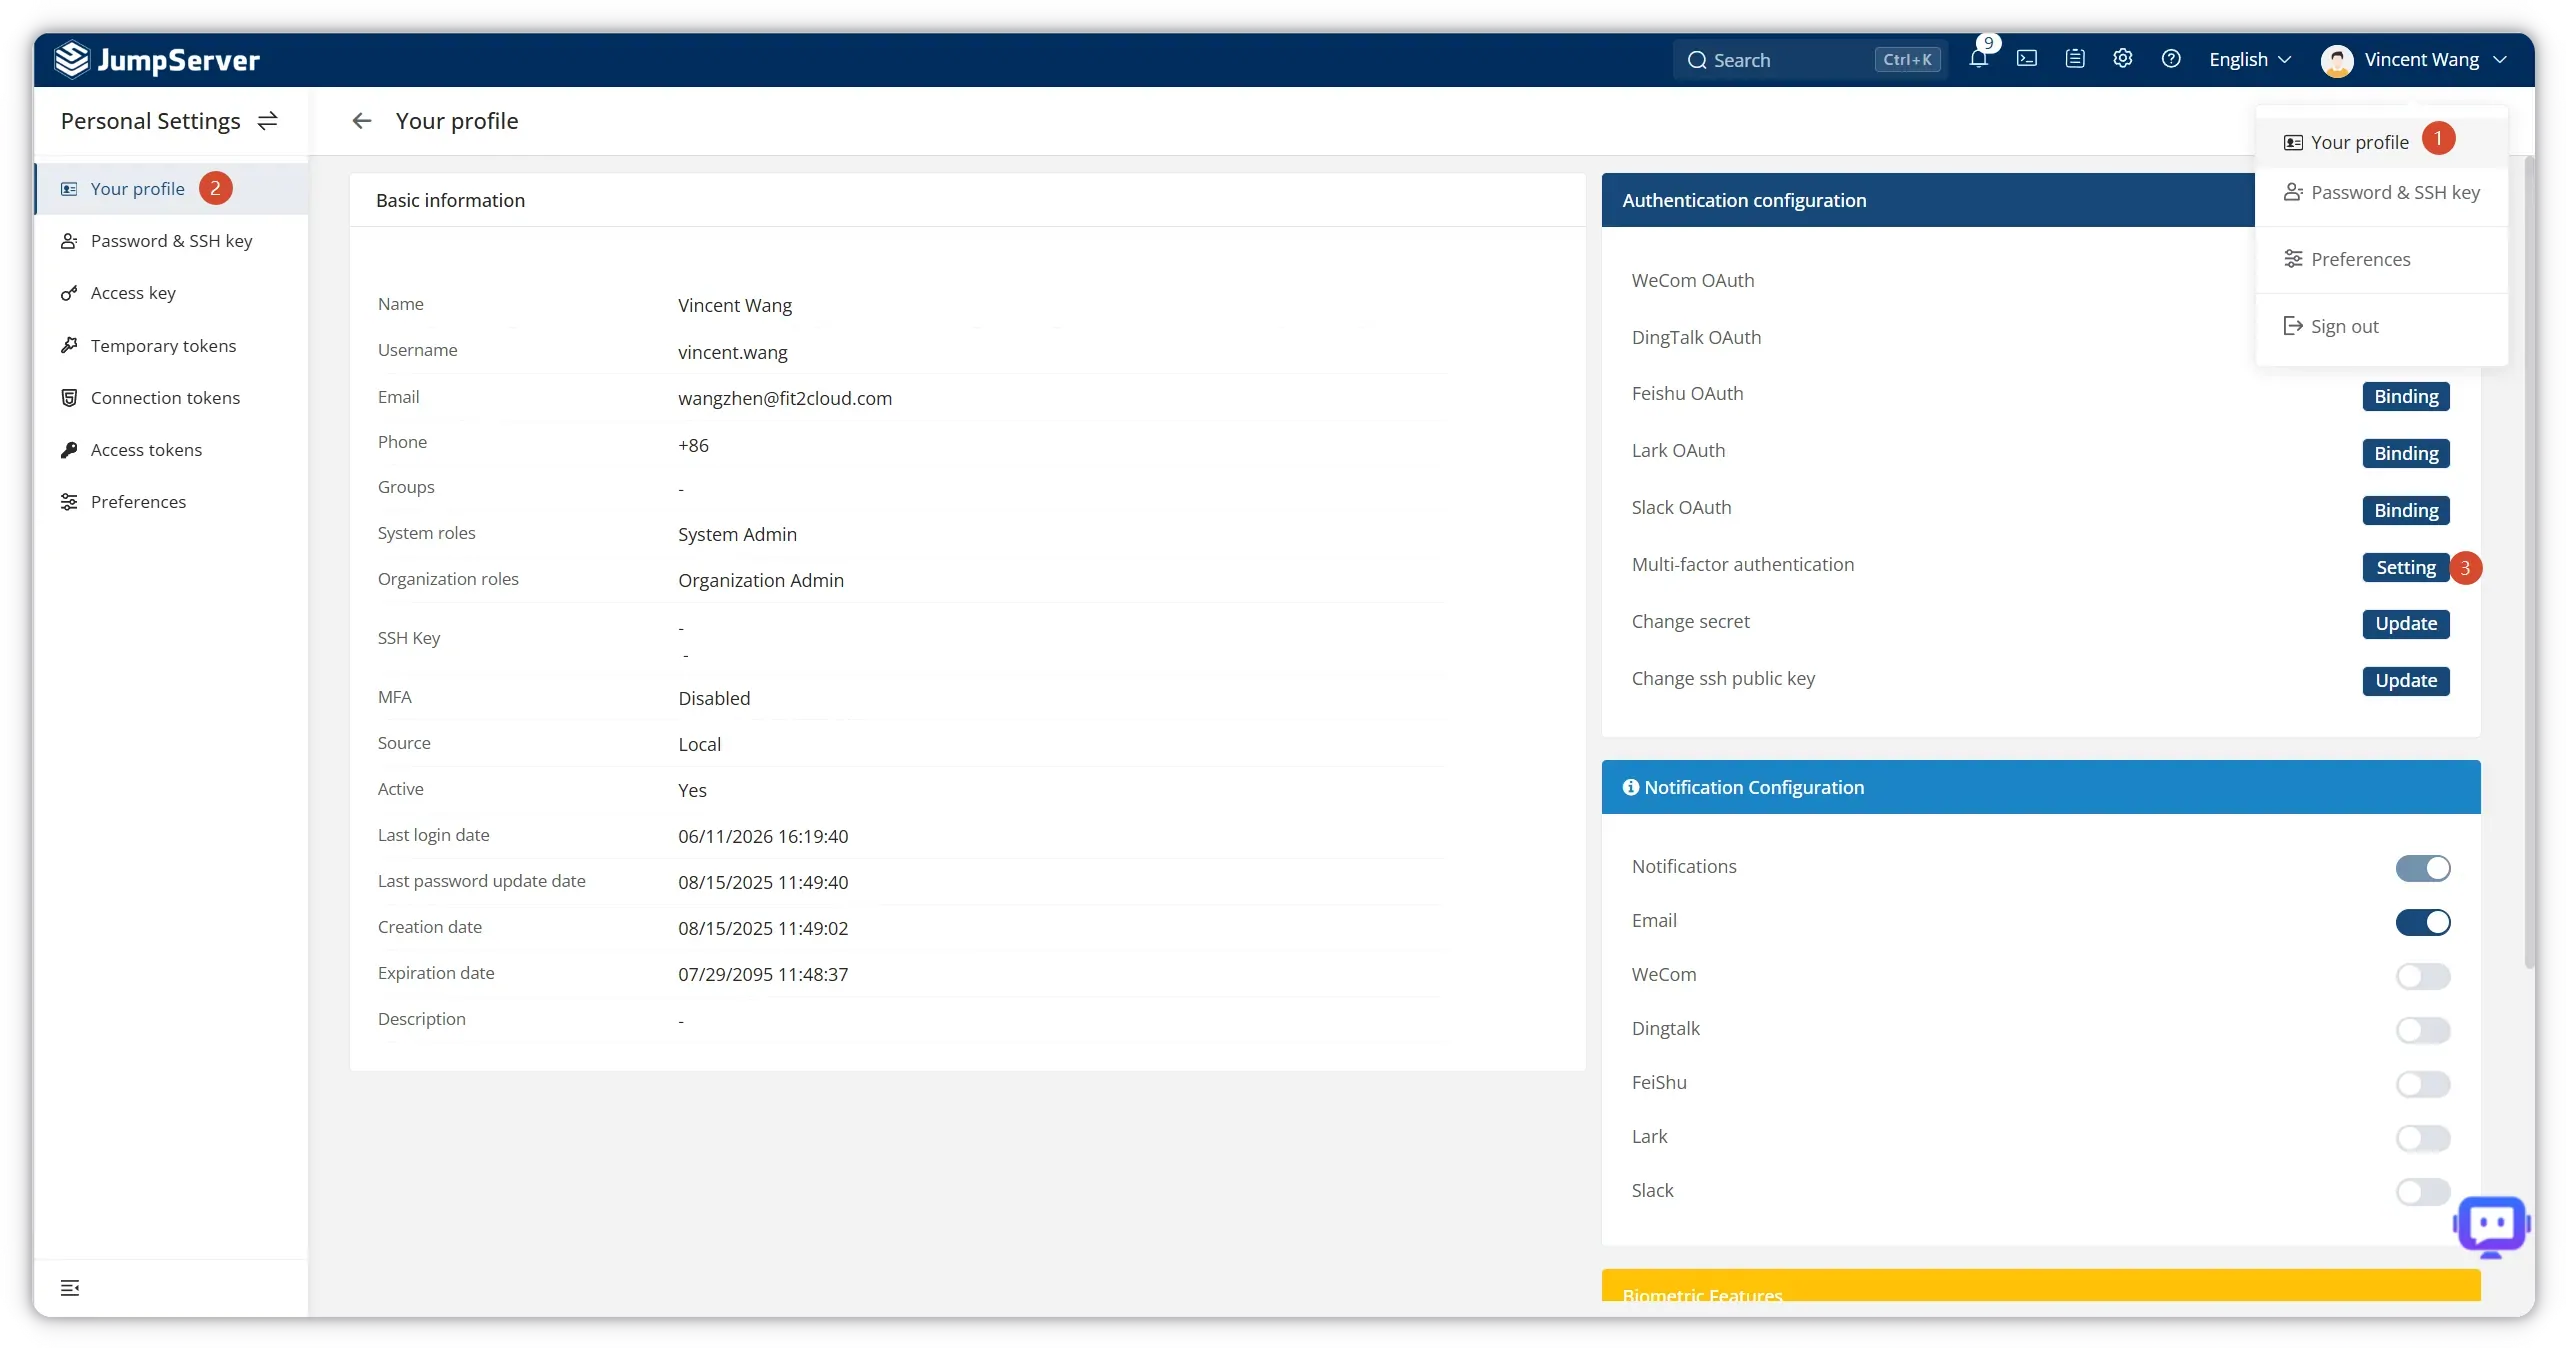
Step 3: Open MFA Settings
- Click your username in the top-right corner and select Your profile.
- In the Authentication configuration section, click Setting next to Multi-factor authentication.
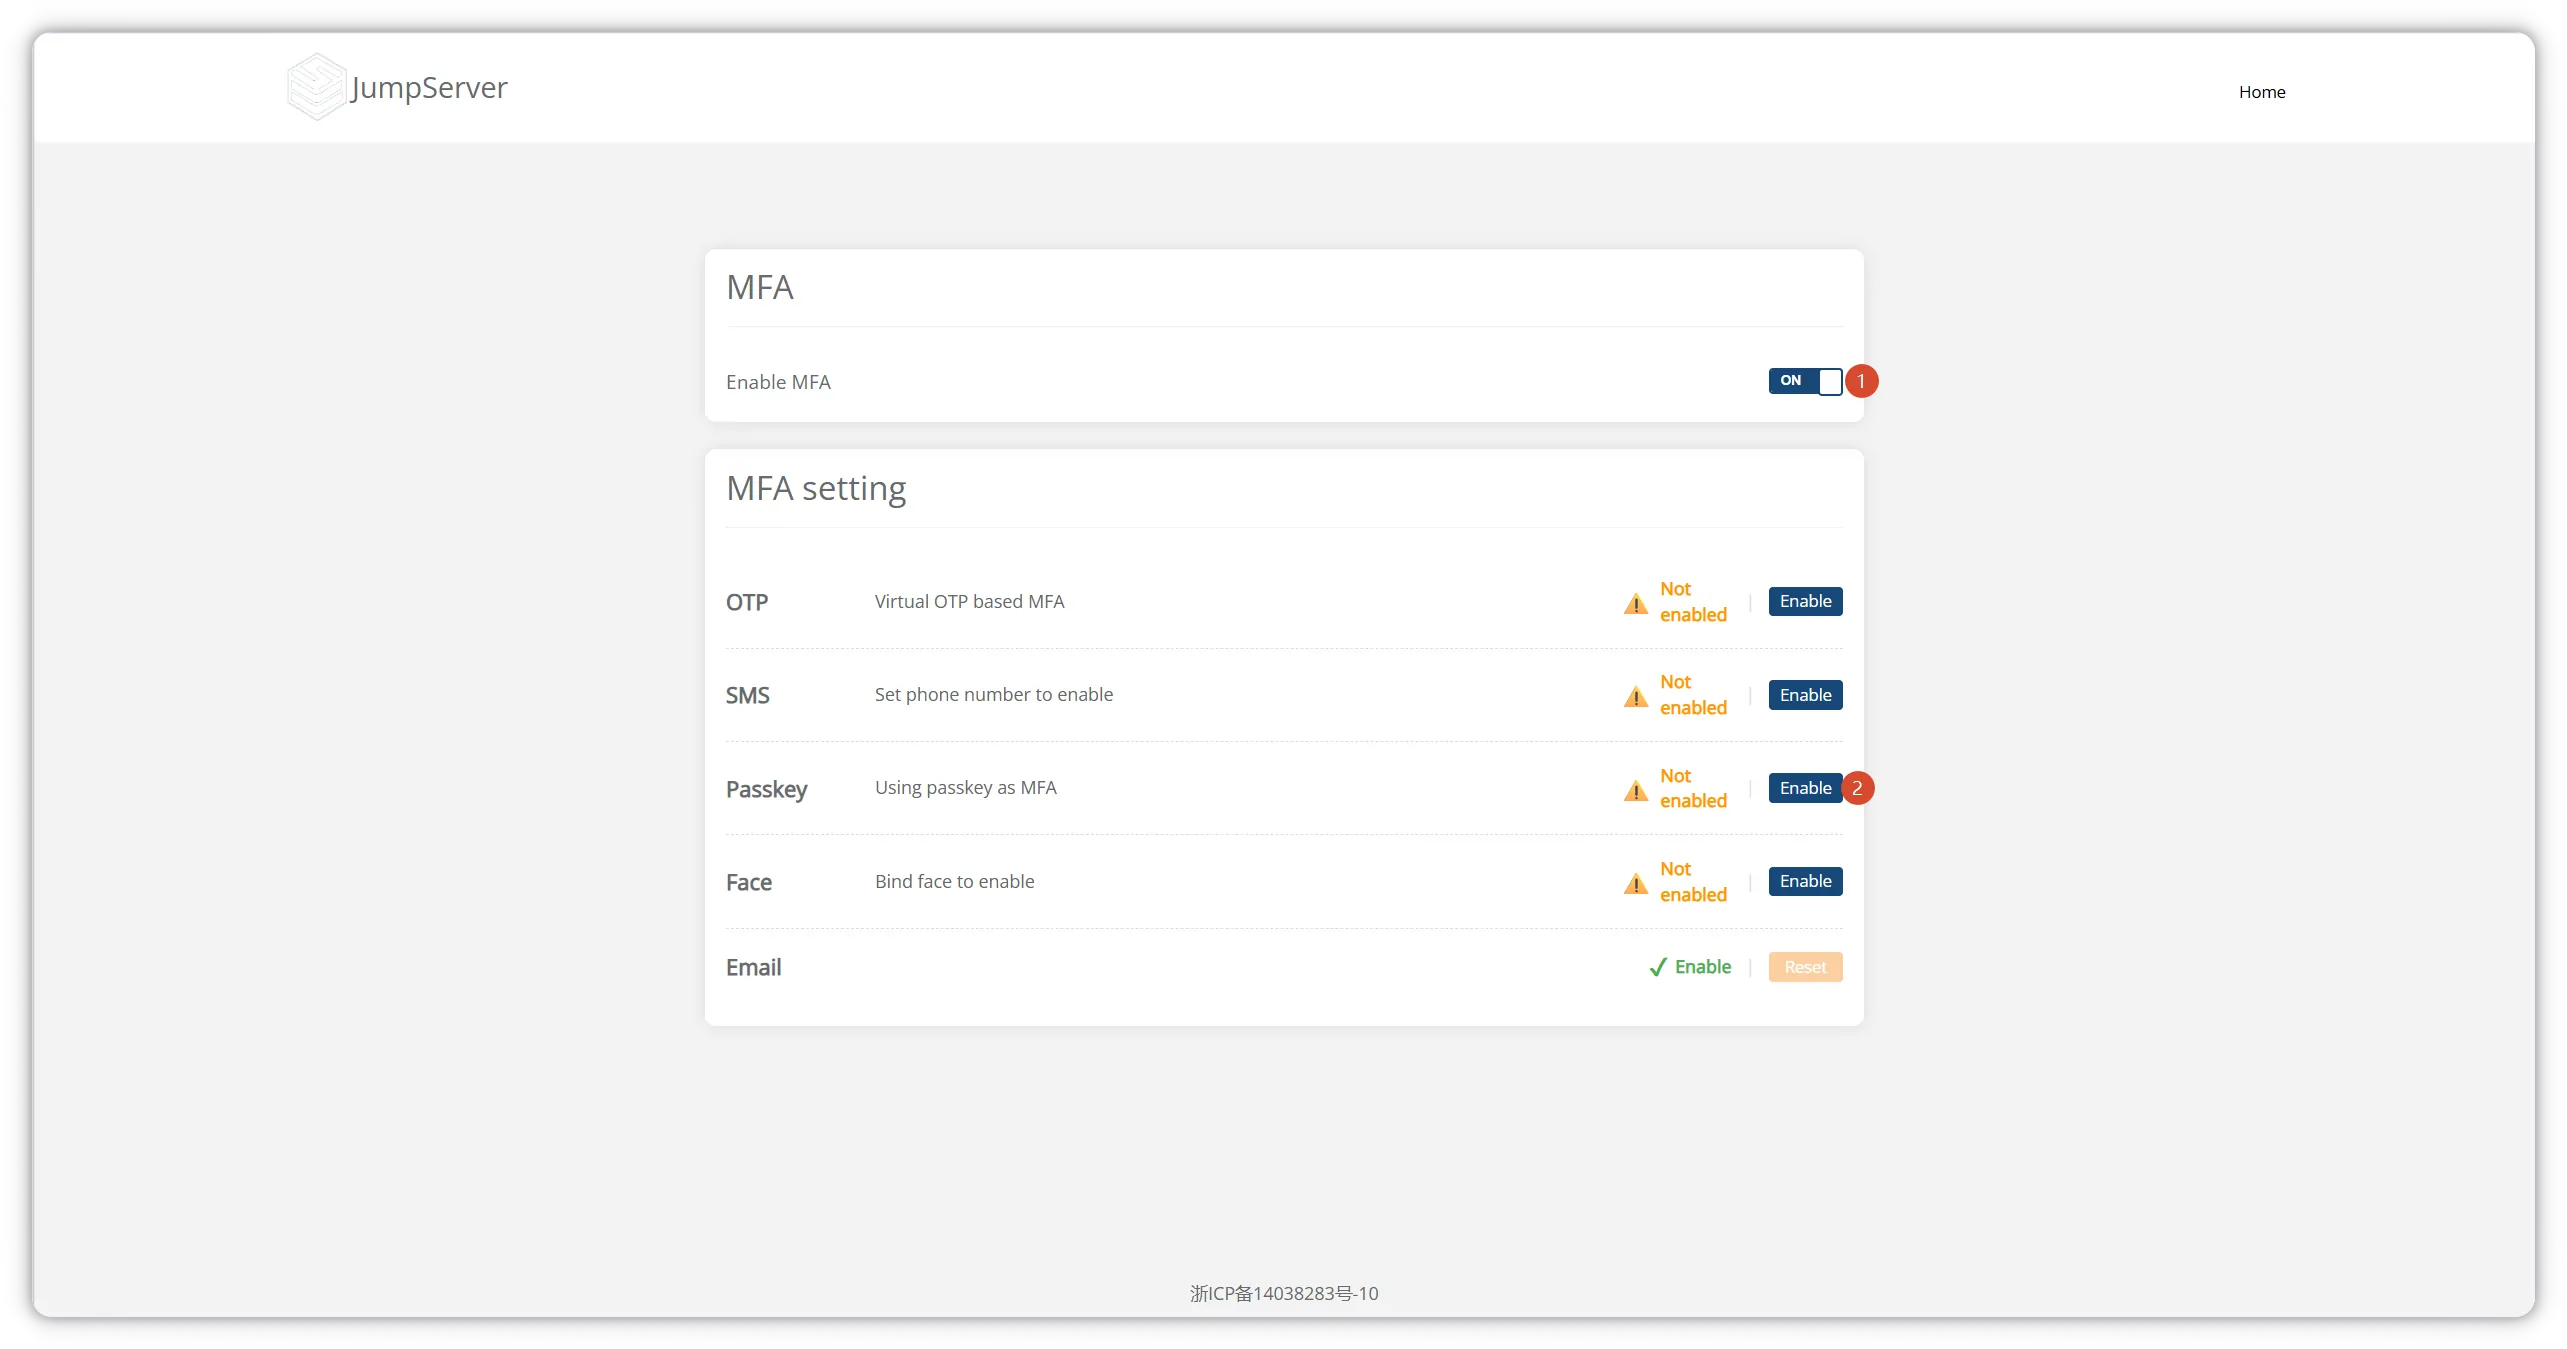
Step 4: Enable MFA and Passkey
On the MFA configuration page:
- Toggle Enable MFA to ON.
- In the MFA setting table, find the Passkey row (Using passkey as MFA) and click Enable.
Your browser or operating system will prompt you to create a passkey — follow the on-screen instructions to complete biometric or PIN verification.
Step 5: Create a Named Passkey
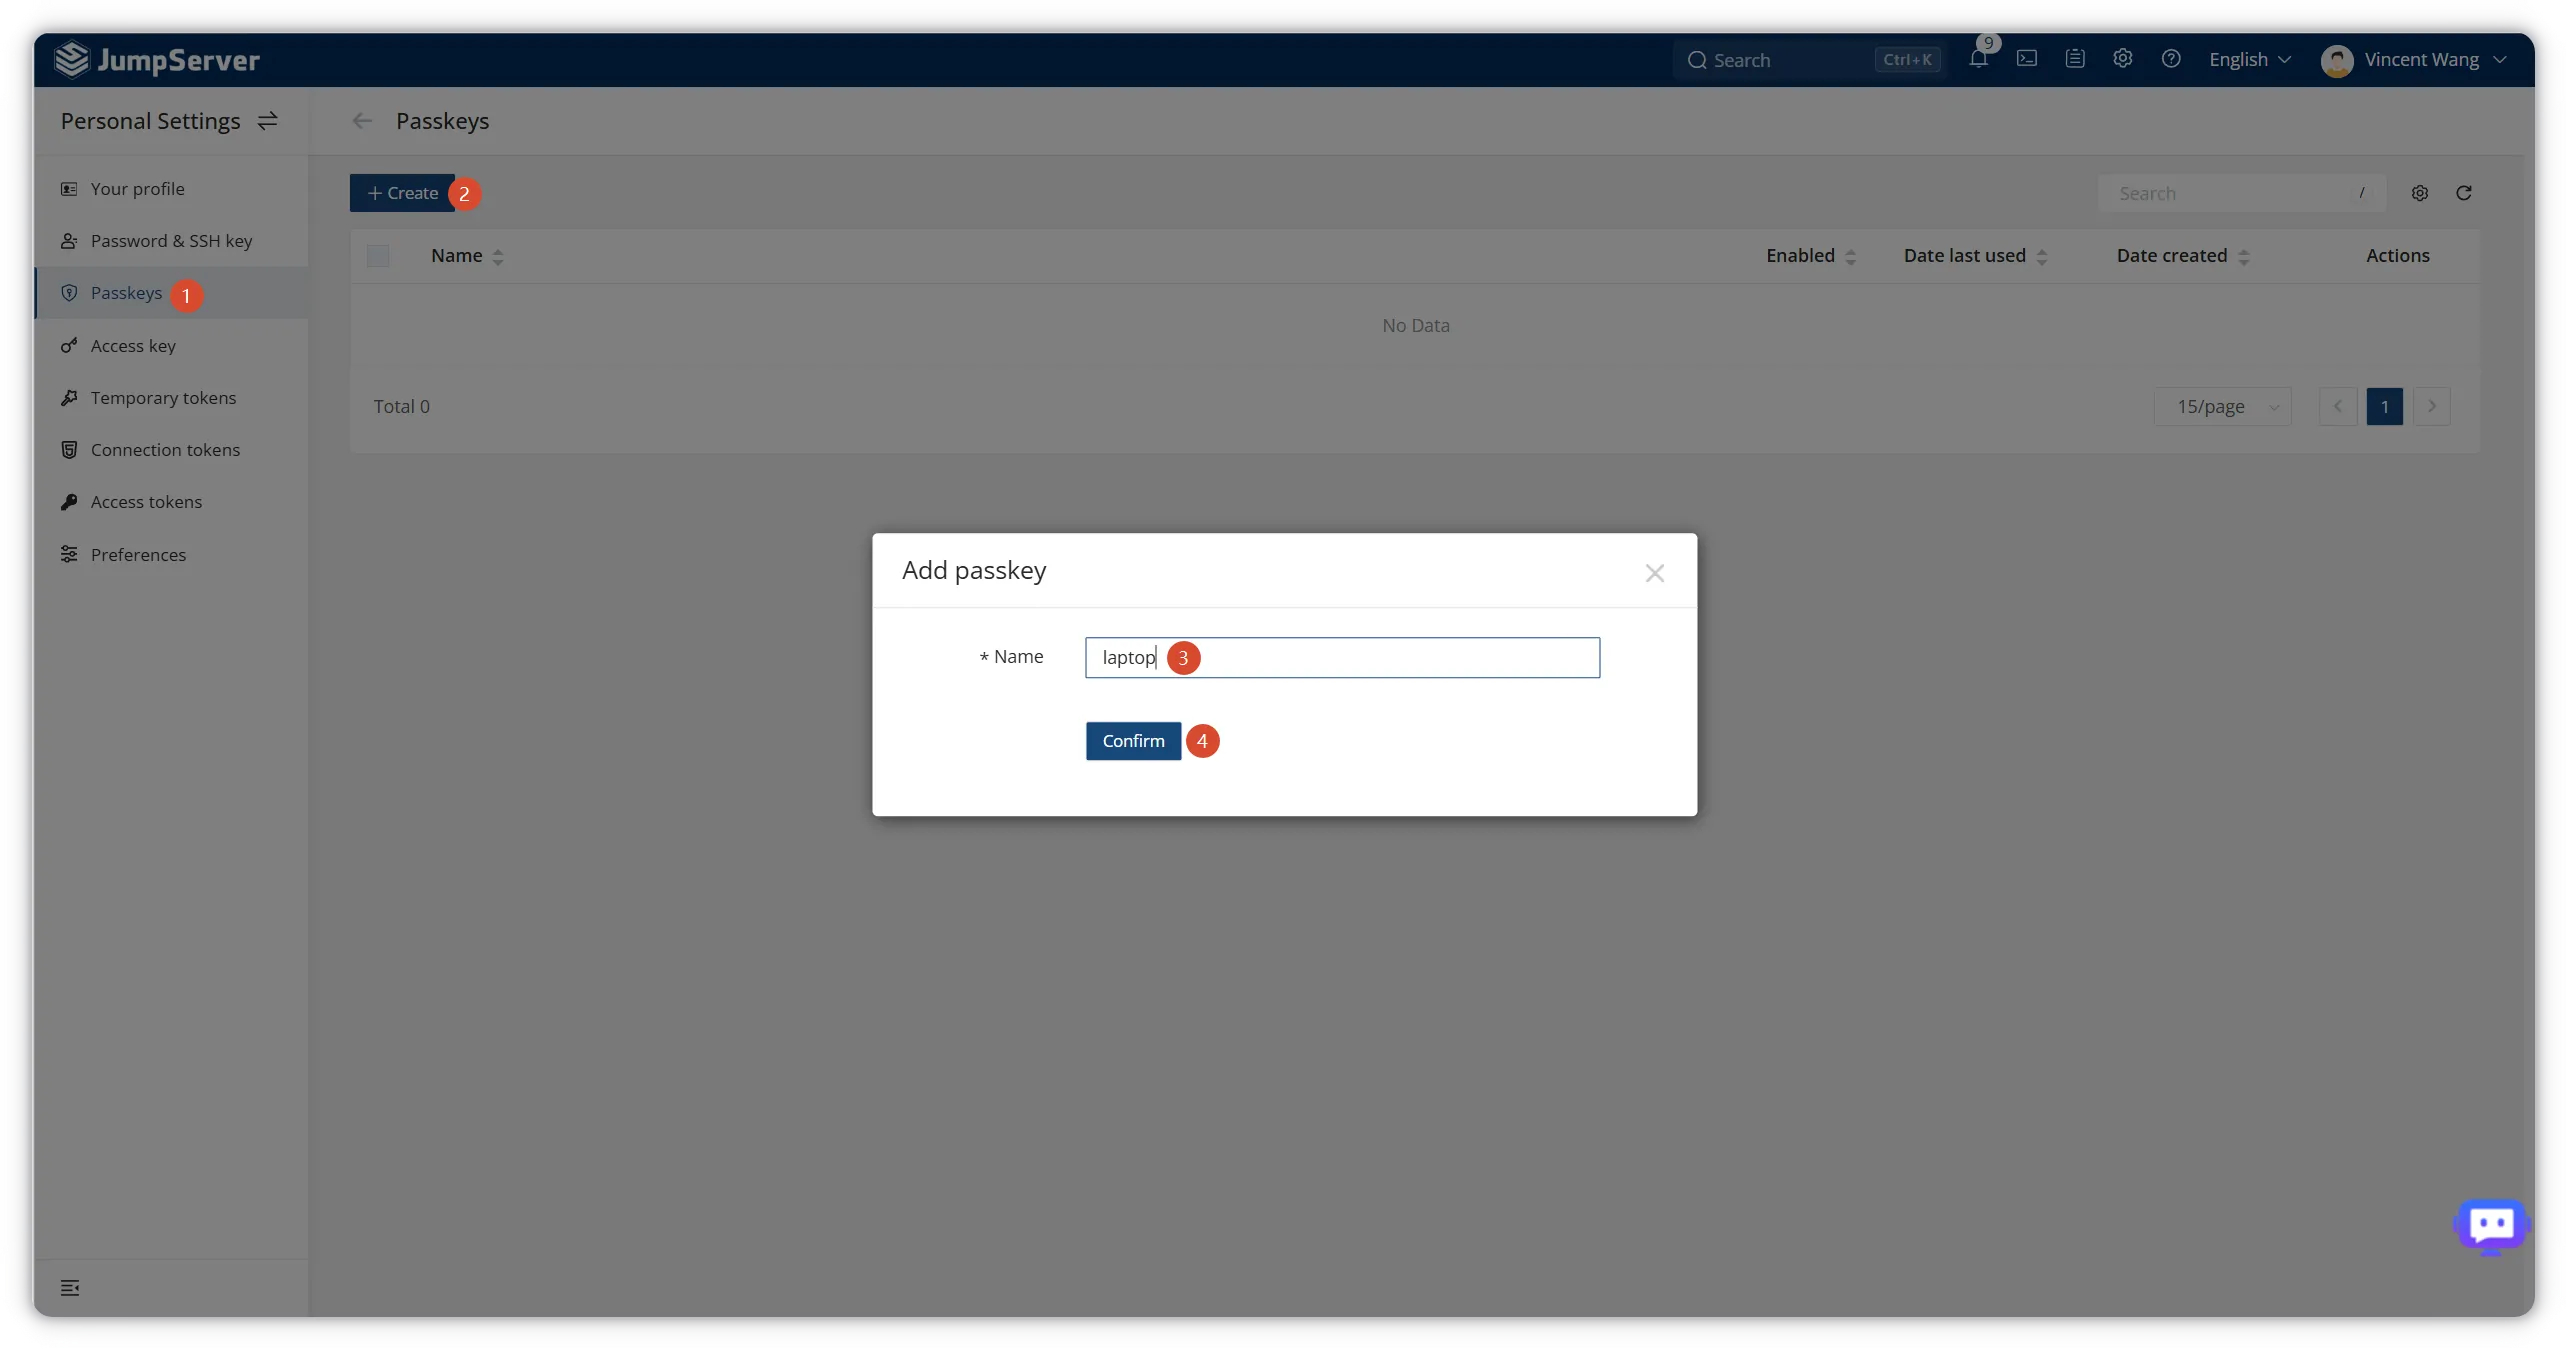
Alternatively, manage passkeys directly from Personal Settings:
- Open Personal Settings → Passkeys from the left sidebar.
- Click + Create.
- Enter a descriptive Name (for example,
laptop,work-phone, oryubikey). - Click Confirm and complete the device authentication prompt.
JumpServer supports three passkey creation methods:
| Method | Description |
|---|---|
| This device | Store the passkey locally on your current computer or browser profile |
| Phone or tablet | Register a passkey on a mobile device via QR code |
| USB security key | Use a FIDO2-compatible hardware token (YubiKey, etc.) |
You can register multiple passkeys per account — useful for backup devices or separate work and personal authenticators.
Part 4: Sign In with a Passkey
Once a passkey is registered, users can authenticate without entering a username and password.
Step 6: Use Passkey on the Login Page
- Navigate to the JumpServer login page (use a private/incognito window to test without an existing session).
- Below the standard Sign in form, click the Passkey option.
- Select the passkey stored on your device (or insert your security key).
- Complete biometric or PIN verification when prompted.
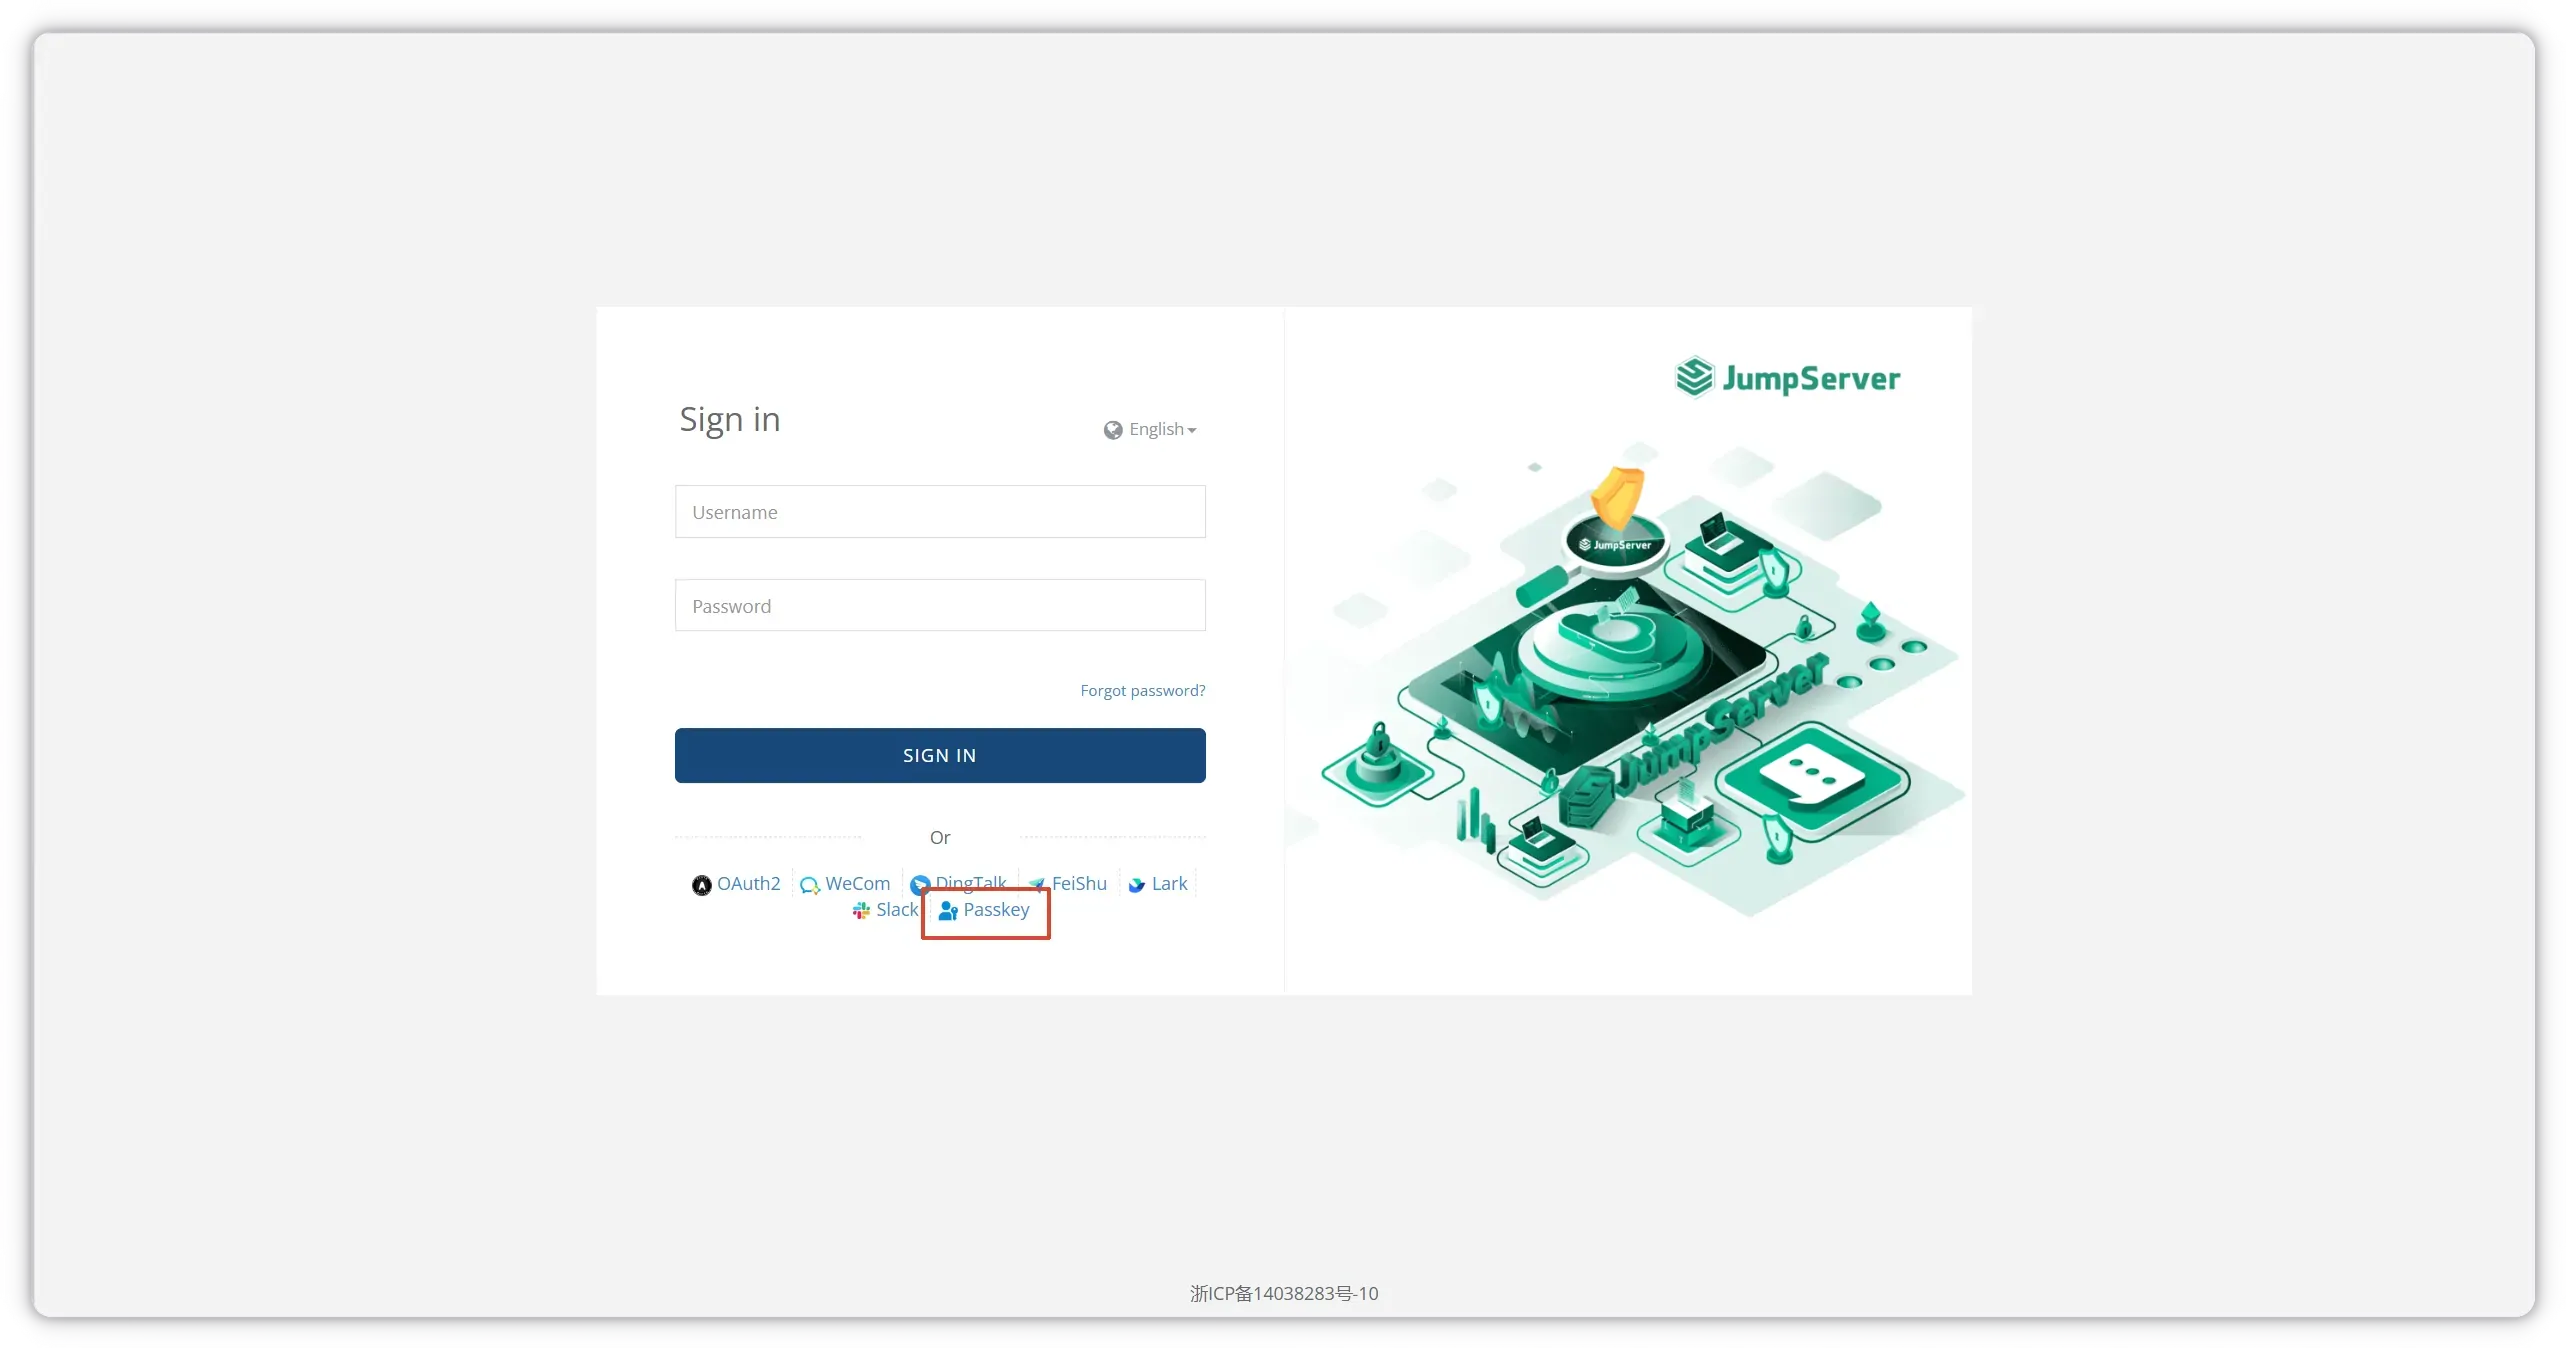
After successful verification, JumpServer authenticates you and redirects to the dashboard — no password required.
Summary
Configuring Passkey authentication in JumpServer involves two roles:
| Role | Tasks |
|---|---|
| Administrator | Enable Passkey underAuthentication → Integration, configure FIDO server ID and name on the Passkey tab, ensure HTTPS is enabled |
| End user | Enable MFA, register a passkey viaMulti-factor authentication or Personal Settings → Passkeys, then sign in using the Passkey button on the login page |
Passkey authentication strengthens JumpServer's identity layer by replacing reusable passwords with phishing-resistant, device-bound cryptographic credentials — aligning privileged access management with modern zero-trust security practices.
Troubleshooting
| Symptom | Likely Cause | Fix |
|---|---|---|
| Passkey option missing on login page | Passkey not enabled in system settings | Enable Passkey underAuthentication → Integration and save |
| "Only SSL domain can use passkey auth" | JumpServer accessed over HTTP | Deploy a valid TLS certificate and access JumpServer via HTTPS |
| Browser does not prompt for passkey | Browser lacks WebAuthn support or permission blocked | Use a supported browser; check site permissions for security keys |
| FIDO server ID mismatch | Domain in browser URL differs from configured FIDO server ID | Set FIDO server ID to match the exact hostname users visit |
| Passkey registration fails | MFA not enabled for the user | Enable MFA globally, then enable Passkey as an MFA method |
| Cannot sign in after device change | Passkey stored on a different device | Register an additional passkey on the new device while still authenticated |
Related Topics
Have questions about JumpServer authentication? Explore more security and integration guides on our blog, or contact the JumpServer team for enterprise support.