

Assets
Oracle, SQL Server, ClickHouse, and Dameng database assets, advanced RemoteApp, and VirtualApp require JumpServer Enterprise Edition.
The Assets page is the inventory of everything JumpServer can connect to: hosts, network devices, databases, cloud services, web applications, directory services, and custom asset types. Assets are grouped into a node tree, created from a platform template, and bound to the accounts that are used for sign-in.
Open the page from Console > Assets.
Overview
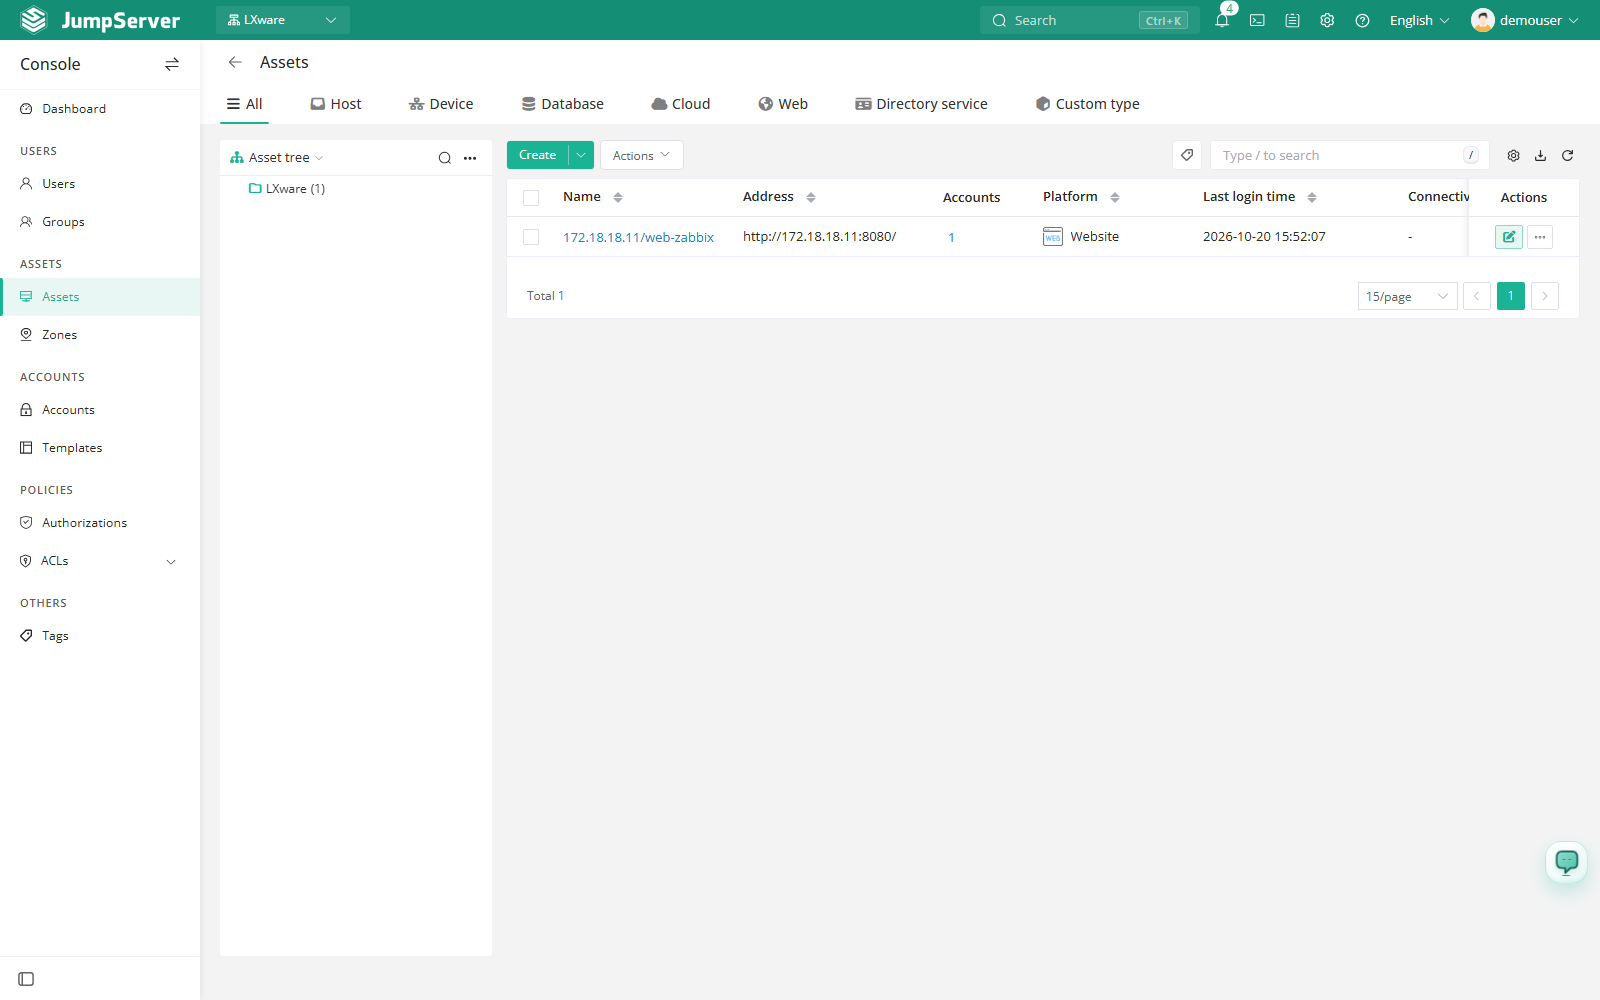
Type tabs at the top filter the inventory: All, Hosts, Network devices, Databases, Cloud services, Web, Directory services, and Custom types. The node tree is shown on the left of the All tab; when you switch to a specific type, the tree is hidden and the list is filtered.
Columns on the All tab are Name, Address, Account count, Platform, Last login time, Connectivity, and Actions.
Before you begin
- Sign in with an account that can manage assets.
- Plan the node structure first, and create a zone if the assets sit behind another network segment.
- Web assets also require a remote application publisher.
The list shows only assets in the current organization. Nodes, zones, and authorizations also apply only within the active organization.
Work with the node tree
On the All tab, the node tree organizes assets by node. An asset can belong to several nodes, which makes it easy to authorize along project or protocol boundaries.
Right-click a node to:
- Create node, Rename node, or Delete node.
- Add assets to node: add assets while keeping their original membership.
- Move assets to node: move assets here and remove them from the old node.
- Remove assets from node: detach assets without deleting them.
- Update hardware information or Test connectivity for the node's assets.
The number beside a node is the count of assets inside it.
Create an asset
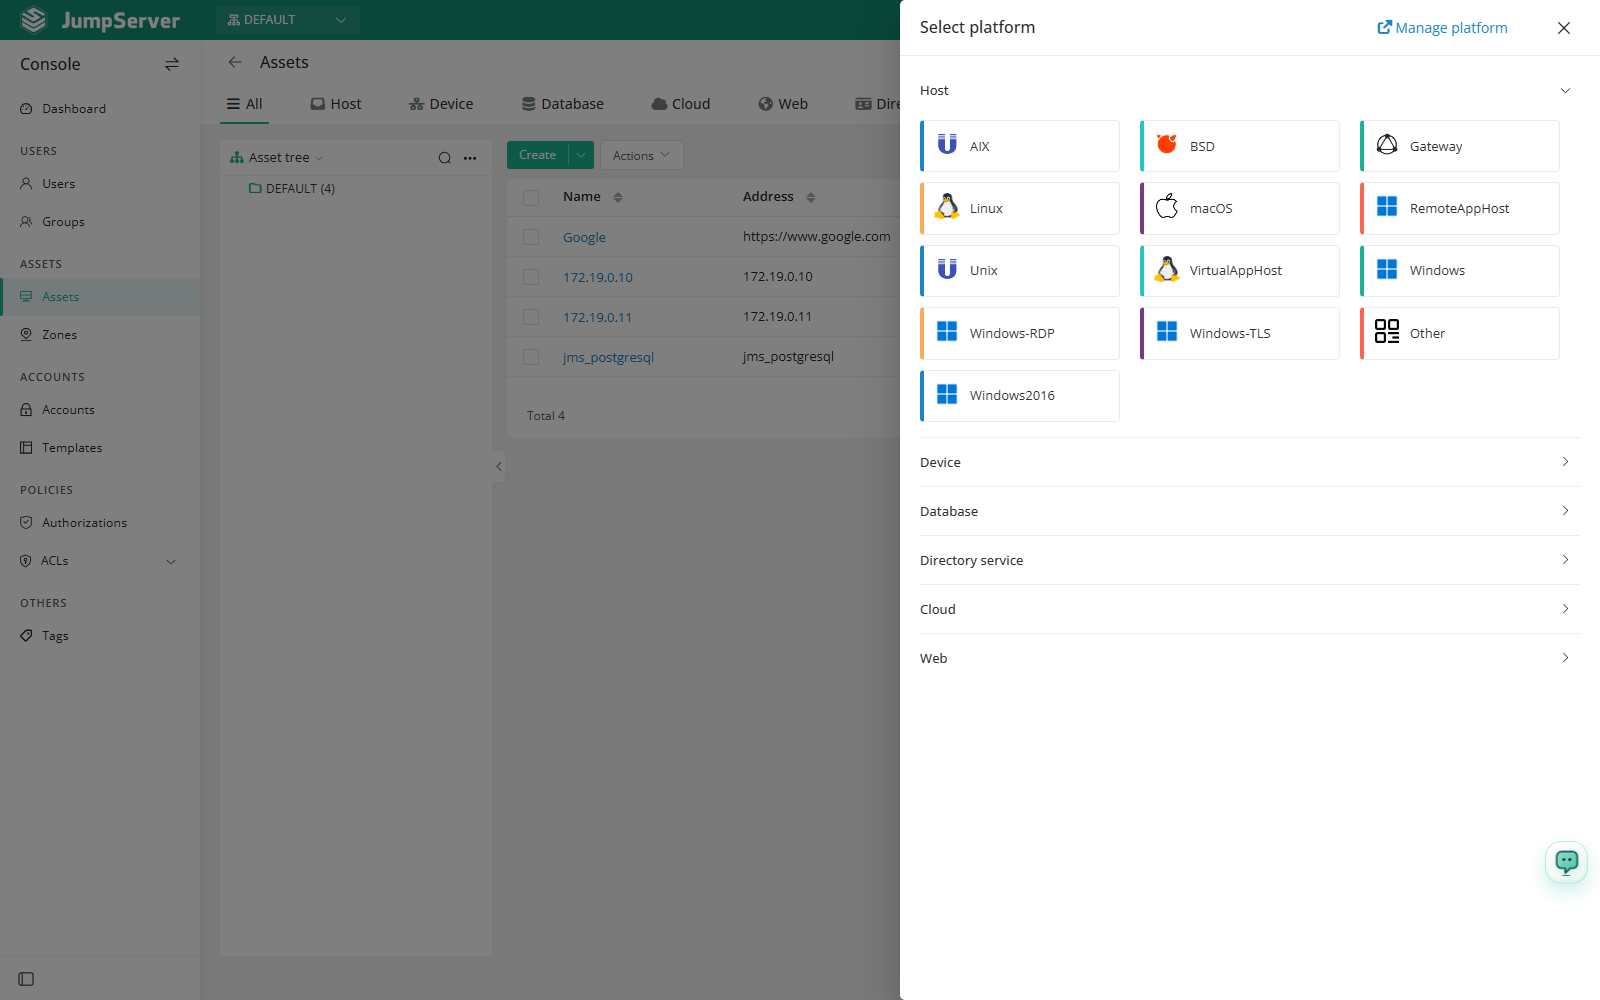
Click Create and pick a platform in the Select platform dialog.
In the Create asset drawer, fill in the fields below.
Click Submit, or Save and continue adding to create another asset.
Field reference
Available protocols are defined by the platform. To change protocol capabilities, update the platform instead of the asset.
Import and export
Use the toolbar to import or export assets. Import can create or update assets, accepts CSV and XLSX files up to 10 MB, and is easiest when you download the template first and fill in the columns.
Asset details
Click an asset's Name to open the detail drawer. Tabs include Basic, Accounts, Authorized users, Sessions, Commands, and Activity.
- Basic shows identity, platform, protocols, zone, activation, and dates. Quick update toggles Active, refreshes hardware information, and tests connectivity.
- Accounts lists bound accounts; add them with Create or Account template. Lifecycle automation is covered in the PAM module.
- Authorized users, Sessions, Commands, and Activity show access and recent records.
Row actions and bulk actions
The row menu (...) provides Delete, Duplicate, Test, Add account, and Account discovery. Add account asks for the name, username, privileged flag, switch-from account, secret type, password-change permission, immediate push, activation, and comment.
Select several assets and click More actions to test, disable, enable, edit, or delete them.
Delete and Delete selected remove asset data permanently. To detach an asset from a node, use Remove assets from node instead.