

Access Assets
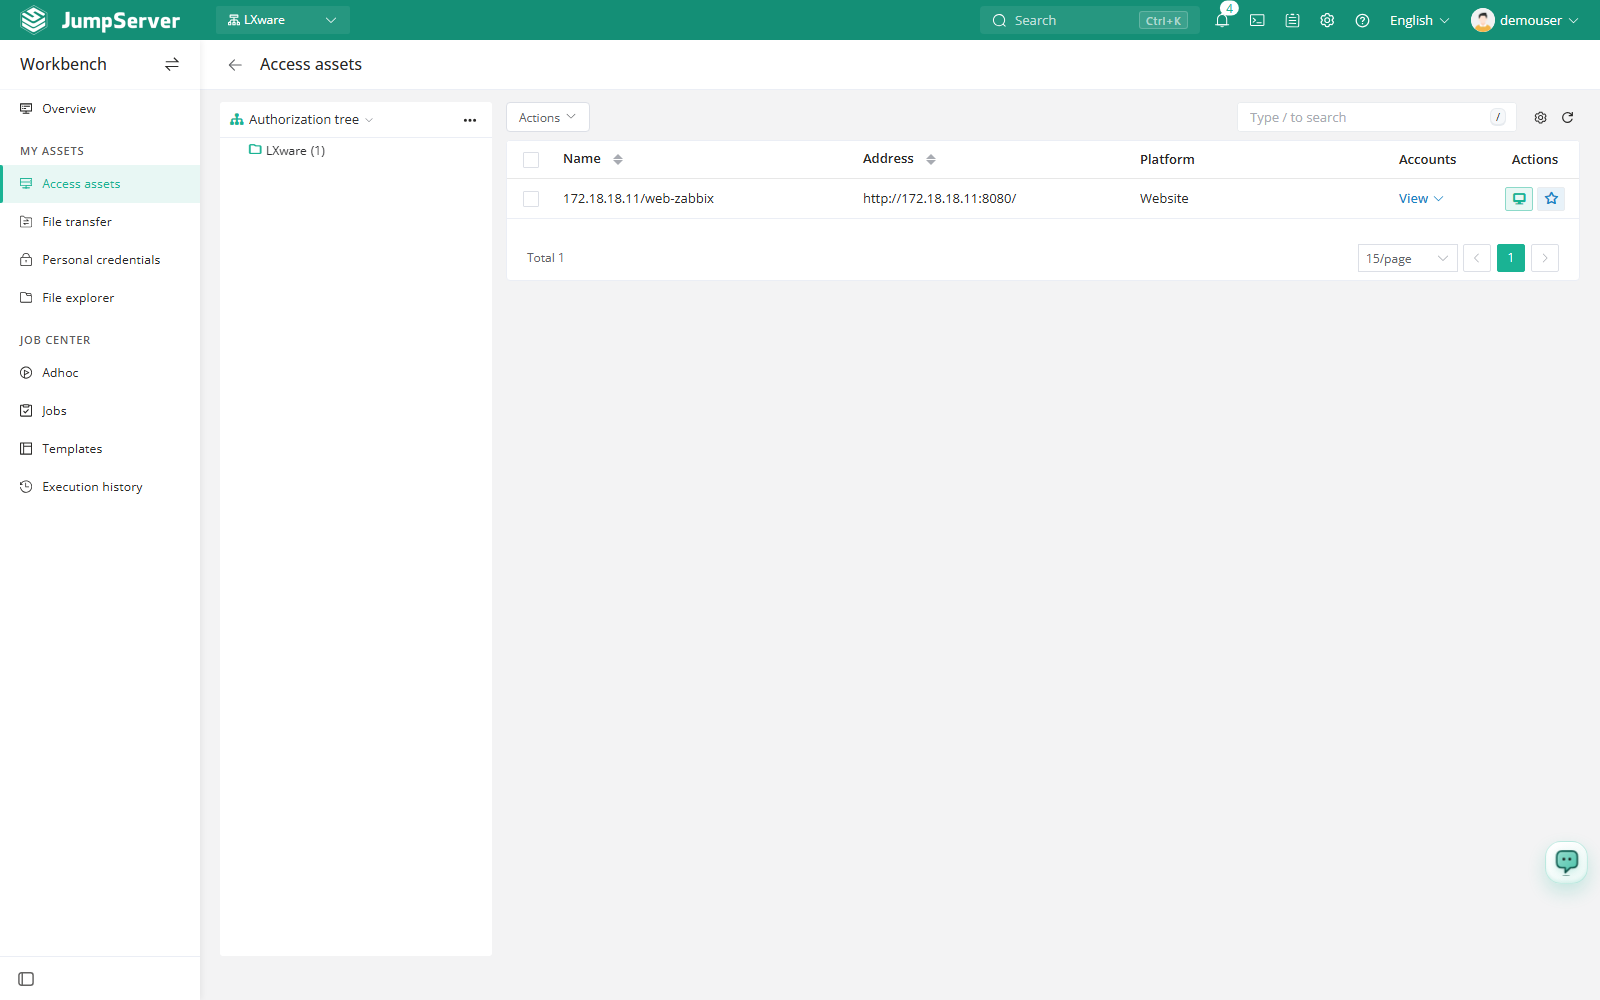
Access Assets lists the assets your account has been authorized to use. From this page you can filter by node, search, inspect the accounts you may log in with, mark assets as favorites, and open a connection. Choosing the protocol, account, and connection method is completed in the web terminal.
Prerequisites
- You are signed in and can open the Workbench. Regular users land there by default; administrators switch the workspace first.
- An administrator has authorized the assets for your account. See Authorizations.
- The correct organization is selected in the organization switcher. Assets are authorized per organization.
If the list is empty, confirm that the assets are authorized for your account and that you are in the organization where the authorization was created. Changing the organization reloads the list.
Browse and filter
The page is split into a tree on the left and an asset list on the right.
- Use the Authorized tree on the left to filter by node and category. The numbers next to nodes indicate how many assets they contain.
- Use the search box in the top-right corner to find an asset by name or address.
- Use the column settings icon to show or hide optional columns, and the refresh icon to reload permissions.
- Click a node in the tree to scope the table to that node. Click the same node again, or the parent node, to widen the list.
Inspect accounts and favorites
- The Accounts column shows a View link. Click it to open the list of accounts your account may use on that asset, including the account type and connectivity status.
- Click the star in the Actions column to add or remove an asset from your favorites. Favorites are shown in the web terminal's favorites list, so they are quick to reach during a connection.
- Select multiple rows and use More actions to add or remove favorites in bulk.
- Asset names and comments can be renamed inline for your own view. These personal aliases and comments do not rename the asset for other users.
Start a connection
Find the target asset with the tree, the search box, or the favorites you saved.
Click the connect icon in the Actions column. The connect action is only offered for active assets.
The web terminal opens in a new window with the asset preselected. Choose the protocol and account there and connect.
The connection itself, including protocol selection, account selection, and connection options, is handled by the Web Terminal.
To connect from a local terminal instead of a browser, use SSH Terminal.
Column reference
Favorites created here are personal to your account and appear in the web terminal. Removing a favorite does not change the authorization, and it never deletes the asset.