

File Transfer
File Transfer pushes local files to one or more authorized Linux assets in a single run. It is designed for distributing the same file to many hosts at the same path. The transfer runs through the Job Center execution channel, so it does not open an SFTP browser and it does not download files from assets.
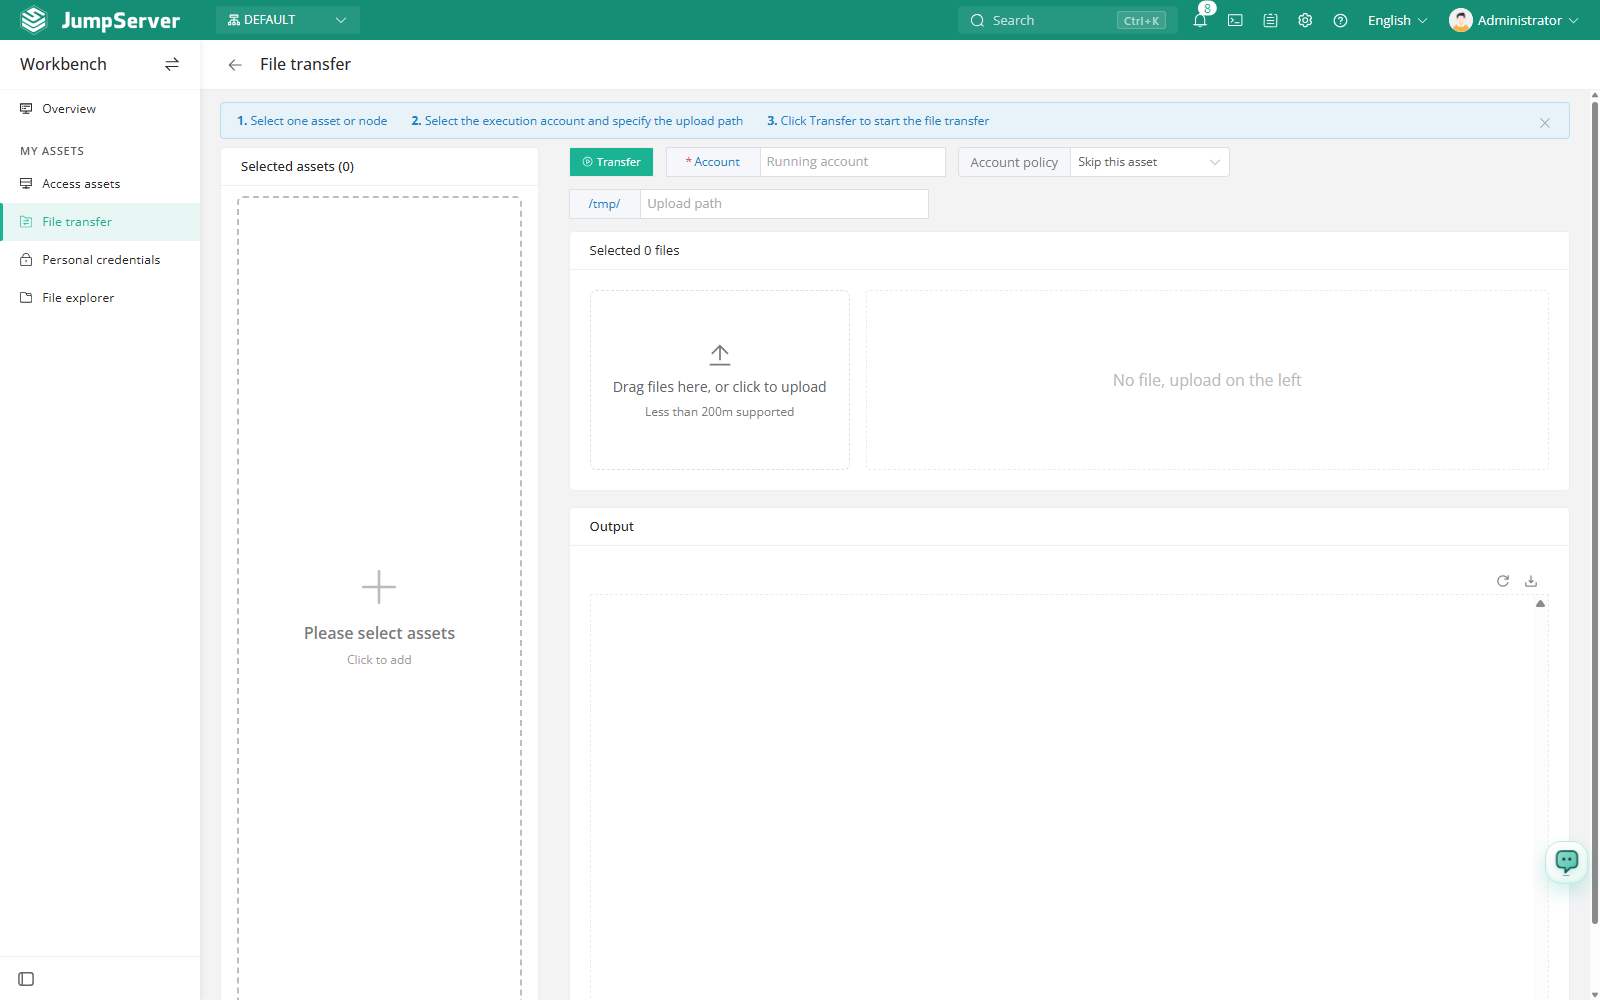
To browse remote directories, create or download files, or move files in both directions, use a file-enabled session in the Web Terminal instead.
Prerequisites
- Your account is authorized for the target assets, and the authorization includes the upload action. See Authorizations.
- A run account exists on the target assets and can write to the upload path.
- Your role can create jobs in the Job Center. The Transfer button is disabled without that permission.
- A specific organization is selected. In the global (root) organization the Transfer button is disabled.
Usage limits
Upload files
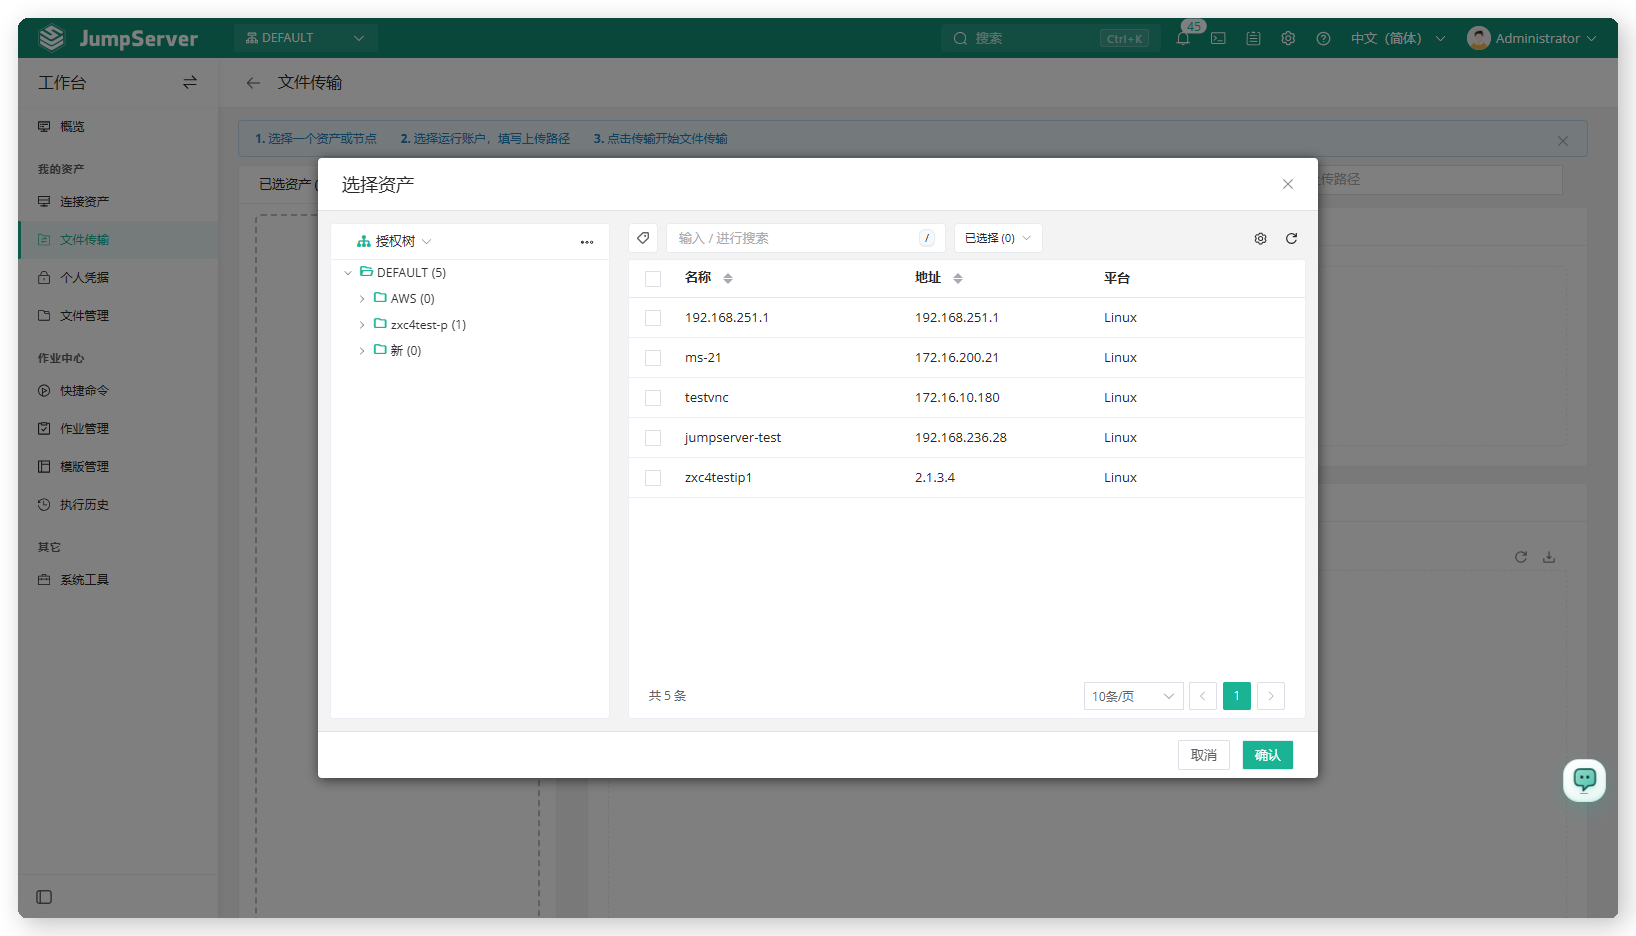
Click Select assets (or the add icon) in the Selected assets area, choose one or more hosts from the authorized tree, then confirm.
Enter the Account used to run the upload on the selected assets. Autocomplete suggests usernames that exist on those assets.
Choose an Account policy for assets that do not have that account.
Enter the Upload path. The fixed prefix is /tmp/; type only the relative
path. Leaving it empty uploads to /tmp/.
Drag files into the upload area or click it to select local files. Remove unwanted files with the close icon.
Click Transfer. If some assets cannot run the job, review the Runnable assets and Unrunnable assets lists and confirm the remaining selection.
Account policy
Read the result
Progress, speed, and uploaded size appear below the file selector. Once the run starts, the Output terminal streams the log for every asset. When the run finishes, the header summarizes:
- Success: assets where the file was written to the target directory.
- Skip: assets skipped by the account policy.
- Failed: assets that could not be written, for example because of a permission or path problem.
- Duration: total time used by the run.
- Timeout: shown when the job exceeded its time limit.
Use the refresh and download icons in the Output header to reload or save the log. The run is also recorded in Execution History for later review.
Assets are marked as failed when the path is wrong, the run account cannot write to the target directory, or the asset is unreachable at that moment. Open the Output log, fix the cause, and run the transfer again.